Why Is My Bread Hard? – How To Fix Hard Bread

There is just something about homemade bread. It’s irresistible when just out of the oven! Perhaps you plan to serve it with a comforting Sunday breakfast? For sandwiches? Whatever the reason you made a loaf of bread, you have the highest hopes for perfection. However, if you pull it out of the oven and it is hard as a rock. You are left wondering, why is my bread hard?
You can ask yourself many questions when bread is hard. I get it. It’s frustrating. All that work and all you have to show for it is a hard, dense loaf of bread you don’t want to eat.
Baking takes time to learn. If you are a new baker, remember to be patient and try and learn a few new tricks, and you will find that you’re turning out perfect loaves of bread in no time! If your home baked bread is turning out hard, here are my top tips to prevent hard bread:
Knead your dough a little more

Kneading your dough or not kneading enough could be why you’re asking yourself – “why is my bread hard?”
As the yeast consumes sugars in the flour, it releases carbon dioxide gas which gets trapped in the dough by the gluten matrix. The result should leave you with a fluffy, airy loaf of delicious bread.
To achieve this, you’ll need to develop a robust gluten matrix. You can do this by kneading the dough well or allowing it time to mature and fall into place naturally. A half-and-half method can work well too, where the dough is not kneaded to maximum gluten development but is left for several hours to rest and develop naturally.
The rest stage is called bulk fermentation. Here, the gluten soaks up water and changes its bonding system to improve its structure.
Unless you let your dough bulk ferment for 8+ hours (you’ll need to do the majority of this in the fridge to slow yeast activity, making the dough gassy), you’ll need to knead your dough to build that structure.
So, how long should you knead your dough?
Below is a table of recommended kneading vs bulk fermentation times required to develop the strong gluten structure required for good artisan bread.
| Length of the first rise | Amount of kneading applied | Recommended fresh yeast % |
|---|---|---|
| None – 30 minutes | Fully: 100% gluten development | 1.8-2.2% |
| 1½ – 3 hours | Standard: 70% gluten development | 1.7-1.9% |
| 2-4 hours | Light: 40% gluten development | 1.5-1.8% |
| 4-8 hours | Just combined: 10% gluten development | 1.3-1.6% |
These times are just recommendations. Recipes, flour types, and the amount of water in your dough will call for different development times, but it’s a good guide if you’re new to baking bread.
A 2-3 hour bulk rise at an ambient temperature is arguably the most convenient method when making bread at home. Bulk fermentation develops flavour and matures the gluten, making it more stretchy (extensible) and capable of capturing gas. You’ll make better bread if it’s allowed some time to bulk ferment. However, to make bread quicker, knead to 100% gluten development and skip the double rise.
So if we aim for a 2-hour bulk rise, you should be looking to develop the gluten to around 50-75% development (more on this in a moment). To achieve this:
- If you are using a mixer with a kneading hook, knead your dough for a minimum of 10 minutes.
- If you are kneading by hand, knead your dough for at least 20 minutes.
How to test gluten development
You want your dough to be soft and stretchy by the time kneading finishes. You can test this with the windowpane test:
Stretch a piece of dough between your fingers. Does the dough rip as soon as you start pulling? If so, you will want to keep kneading that dough. For 50% gluten development, you are looking for a dough that stretches and pulls but does not tear apart. At 100% developed, the dough will stretch so thinly that you can see light through it.
Kneading bread dough tips
Split your kneading into three stages;
1) Gentle incorporation
2) Slow mixing
3) Fast kneading
The first two steps ensure ingredients are evenly distributed and the gluten is sufficiently hydrated before intense kneading commences. If using a stand mixer to knead dough, first give the ingredients a gentle mix with the dough hook by hand, then turn the mixer on a slow speed for 5-7 minutes, followed by kneading on a faster speed for 5 minutes (or until the gluten is developed).
Tip: Over-kneading dough isn't good, either. Overworking your dough will cause the gluten to weaken as it rises, leaving it to collapse and unable to capture the gas produced.
Change the type of flour
Flour can be another solution to the question, why is my bread hard? How much flour did you use? And what type of flour did you use?
The type of flour impacts the end result of your bread. For example, if you want light bread, you don’t want to use whole-grain flour such as rye or wheat. Not if you are a beginner, at least!
When you want to add whole grain flour such as these for flavour, split it 50-50 with white bread flour. Your loaf will come out light with more depth in taste whilst maintaining lightness. This is the trick that I use to make my unique loaves of bread.
It’s also worth considering that each type of flour absorbs water in different quantities and at varying rates. Whole grain flours are slow to soak up water initially but absorb more overall when compared to white wheat flour. High-protein bread flour absorbs more water than a lower-protein variety.
Expect differences between brands and even batches of the same brands of flour. This means that a recipe that you follow may need some tweaking of its hydration ratio to make it perfect for you. See how to fix a dry dough to learn how to do this.
Resist incorporating extra flour
Be careful about how much flour you use when kneading and shaping. Too much flour can make your dough tough, which will make your bread hard.
Start with the amount of flour called for in your recipe. If your dough is sticky, try working the dough a little longer before adding more flour. The more you get used to working with a particular flour, the more you’ll understand how much water it needs.
We know that sticky dough is not fun or easy to work with, but for light bread, it’s better to be sticky than dense.
Adding raw flour whilst kneading or shaping soaks up water without developing the fours gluten. The result is a dry-tasting loaf of bread.
If you feel that you’ve added too much or too little water to your recipe, follow my how to deal with sticky dough guide or add more water or flour right at the start of kneading.
Measure your ingredients accurately
When it comes to baking, you must use accurate measurements.
Many people use measuring cups. However, as you gain experience with baking, you will find that scales are much more accurate. And because scales are more accurate, they are much easier to bake bread with.
Measuring cups leave room for error by air pockets and differences between the coarseness and density of the ingredients. It’s easy to add too much flour without realising it. The KD-8000’s are the scales that I recommend at Busby’s Bakery.

Properly proof your dough

If you pull your loaf of bread from the oven and notice the edges of the dough look compressed, it is because you should have let that dough rise longer. More experienced bakers know this is more of a feel than following directions to the letter.
Make sure your dough is in a warm place to rise, and keep an eye on it!
Most bread requires proofing for a couple of hours of proofing after you have shaped it. This is the two-rise method I mentioned earlier that many bread recipes follow.
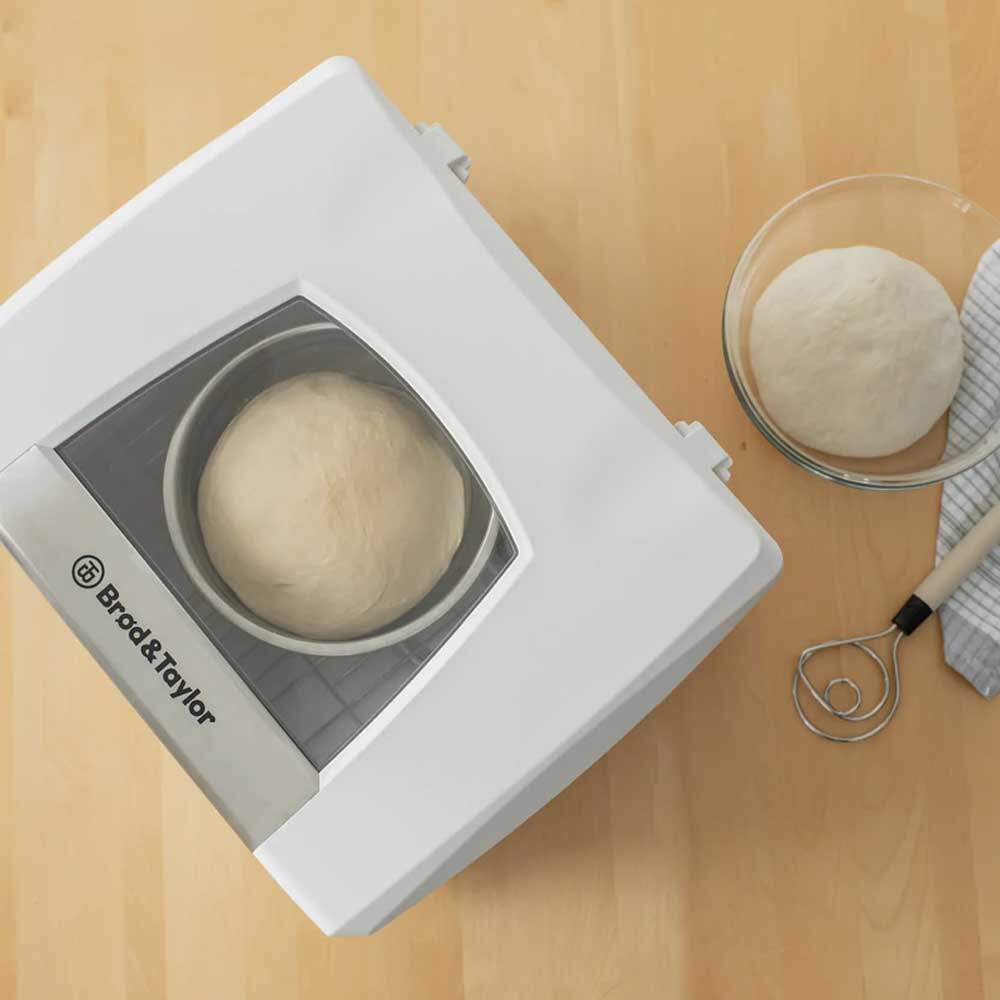
Proofing boxes are excellent tools for all home bakers looking to make the perfect loaf of bread. Not only do proofing boxes improve your end baking product, but they accelerate your proofing times.

You can cut your proofing time down by approximately 50-100% with a proofer. The Brod and Taylor proofing box is the best solution for home bakers, or you can take a stab at making your own with my DIY proofing box guide.
If you are unsure if your dough is ready to bake, use the poke test. Push your finger into the dough. It should spring back in around 3 seconds. If it springs back straight away, it needs longer to rise.

Push your finger into the dough. It should spring back in around 2-3 seconds. If it springs back straight away, it needs longer to rise.
Work on your shaping technique
Proper shaping can fix hard bread. You put all this time and effort into making your loaf of bread. So, hang in there a little longer! Moulding or shaping bread dough is maybe more important than you think. It can make your loaf…. or it can make your loaf hard!
You can’t just roll it into a ball and throw it in the oven. Well, you can, but the result probably won’t be what you want!
You have a lot of options when it comes to shaping your bread. The main thing you are looking for is that tension in the dough remains after it is shaped. You create tension by stretching the outer membrane of the dough as you mould it before it’s ready for final proofing. This develops strength for the bread crust to support the dough’s rise and for moisture to escape as the bread cools.
You can learn more in my how to shape and preshape bread dough guide, but here are the basics:
Preshape the dough
Before your final rise, you want to flatten it out and “preshape” it. Flattening the dough will get all of the air out of it. Once flattened, you can start folding or tucking the dough towards the centre to produce a ball or batard shape.
Bench rest
Between preshaping and final shaping, you’ll want to let the dough rest for 10-30 minutes. The length of the rest is determined by how gassy the dough is. The gassier it is, the longer rest is required. You should cover the dough with a tea towel or greaseproof sheet to prevent it from drying out as it rests.
a) Final shape into a round
For round shapes, make your way around the outside of the dough, tucking it in as you go until you get back to your starting point – creating a round loaf. Then place your hands in a v-shape and drag the dough towards you on the table to round the edges. This generates tension in the bread crust.
b) Final shape into a loaf pan
For a long loaf, roll your dough in a rectangular shape. Place your dough on the table in a rough square or circle. Grasp the right and left sides of the bread in their respective hands. Stretch them out a little before folding them in towards the centre.
Next, take the top and bottom edges, and fold them towards the centre, one at a time. Then, take the top half and roll it like a swiss roll towards you to form a sausage. Keep rolling by tucking it in with your thumb until your cylinder reaches the end of the dough. Using your fingertips, close the loaf at the seam.
Tip: Try to avoid adding flour to the dough when shaping. It incorporates raw flour into the bread which leaves a dry taste after baking.
What if my bread has a hard, thick crust?
The bread crust is essential when it comes to a perfect loaf of bread. You want just a bit of a crust but not a thick and hard crust that is too hard to eat. Here are some points to consider:
- Did you over-bake your bread? Overbaking your bread will lead to a hard, overly crusty crust. To check if your bread is done, use the tap test. Take it out of the oven and tap the bottom. If it makes a hollow sound, your bread is done. You can also use a thermometer. Stick it into the thickest part of your loaf of bread. Your bread is done when the thermometer reads 90-93C (190–200F). The exact temperature depends on what type of bread you are making.
- Did you have enough moisture in your dough? When your dough does not have enough moisture, it can result in a dry hard crust. Again, you must be careful about adding extra flour to your dough. Your bread may need more kneading, or longer time in bulk fermentation, not more flour.
- A common way to turn rolls into soft rolls is to wrap them in a plastic bag (or beeswax wrap) once the bread is cool. Escaping moisture will be retained in the bread, making the crust soft and spongy.
How can I make my bread crust softer?
Why is my bread dry? How can I make a loaf with a softer crust? A perfect loaf of bread is all about having a perfect crust and a soft centre. Here are a few tricks of the trade to help your bread come out with a soft, delicious crust.:
- Changing the ingredients in your dough can impact how your loaf of bread turns out. By adding milk, oil, butter, or eggs, you can create a lighter crust and a soft airy texture.
- Use a light colour tin like stainless steel rather than a darker tin or one with a non-stick coating. Lighter tins will reflect the heat. Dark tins will hold onto heat for longer, leaving your crust darker and harder.
- You can try using a Pullman tin. A straight-sided tin that has a lid. This will keep your loaf uniform and create a light crust on your bread.
- Try brushing your loaf with butter when it comes out of the oven. Brushing with butter can help soften that crust. I’m not a fan of this method, but hey, you’re welcome to give it a go!
- Cover your bread with a tea towel for 30 minutes as it comes out of the oven. This retains the moisture escaping the loaf in the crust, making it softer.
- Storing your bread in a plastic bag will affect how long your bread stays in the same “fresh out of the oven” texture. Storing your bread in a bread box is the best way to keep it fresh for several days. Bread should stay fresh wrapped in a bag for around three days before mould starts to step in.
- If your bread is just a little dry, you can try popping it in the microwave for a second. This will create a bit of moisture to soften that bread.
Ending thoughts
Learning to bake takes time and patience, especially when you are going for those perfectly lovely golden loaves of bread that taste just as good as they look. You will soon be mastering those loaves of bread with practice and patience! Which of these tips are you going to attempt? Let me know, alongside any questions, in the comments below.
If you’ve enjoyed this article and wish to treat me to a coffee, you can by following the link below – Thanks x

Hi, I’m Gareth Busby, a baking coach, senior baker and bread-baking fanatic! My aim is to use science, techniques and 15 years of baking experience to make you a better baker.
Table of Contents
Related Recipes
Related Articles
Latest Articles
Baking Categories
Disclaimer
Address
53 Greystone Avenue
Worthing
West Sussex
BN13 1LR
UK


