The Windowpane Test – Know When Dough is Kneaded Enough

When kneading dough are you frequently asking yourself “Is it ready yet”? If so, in this article I’ll share how to know when to end kneading. We are going to do this by feeling the dough and using what is known as “The Windowpane Test”. It’s a great way to tell when your dough has been kneaded enough and can also be used to tell when to end the first rise.
Why kneading is important for the gluten structure
Kneading forms the gluten matrix in the dough. It needs this structure to retain gas during the final rise. A well-worked dough develops gluten that’s strong enough to stretch thinly without tearing. This forms a network of strands that retain gas.
The effect of oxygen in bread dough?
Kneading also incorporates oxygen into the dough. The yeast uses oxygen for respiration, which is different to fermentation. During respiration, the yeast uses oxygen to provide carbon dioxide gas. When the yeast ferments anaerobically, it produces C02 and ethanol. For light and fluffy bread, we want to encourage more kneading to achieve a higher level of gluten development. This provides a lighter flavour and a better rise in the bread. A common cause of dense bread is not working the dough on the table or mixer enough.
Problems with under kneading
Some bakers don’t knead their dough for long enough or don’t use a method that kneads dough effectively. See my post dedicated to how to knead dough to learn more about the latter. Common signs of under kneaded dough are:
- The dough takes a long time to rise
- The gluten structure (crumb) is dense
- The bread explodes from the sides or base in the oven
In this post, we are going to cover how to tell when to stop kneading. There are two methods, “The feel the dough test”, and “The windowpane test”.
The feel the dough test
The easiest method is the relax and feel test.
- Let the dough relax on the table for one minute.
- Break away a small piece and roll it into a ball.
- Play with the ball in your fingers.
What does a well-kneaded dough look like?
- Feels slightly gassy
- Creamy white colour
- Smooth surface texture
- Elastic enough to support itself – it springs back
- Nice, rounded smell
- A sheen of natural oils coats the surface
View my beginner’s bread recipe to get started today with a simple recipe!
Signs of under kneading
If your dough lacks elasticity, tears easily when stretched and doesn’t appear smooth then it is under kneaded. Knead the dough for a few more minutes and check again.
How to do the windowpane test
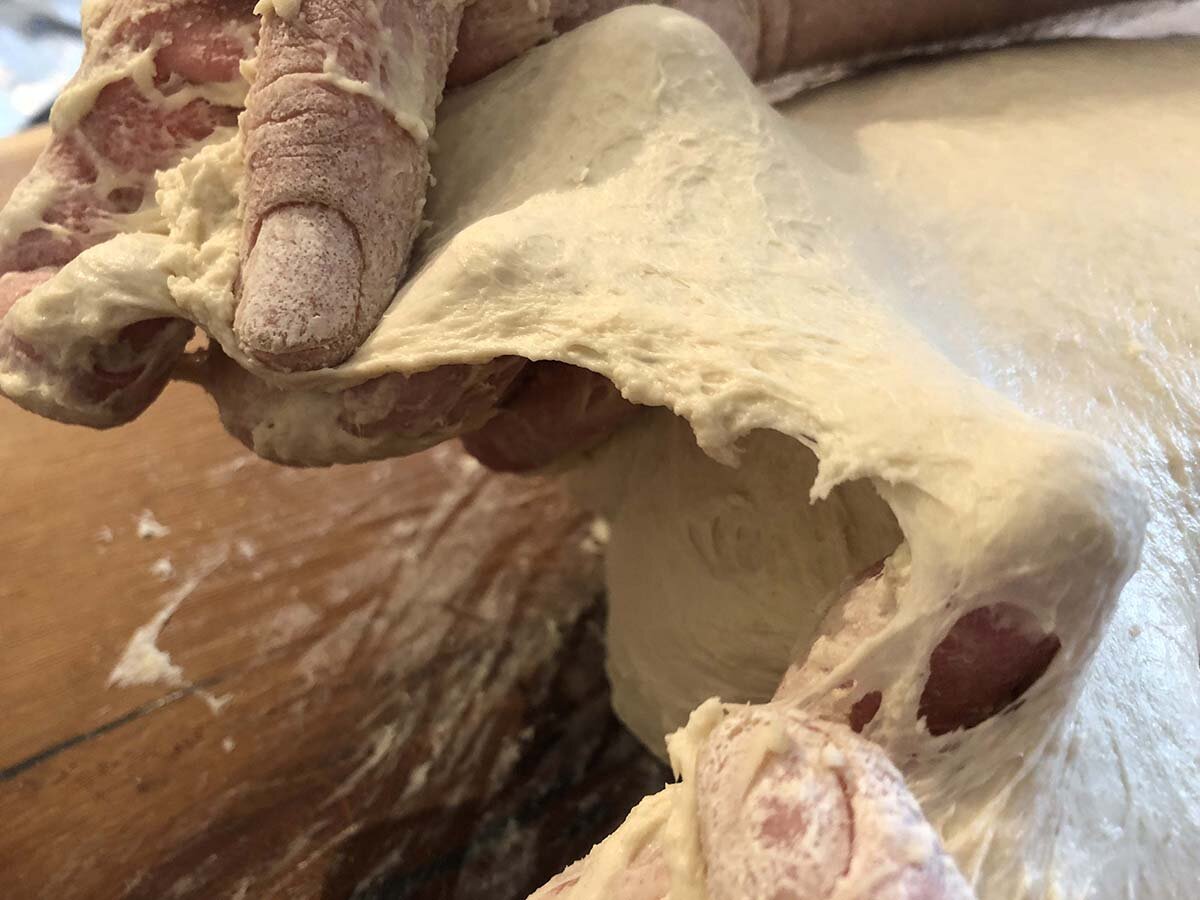
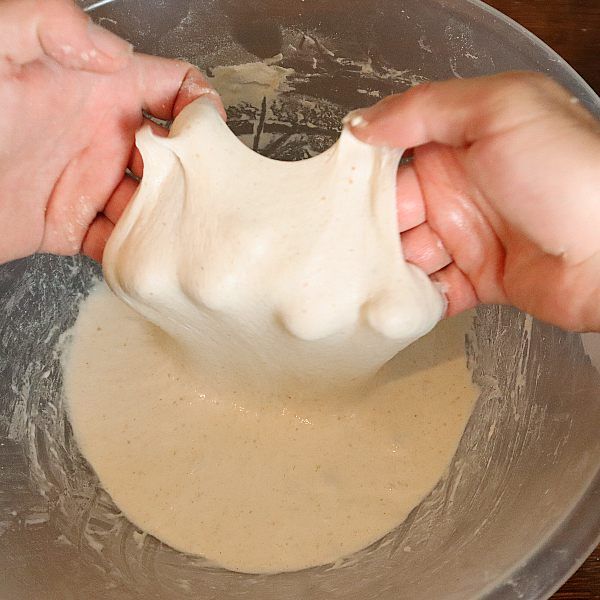
A windowpane test reveals the strength of the gluten with more accuracy. It’s the best way to see how well gluten has developed.
- Let the dough relax for a minute
- Gently tare off a piece
- Pinch a side in each hand and stretch it gently with your fingers
- Hold it up in front of you and use the table below to rate it
Windowpane test results table
| Stage | Gluten development | Features | Visual |
|---|---|---|---|
|
Stage 1 | 25% | Dough breaks when lightly stretched. |  |
|
Stage 2 | 50% | Dough has a small amount of stretch (1-2 cm) before it tears. |  |
|
Stage 3 | 75% | Stretches 2-3 cm before it tears. |  |
|
Stage 4 | 90% | Stretches thin to 5-8cm without tearing. Remains opaque when held up against a light. |  |
|
Stage 5 | 100% | Stretches thinly and allows light to shine through when held up. |  |
Interpreting the windowpane results
As the dough is kneaded it will pass through each of the stages shown in the table. Working the dough further will continue to develop the gluten so that it passes the next grade. Many home bakers will use a bulk fermentation period to allow the dough to develop naturally which means the gluten is less developed at the time it leaves the mixer. Natural gluten development occurs during bulk fermentation which leads to the dough passing the windowpane test when it is ready to be shaped. See a timeline of how kneading affects the length of bulk fermentation in my proofing guide table.
How to pass the windowpane test
The simple solution is to knead for longer! Though this is hard work when kneading by hand. Most home bakers will allow the dough to rest during bulk fermentation to develop naturally. Here the gluten will continue to develop whilst oxidation is lowered. This means the dough benefits from organic acids which will also improve the structure of the dough. Here are a few tips in order to make your dough pass the test:
- Add prefermented flour.
- Start with an autolyse to hydrate the flour.
- Use a slow technique at first to help the flour hydrate.
- Follow a proven kneading technique or use a quality dough mixer.
- If using a no-knead recipe, use stretch and folds and a long bulk fermentation time at a cool temperature.
- Bulk ferment with stretch and folds.
- Delay fats and sweeteners till the end of mixing where possible.
- Measure your ingredients with scales for accurate measurements.
Can I use the windowpane test for sourdough?
Yes! Slow rising doughs like sourdough should only be kneaded lightly. As the gluten is left to develop during the first rise it continues to strengthen and bond. It will also absorb oxygen from the surrounding area. This, compiled with the masses of oxygen incorporated during kneading, can lead to over-oxidation. This ruins the flavour and gas retaining properties of the flour.
For sourdough and other long-fermented artisan bread, lightly knead and use the windowpane test to check the development of the dough during bulk fermentation. The trick is for the gluten to mature to reach 100% development at the same point the dough doubles in size!
What does over kneaded bread dough look like?
It’s not common to over-knead dough by hand, but it can happen in a dough mixer. If your bread dough is sticky, warm, gassy and lacks strength it is over-kneaded.
Ending thoughts on the windowpane test
In this post, we’ve covered how the windowpane test can be used to display gluten development. One thing that I love about this method is there is no advanced technique or alternative for different bread styles. It’s a simple test that can be used for every bread dough you make! If you are struggling to achieve 100% gluten development, see my guide on why doesn’t my dough pass the windowpane test or leave a comment below. Let me know if this article helped you and what you will do differently going forward.
If you’ve enjoyed this article and wish to treat me to a coffee, you can by following the link below – Thanks x

Hi, I’m Gareth Busby, a baking coach, senior baker and bread-baking fanatic! My aim is to use science, techniques and 15 years of baking experience to make you a better baker.
Table of Contents
- Why kneading is important for the gluten structure
- The effect of oxygen in bread dough?
- Problems with under kneading
- The feel the dough test
- Signs of under kneading
- How to do the windowpane test
- Windowpane test results table
- Interpreting the windowpane results
- How to pass the windowpane test
- Can I use the windowpane test for sourdough?
- What does over kneaded bread dough look like?
- Ending thoughts on the windowpane test
Related Recipes
Related Articles
Latest Articles
Baking Categories
Disclaimer
Address
53 Greystone Avenue
Worthing
West Sussex
BN13 1LR
UK


