You’ve seen bakers sharing videos of beautiful bread-scoring patterns on social media. To many scoring bread is an essential step of the bread-making process. To others, it’s a form of art.
While some of these designs might seem far from your current abilities, you can begin with simple bread-scoring patterns. Even if you’re not very“artistic”, with a bit of practice (and this basic bread-scoring guide), you’ll learn to score bread dough like a professional in no time!
Why score bread?
Once the bread is proofed, its surface is scored with a blade before entering the oven. One reason for scoring bread is that years ago, bread dough was prepared at home and taken to the local bakery to be baked. An identifiable design was cut into each loaf so the baker knew whose loaf was whose,
But scoring bread dough has an important role to play in the quality of the crust and crumb.
See, when bread goes into the oven, it continues to inflate. The warm environment generates a strong burst of carbon dioxide gas and water vapour which is captured by the dough’s gluten structure. The intense heat forces the dough to expand rapidly, making it 30-60% larger than it was unbaked. This process is called oven spring.
When bread dough is correctly shaped, the outer membrane is strong and resistant to products passing through. If there is no escape route from the centre of the loaf, carbon dioxide and water vapour congregate in weak areas of the gluten structure.
Pressure builds in these pockets, and the dough eventually ruptures, with the excess gas and vapour tearing the surface and ripping a hole through to the crumb for gas to escape.
These unsightly “rupture holes”, “blowouts”, and even “big bubbles” of gas retained in the crumb are prevented by scoring the bread before baking. Once an incision is made with a knife, excess gas and water vapour can escape the bread. The result is that the dough rises, and looks appealing.
What knife to make slashes in bread?
Lame

To score bread, a lame, also known as a grignette, is usually preferred. A lame (pronounced “lamb”) is essentially a razor blade on a stick (some bakers make their own). The sharp blade has a small surface area, so cuts through soft bread dough with ease and without dragging.
Small serrated knife

Many bakers use a serrated knife for scoring bread dough. Whilst not as accurate or versatile as a lame, a serrated knife can score bread to a high standard.
Bread knife
If you don’t have any other knife for scoring bread a bread knife will work! You’ll be restricted in the designs you score, but you’ll be able to score most of the simple designs (including a simple loaf cut) with a bread knife.
Scissors

For some cuts, a sharp pair of kitchen scissors is preferred. Popular examples are star shapes, epi baguettes and hedgehog bread.
How to score bread
1. Get ready
Once your dough is cut, you’ll want to put it in the oven immediately, so get your water mister pumped (if used for steam) and everything ready. Clear your route to the oven.
2. Tip the bread onto a board or peel
If you use a bread tin to proof and bake your dough, you can skip this step. If a banneton or couche is used, turn the dough out onto a lightly floured board or peel.
TIP: Slide a metal dough scraper or palette knife underneath the dough to loosen it from the board.
3. Remove excess flour
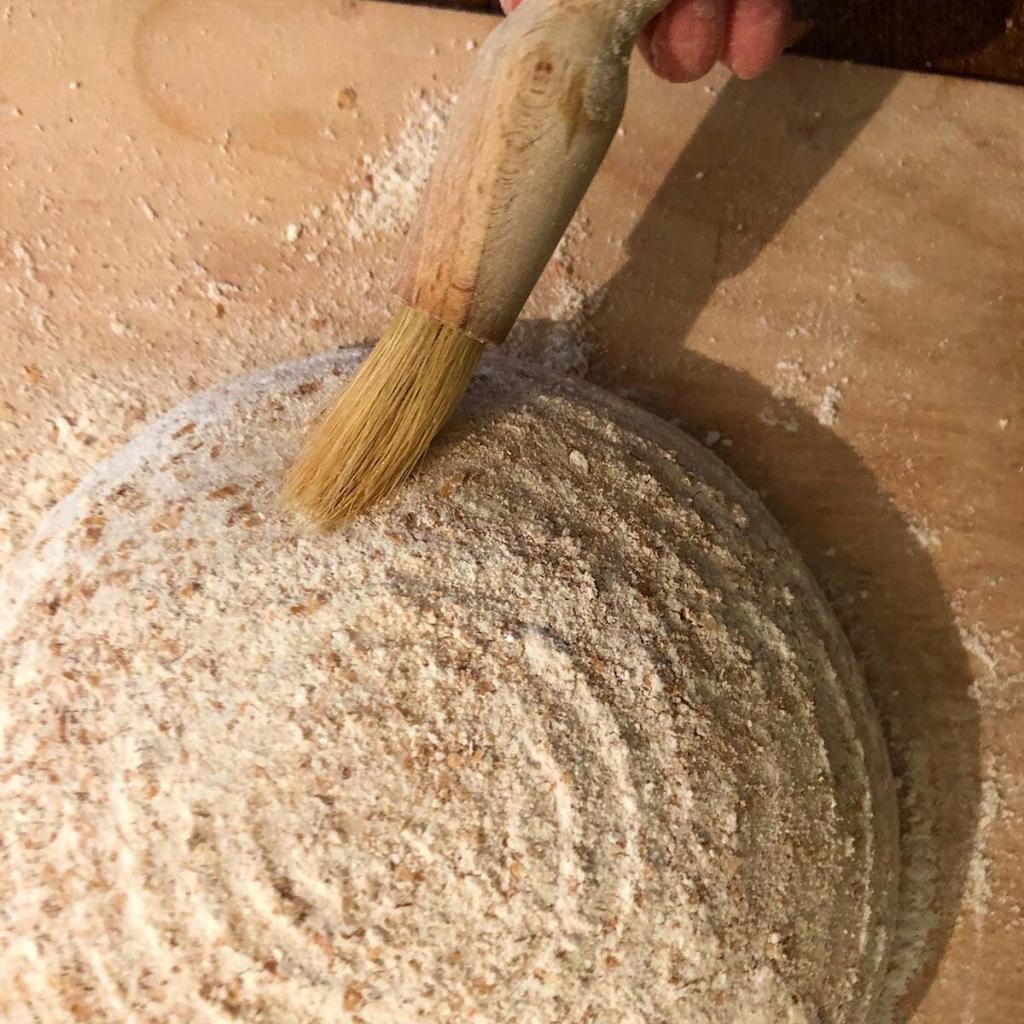
Use a pastry brush to remove the excess flour from the dough’s surface. Dry flour will burn to leave a dry, bitter taste.
4. Make the scores
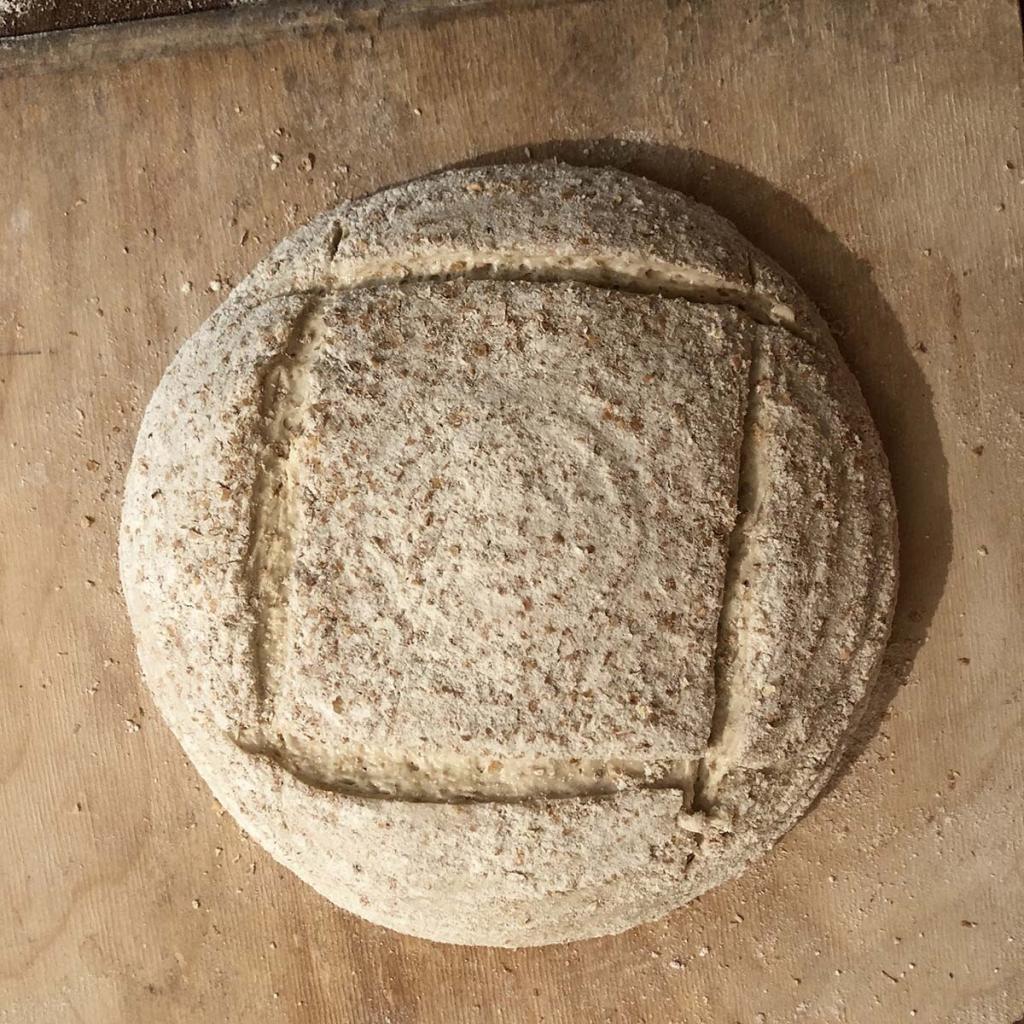
Take the lame and remove the cover. You want to make clean and precise cuts, so take a second to plan your cuts before proceeding. For the popular pound sign design (also called a windowpane), position the scoring blade at a 30-degree angle, 10 cm away from the side of the bread you intend to score.
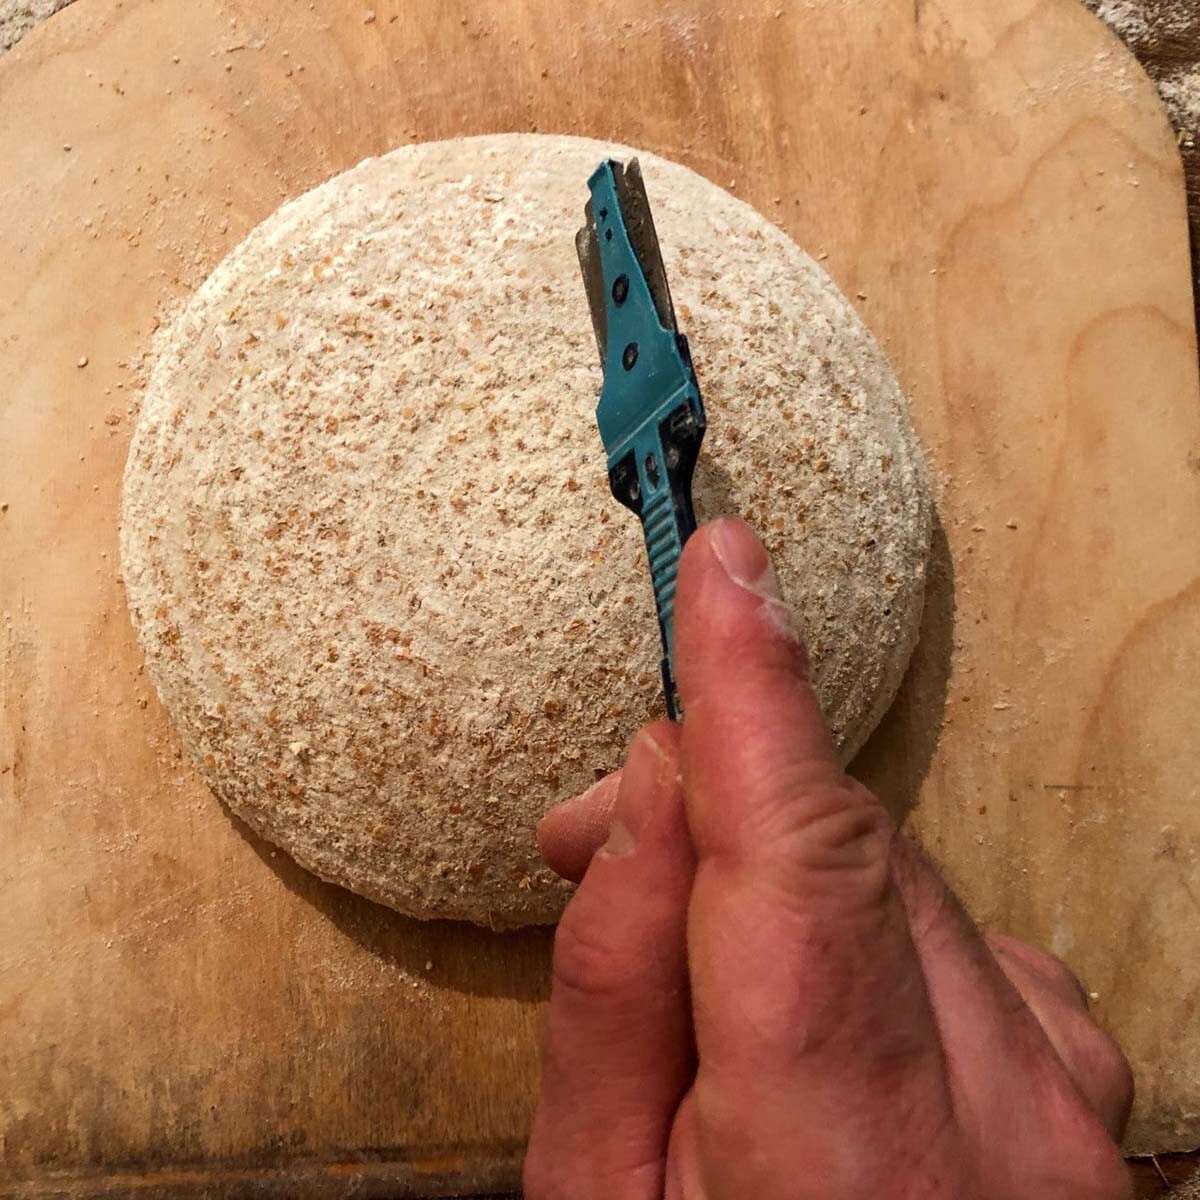
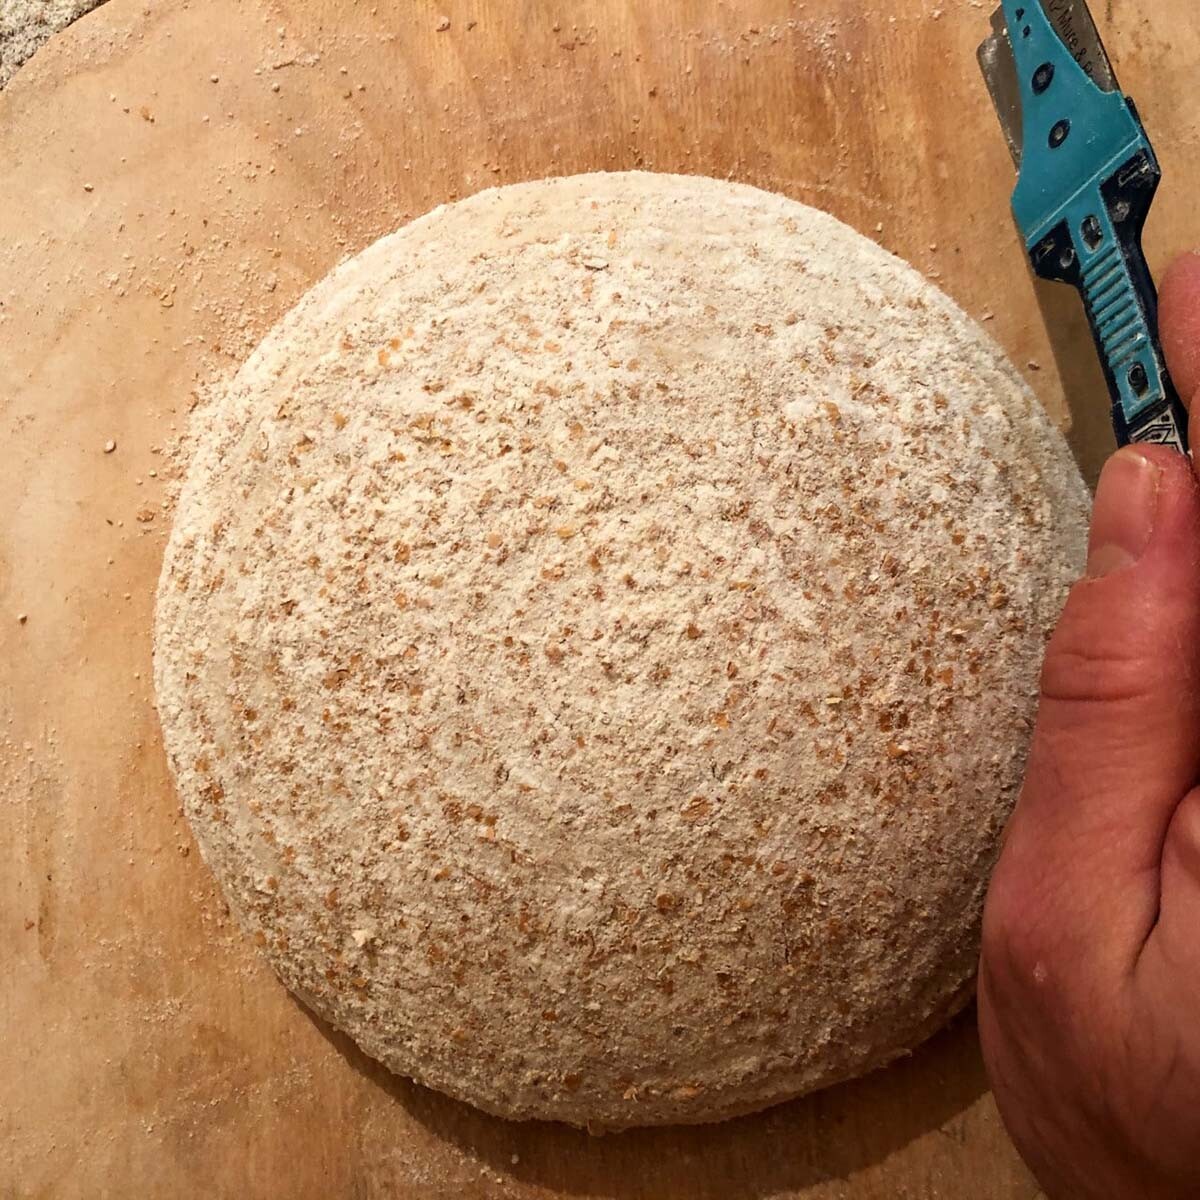
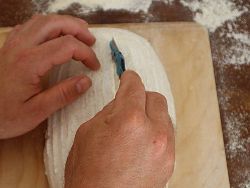
Pull the blade towards you whilst lowering the blade into the dough’s surface and pull the blade in a straight line towards you, raising it at the end of the incision. You should have a nice, straight cut.
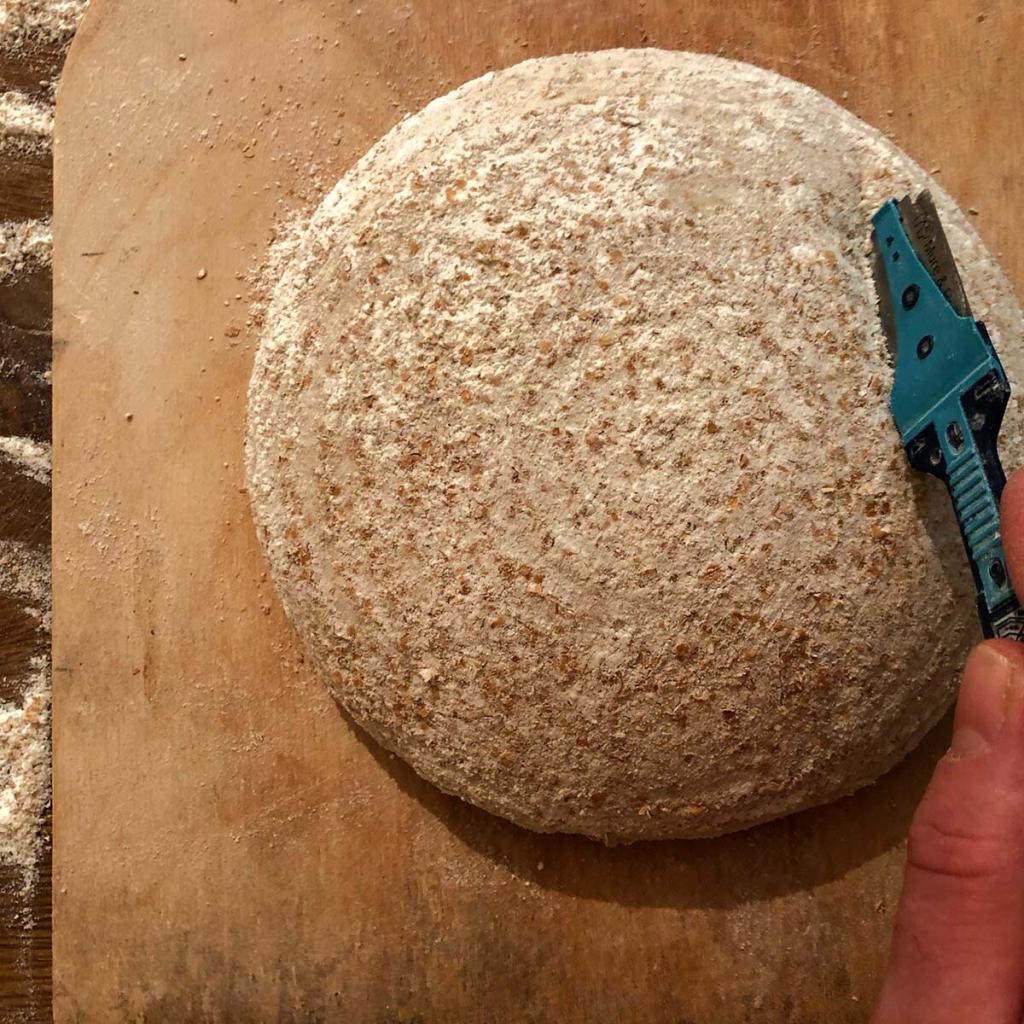
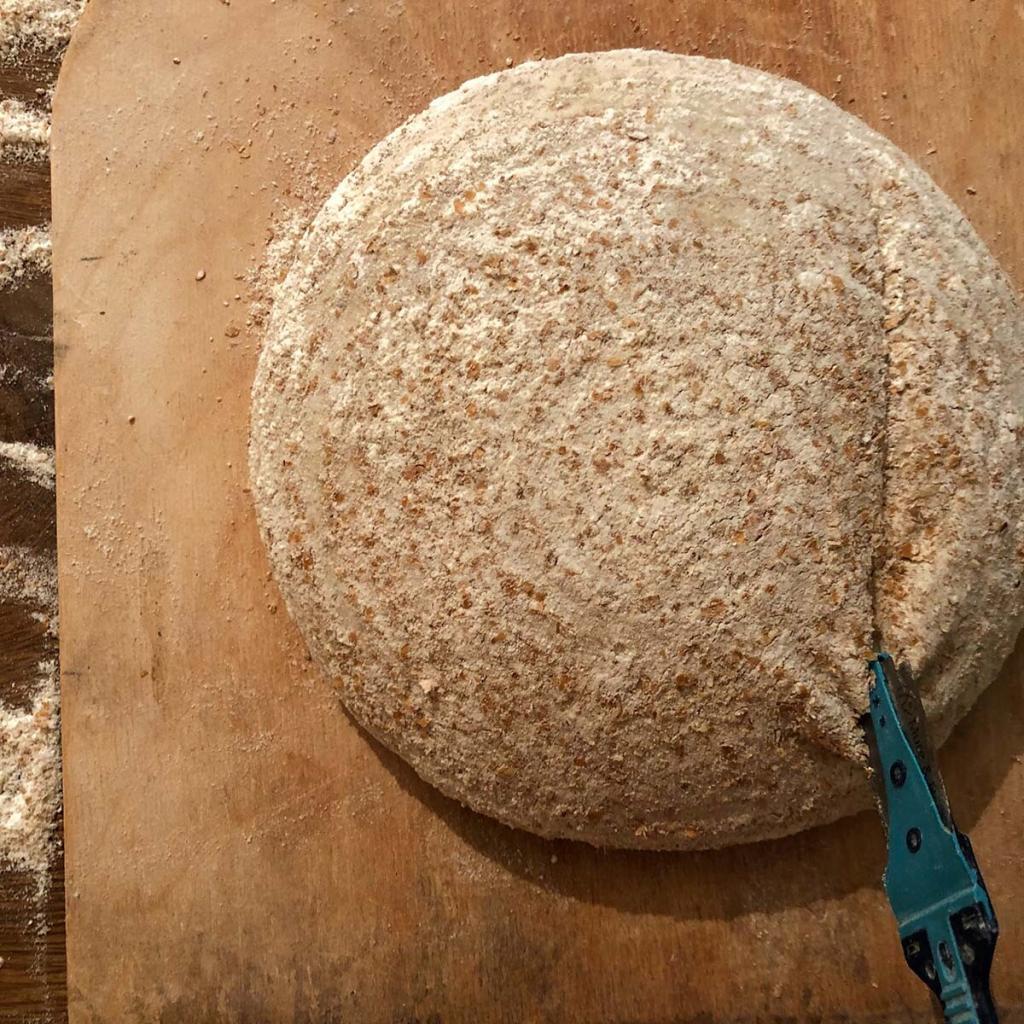
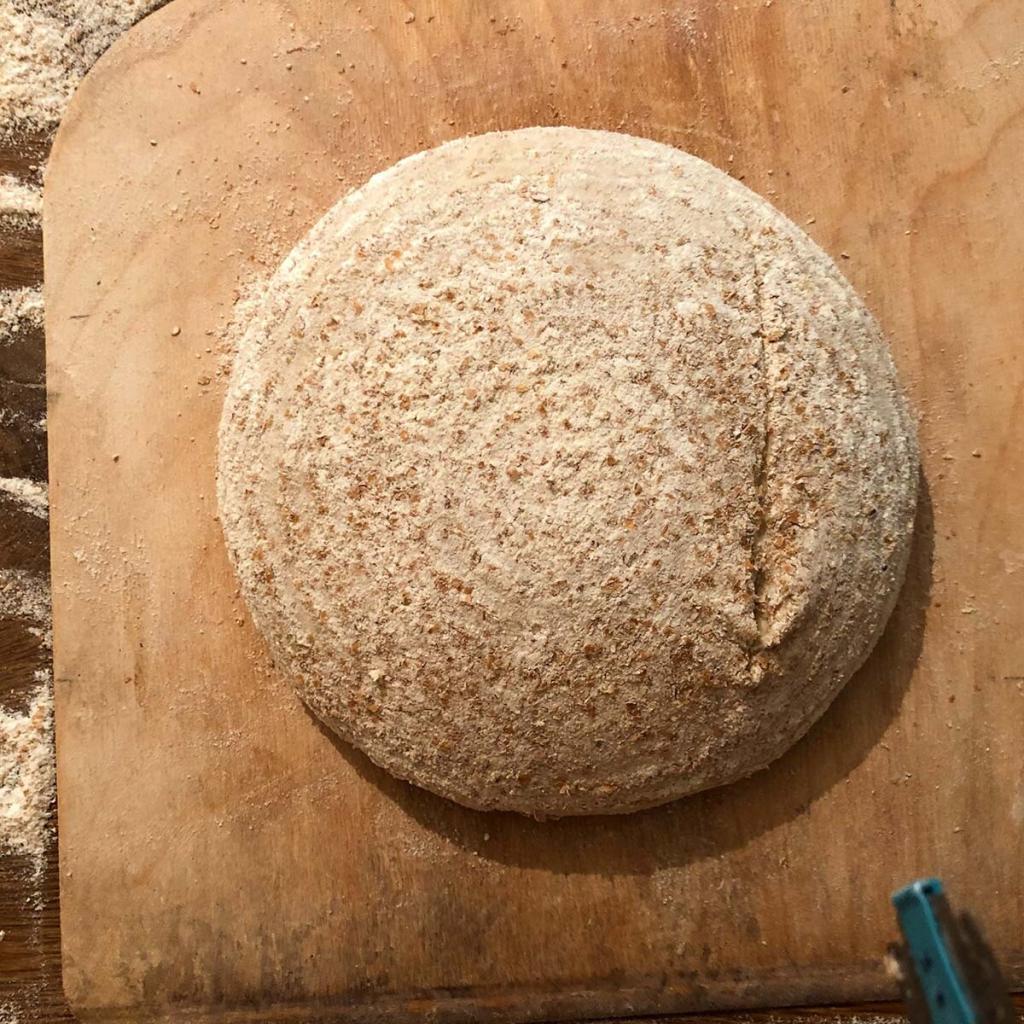
Note: The blade dragged against the dough, as shown in the middle image. This is because I was too slow when making the cut (I was trying to get a nice photo!). If you notice this happening, try and be quicker and firmer with your movement.
Check the cut is even, going over missed areas if needed.
Cuts open up best when clean and singular, so don’t play around too much.
Turn the dough 90 degrees and repeat.
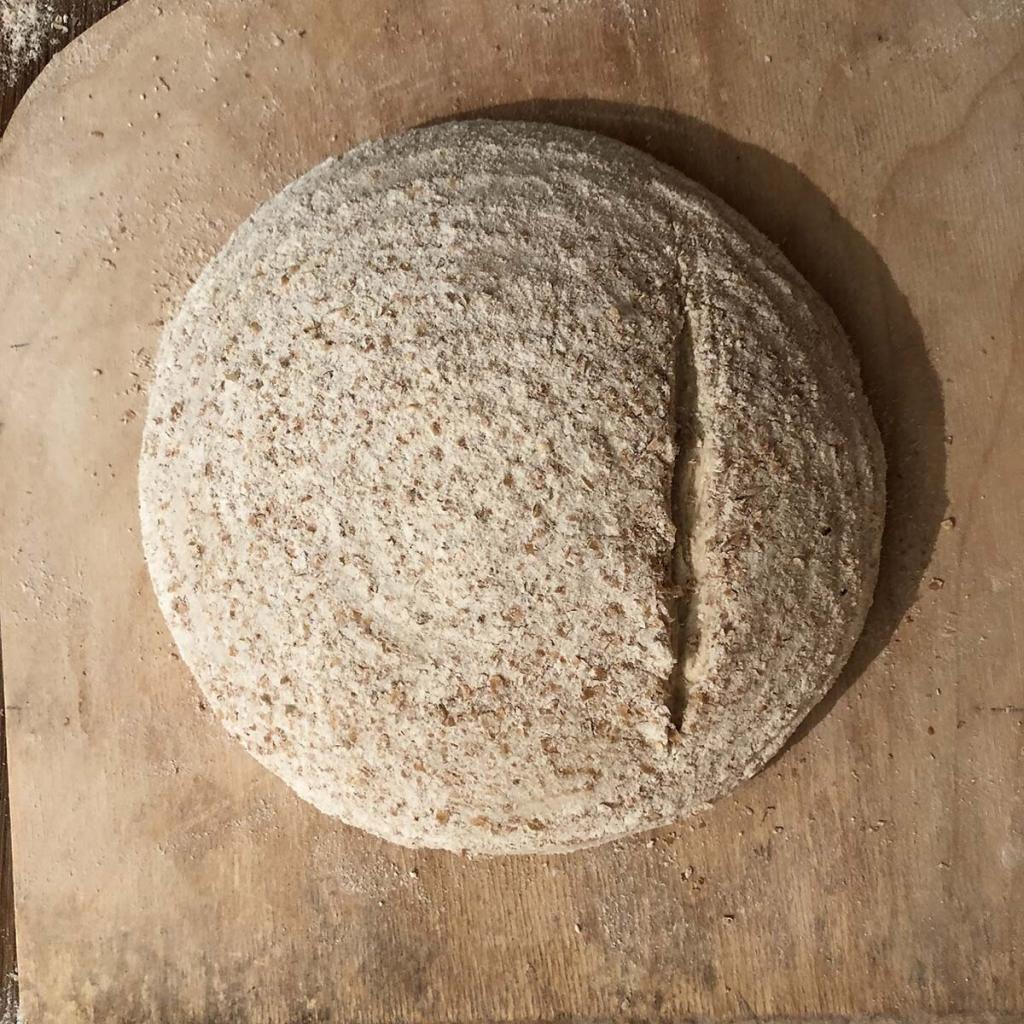

Repeat on all four sides.
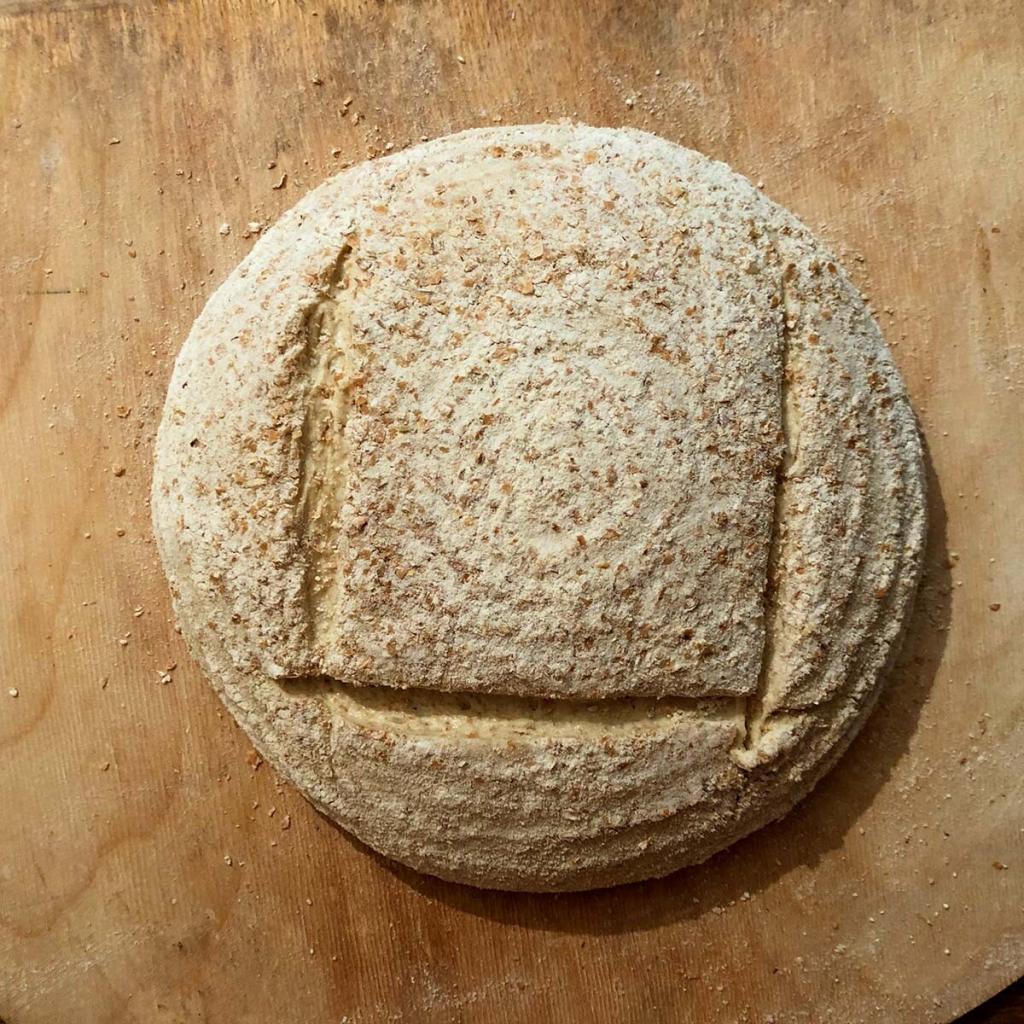
5. Put the bread in the oven
As soon as the cuts are made, put your bread in the oven. Being quick here will enhance the effects of the oven spring and open the cuts properly.
For the best oven spring, bake your bread on a baking stone and add steam to the oven.
6. Remove your bread from the oven and cool

Once you’ve baked your bread, it will need to cool for around 2-3 hours before it’s sliced and eaten. See how long to cool bread properly to learn more.
Reversing the angle of the blade
Instead of rotating yourself (or the peel) 90 degrees for each score, make two cuts in the dough surface at a time, then move 90 degrees and score the other two. You can flip the angle of the blade so that it points inwards each time. Or not. It’s up to you!


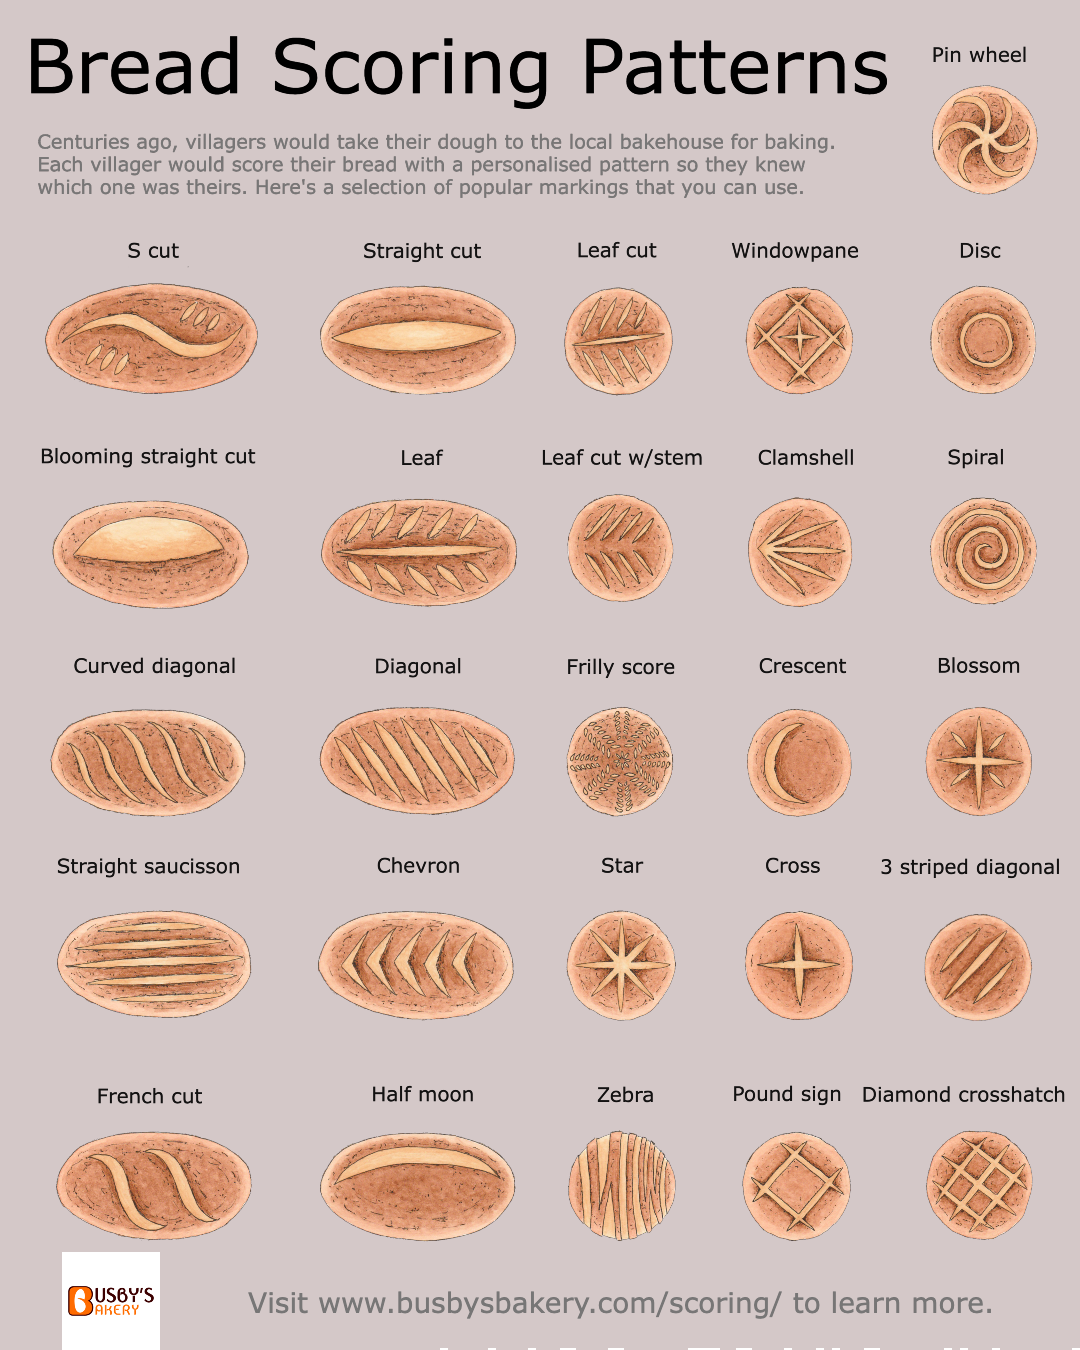
Bread scoring patterns
Once you’ve mastered the simple pound sign design, why not try another bread scoring pattern? Here are some of the most common sourdough scoring patterns, but will work nicely with yeasted bread too:
How to score baguettes
Scoring baguettes is a challenge that takes most home bakers some time to perfect.
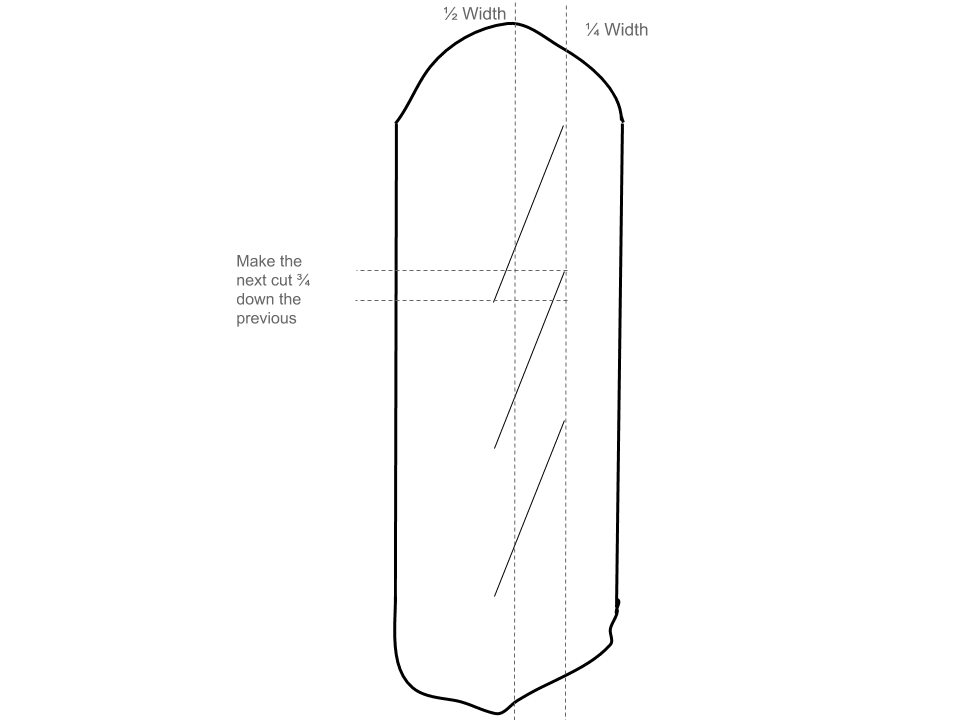
Proof your dough to 70-80% so the cuts open up with vibrancy.
Start at the top, around ¼ inch from the edge. Each score is diagonal, with around 45 degrees as the perfect angle. The next cut starts slightly higher than where the previous one ended. There should be 5-8 cuts for a full-size baguette, but one small enough to fit in a domestic oven will have 3-4.
A curved French lame is preferred for scoring baguettes. The curved blade scores dough in a diamond shape that makes the final baked loaf look magnificent!
How to score bread to get an ear
To achieve the distinctive ear many bakers love on their sourdough bread, take a properly fermented dough that has been well developed during bulk fermentation. Proof it to 70-80% proof (slightly under-proofed) and make a single deep cut at a 45-degree angle in the half-moon pattern. When baked with steam, the rapid expansion causes the bread to open up like an ear.
Understanding ripping – Improve your oven spring!
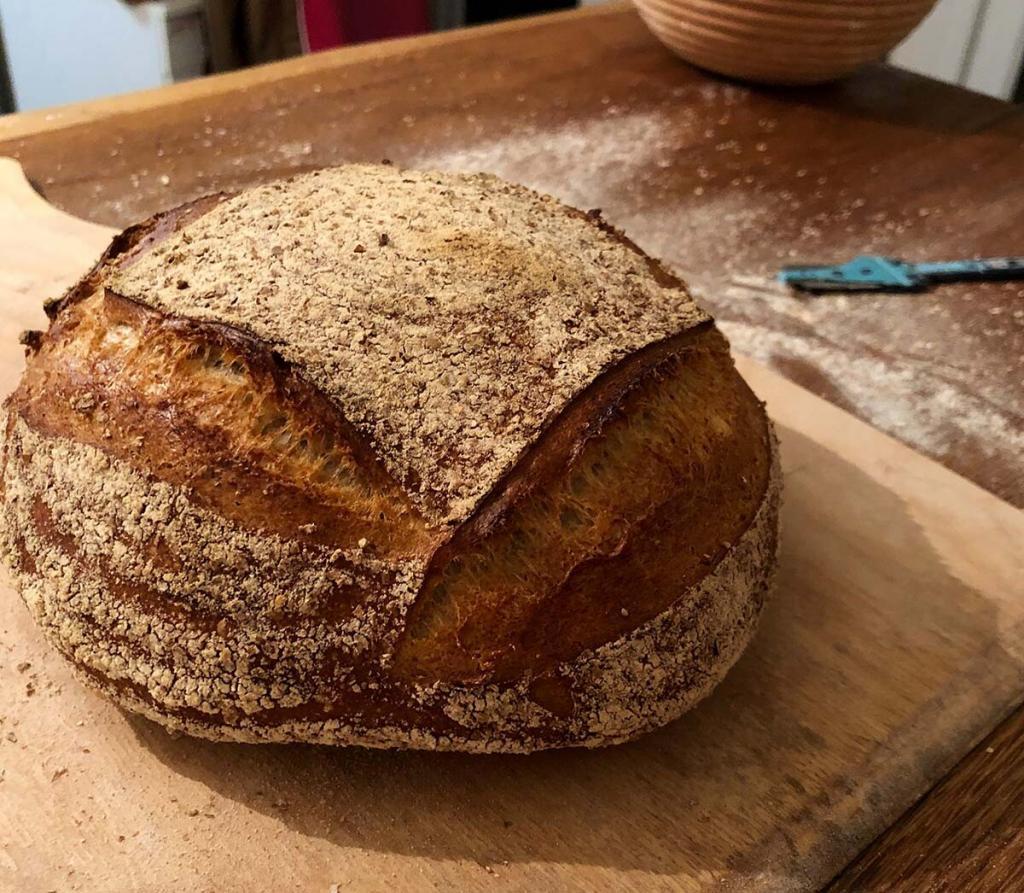
When the dough is slightly under proofed, the oven spring is more prolific. An excess of energy from the dough causes the extra gas produced to expand the cuts, making them more open and exaggerated. This is called ripping and can also happen when scores are slightly too shallow.
Scoring bread dough with elaborate designs
Look at the video below from Sourdough Bread Art’s Instagram. I can’t help but be inspired by it!
Many opportunities are available when scoring bread. Some of my favourite decorative designs are of stalks or diagonal slashes with leaves in the middle. Scoring bread dough doesn’t have to be so elaborate. In commercial bakeries, there isn’t time for fancy scoring patterns.
If you would like to step into the arena of “sourdough bread art”, the dough is best placed in the freezer for 10-30 minutes before scoring. The cold dough has a firm surface which makes it easier to slash.
The dough must be well fermented and proofed to 90%-100% to reduce ripping as you’ll be making shallower slashes.
The lame must be a sharp razor, with many bakers opting for a UFO blade style or just a razor blade for the intricate bits!
Further reading: What is the best bread lame?
How to use stencils for bread designs
Stencils are a great way to create excitement in the look of your bread alongside scoring designs. Find a bread stencil with a fun, intricate pattern. You can also make your own if you have a 3D printer!
Why is dough sticking to the blade when scoring?
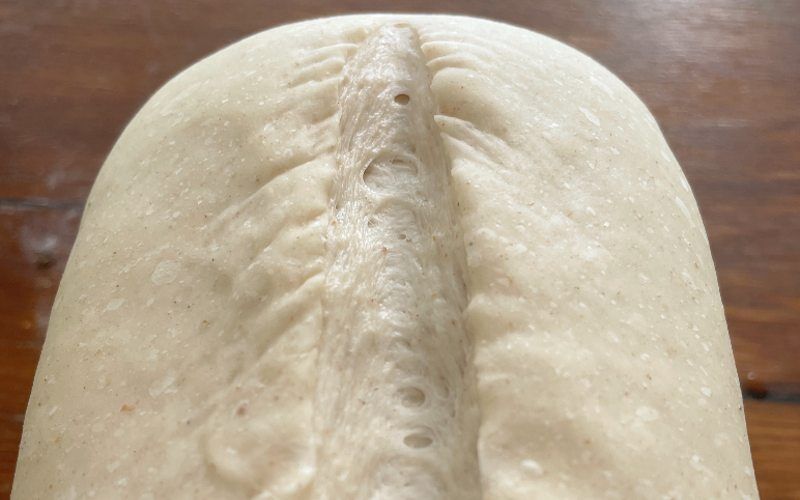
1. The blade isn’t sharp
Replace or rotate the blade on your lame. Blades should be rotated every 30 – 50 loaves and replaced every 100-150. A craft baker will change their razor blade every night. Otherwise, the blade drags on the dough’s surface.
2. The gluten structure is weak
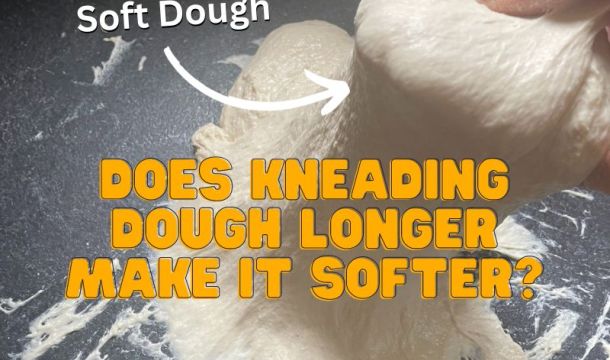
Develop a stronger gluten network by increasing bulk fermentation, kneading for longer or using a high-protein baker’s flour.
3. The bread is over-proofed or fermented
The dough has lost elasticity as the lactic acid and over-oxidation have weakened the gluten. It’s very hard to score dough when there isn’t a taut surface to make straight slashes! Let’s nothing you can do to save an over-developed dough. Reduce the length of the bulk fermentation process or final rise time on your next attempt.
4. The dough was too wet
Dry the dough out for 10-15 minutes before baking. Use the refrigerator or freezer if you need to slow yeast activity down.
Ending thoughts on scoring bread
We’ve covered all the basics of scoring techniques, including how to score a basic design, more complicated methods and some common troubleshooting pointers. The challenge is now for you to practice that smooth cutting motion!
I’ve trained many bakers, and most don’t get it right the first time, so don’t worry if you don’t, either! I recommend making a large batch of dough to practise if you can. Drop a comment in the section below if you have any questions.
Scoring bread – frequently asked questions
If you’ve enjoyed this article and wish to treat me to a coffee, you can by following the link below – Thanks x

Hi, I’m Gareth Busby, a baking coach, senior baker and bread-baking fanatic! My aim is to use science, techniques and 15 years of baking experience to make you a better baker.
Table of Contents
- Why score bread?
- What knife to make slashes in bread?
- How to score bread
- Reversing the angle of the blade
- Bread scoring patterns
- How to score baguettes
- How to score bread to get an ear
- Understanding ripping – Improve your oven spring!
- Scoring bread dough with elaborate designs
- How to use stencils for bread designs
- Why is dough sticking to the blade when scoring?
- Ending thoughts on scoring bread
- Scoring bread – frequently asked questions
Related Recipes
Related Articles
Latest Articles
Baking Categories
Disclaimer
Address
53 Greystone Avenue
Worthing
West Sussex
BN13 1LR
UK




Leave a Reply