I often see questions like, “What is the point of kneading bread dough?”, “Should I knead sourdough?” and “Can I skip kneading bread?” So I thought it was about time I answered these basic baking questions! Kneading is a fantastic skill to learn, and mastering hand kneading or machine mixing is one of the essential skills in bread baking.
No-knead bread recipes are widespread, so do you really need to knead bread dough? To answer these questions, let’s uncover the science behind kneading bread dough!
What does kneading dough do?
For hydrated flour to turn into a loaf of bread, it must develop a gluten network. As yeast feasts on sugars found in the flour, it produces gas which gets captured in the gluten network.
Gluten has the ability to stretch. When yeast is allowed to produce more and more gas, the dough structure inflates, making the dough rise.
By kneading dough, the development of the gluten network is accelerated. A well-developed network enables a faster and more prolific rise, making lighter bread with a more defined crust and crumb texture.
Do I need to knead bread dough?
No knead bread recipes call for the bread ingredients to be gently combined in a shaggy mixture. The dough is left for several hours to develop naturally before it is moulded and proofed.
The process of soaking flour in water supports the gluten strands to unwind, extend and form new bonds. Therefore it’s possible not to need bread dough and make fantastic bread. But if you wish to make bread quickly or develop a more robust texture, consider kneading your dough.
How does kneading work?
Kneading is the stretching or agitation of the dough. It’s broken down into two stages:
The ingredients are incorporated and gently combined in the first stage to hydrate the gluten. A gentle stretching motion is used, or if using a dough mixer, a slow speed setting is selected.

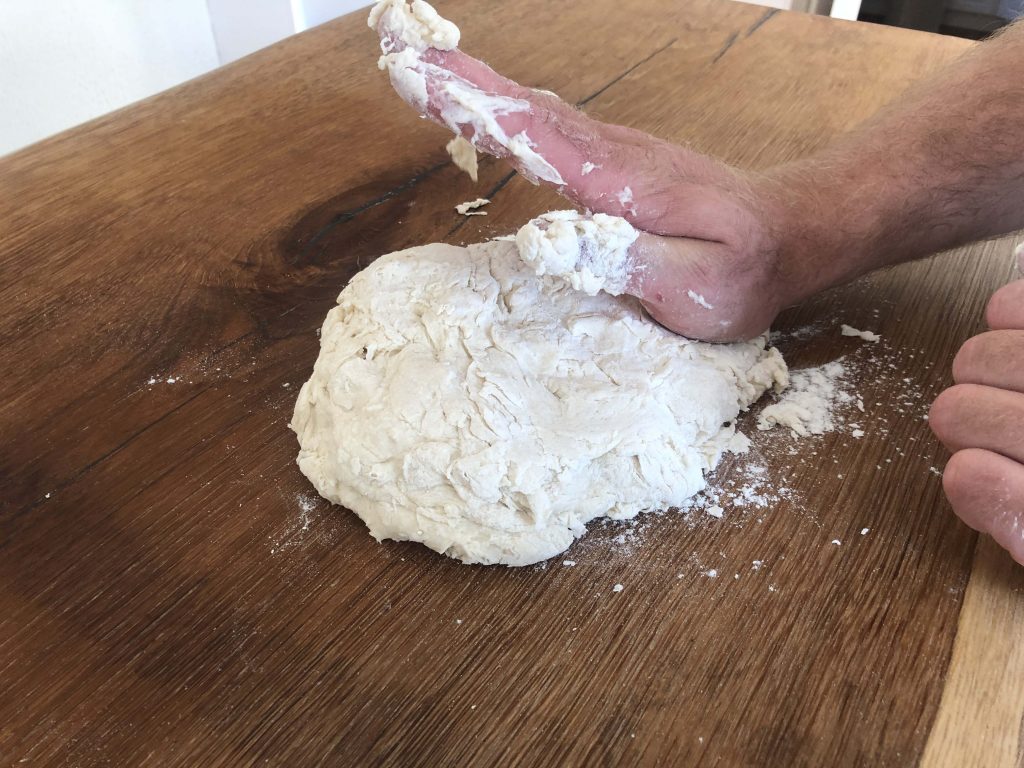
The dough is rapidly hit against a hard surface during the second stage.
When kneading bread dough by hand, the dough is “slapped” against a table.
In a dough mixer, the speed is increased. The powered rotating dough hook stretches and smashes into the dough at a rate unobtainable by hand.
The science behind kneading bread
Flour contains protein, composed of various amino acids that transport molecules and repair broken cells as the wheat grows. When protein is hydrated, water washes away the soluble protein to leave the insoluble gluten proteins intact. The gluten is long and coiled up originally. As gluten hydrates, the chains of proteins unwind and become longer.
There are two gluten proteins in the flour. Glutenin is the longer form and builds strong elastic bonds between strands. Gliadin is more extensible and allows the dough to flow without tearing.
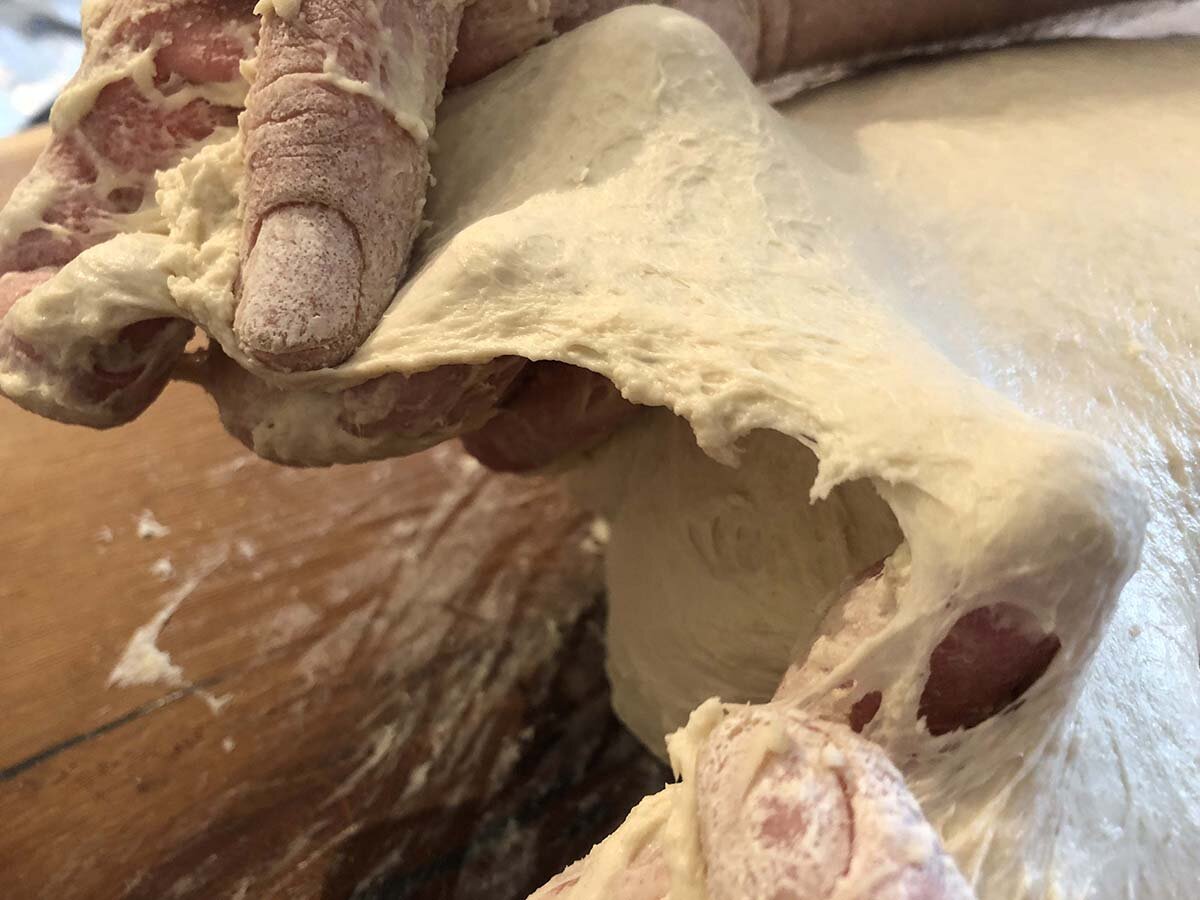
Gluten is the stringy stuff you see in the dough. It's the thing that sticks to your hands when you knead dough! You can see gluten more prominently if you run a piece of dough under a tap. The starch washes away, leaving the long gluten strands visible.
By kneading bread, we are accelerating and enhancing the dough development process. This enhances gluten development to a level that’s not possible without some kind of mechanical force. The kneading motion unwinds the gluten into longer strands and forms new bonds between strands.
As the development continues, the enhanced gluten strands organise themselves into a webbing-like network. This network will continue to develop and becomes more defined in later rising stages.
Kneading also incorporates oxygen into the dough. Oxidation strengthens the gluten bonds, which helps the dough to hold its shape. It also provides oxygen for the yeast. Yeast doesn’t need oxygen to produce carbon dioxide gas, but yeast strains will respire aerobically where oxygen is available. This respiration method produces a faster rise without any ethanol or organic acids. Rather, just carbon dioxide, energy molecules and water are produced. It makes fast kneading to generate oxygen in the dough integral for quickly made, light-tasting bread such as sandwich loaves.
Too much oxygen caused by excessive kneading and/or extended bulk fermentation can lead to bleaching of the carotenoid pigments. This destroys much of the bread’s flavour, colour and minerals.
As the dough is kneaded, kinetic energy is generated as well as a transfer of warmth through the hands when hand-kneading. Both factors combine to warm up the dough, which can considerably impact the recipe. Yeast operates best at warmer temperatures; therefore, warmer doughs rise quicker. This can be great in some situations (quicker bread), yet devastating in others where you want to slowly ferment the dough.
Kneading warm dough will lead to aerobic yeast respiration whilst kneading. This soon makes the dough gassy and wet (as water is produced), leading to a sticky and clammy dough. If the dough is difficult to knead, kneading is often ended prematurely, leading to an under-developed gluten structure.
As dough warms up during kneading, care must be taken to manage temperature throughout the preparation of bread. Taking temperature readings before kneading commences and using a Desired Dough Temperature formula to dictate the temperature of the water are essential to making great bread. For this, you’ll need a decent temperature probe like this one from GDealer!
As the rise in temperature during kneading is so predictable, some professional bakers using dough mixers will utilise temperature readings in their recipes to determine when kneading should finish. This is probably a bit advanced and over-the-top for home baking and even myself, but it’s worth mentioning here, I think.
Protein cutting enzymes called proteases are found naturally in flour. Once the flour is hydrated, these enzymes cut the gluten strands into smaller pieces. This enables the gluten to make additional bonds. Thus a more robust structure is produced with better stretch properties.
Slow vs fast kneading, what’s the point of changing speed?
Kneading is split up into two stages. The first is where light agitation slowly hydrates the flour and distributes the ingredients evenly. I find it easier to split this stage down into two steps, incorporation, and slow kneading. Incorporation blends the ingredients and should last around 2-4 minutes. The next step is for the dough to be slowly kneaded. Here the kneading motion gently works the flour and water together to unwind the gluten strands.
In a dough mixer, both steps are generally carried out by selecting a slow speed and mixing for typically 3-8 minutes. However, some “artisans” like to incorporate the ingredients by hand with the dough hook attachment before returning it to the mixer and kneading.
The length of kneading time is dependent on the dough made. See how long to knead dough for a further explanation on this.
After the ingredients are combined, and the gluten begins to feel long and stretchy (but not firm), the final stage of kneading begins. Here a faster speed on the dough mixer is selected. Kneading during this stage works the gluten more vigorously. This helps develop the gluten faster to pass the windowpane test and incorporates lots of oxygen into the dough.
When kneading by hand, sometimes a different method is used, or the technique used in the previous stage is used, just faster.
The best way to think of two-stage mixing is: In slow mixing, the gluten is prepared for when fast kneading commences. If you knead aggressively too early, the gluten will tear, and the dough will not rise effectively.
What does properly kneaded dough look like?
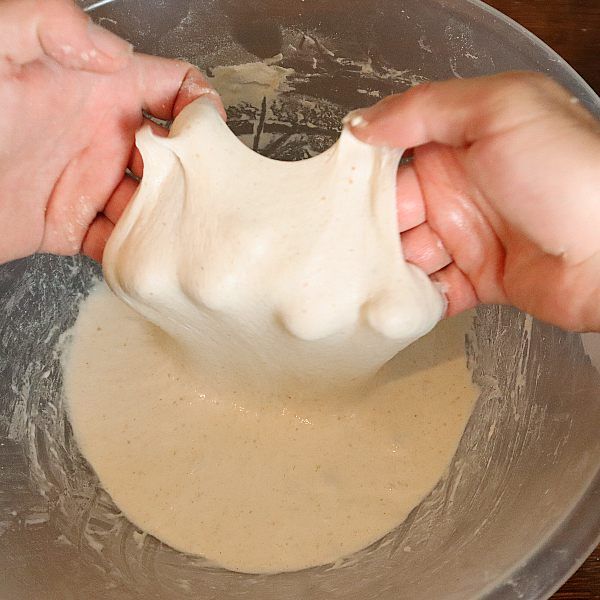
Properly kneaded bread will be strong. It will hold its shape well (elastic properties). Stretch without tearing or pulling straight back (extensible). It should also be nice to smell, be an off-white, creamy colour and have a slightly oily appearance. Many bakers utilise the windowpane test to tell when their dough is kneaded. Click the link to learn more.
| Stage | Gluten development | Features | Visual |
|---|---|---|---|
|
Stage 1 | 25% | Dough breaks when lightly stretched. |  |
|
Stage 2 | 50% | Dough has a small amount of stretch (1-2 cm) before it tears. |  |
|
Stage 3 | 75% | Stretches 2-3 cm before it tears. |  |
|
Stage 4 | 90% | Stretches thin to 5-8cm without tearing. Remains opaque when held up against a light. |  |
|
Stage 5 | 100% | Stretches thinly and allows light to shine through when held up. |  |
How do no-knead recipes work?
A no-knead recipe is a perfect solution if we avoid including too much oxygen in the dough. This situation arises when an extended fermentation duration is used to produce deep, exciting flavours, such as when making sourdough bread.
If the dough was heavily kneaded, it would lead to over-oxidation and the gluten becoming overworked and weak. To prevent this, no-knead recipes require the dough to be gently incorporated before being left to bulk ferment. During bulk fermentation, the dough is further agitated by stretching (see stretch & fold methods) at regular intervals.
The no-knead method can work in other shorter-fermented bread types too. Here, recipes often contain added protein, often eggs, to help bind the dough together. This method is often found in beginner bread recipes. The results of these loaves are often underwhelming in terms of texture but still rewarding as an easy way to make bread at home. Oh, that smell!!
Kneading vs stretch and folds
Stretch and folds offer a way to further develop gluten as the dough sits during its bulk fermentation stage. This is the part where your dough rests between kneading and being shaped and rising. During bulk fermentation, otherwise called the first rise, yeast and lactic bacteria ferment. This (amongst other benefits) matures the properties of gluten. By stretching the gluten every 20-40 minutes, it accelerates fermentation activity, and the extra agitation enhances its structure.
Suppose dough is not kneaded or kneaded only for a short period. In that case, it will benefit from stretch and folds to develop its gluten network. Even dough that has been kneaded to over 80% of gluten development will benefit from some further stretch and folds during the first rise. Therefore a high-quality dough can be produced through kneading, stretch and folds, or a combination of both, which is most popular.
Is no-knead and no stretch and fold bread a thing?
It is possible to skip stretch and folds and intense kneading by placing the dough in the fridge overnight. Here the gluten will mature naturally whilst the yeast is inactive. The following morning the dough can be removed from the fridge for a couple of hours before being shaped and proofed.
Do I need to do two rises after kneading?
If kneading to reach full gluten development, going straight from mixer to shaping and final proofing will create a decent dough structure. But it won’t be as developed in flavour, gas retention qualities and shelf life as it could be. To counteract this, bread improvers, fats, tenderisers and sweeteners can be added to these no-time-doughs. However, artisan bakers prefer to knead a little less and then bulk ferment their dough to mature the structure with the benefits of fermentation.
How to get a shiny dough

You may have noticed a glossy film that appears when dough is kneaded well. A nice sheen is a sign of good dough, but it has a purpose. The film links the proteins and wheat germ oils, making the dough smoother and more cohesive. Follow the steps below to form a fine gluten film. You must knead the dough really well too!
How to make the perfect dough
- To make a high-quality dough you should first start with good quality flour. For most bread types, use a bread flour that’s packed with healthy starch and proteins. Poor quality flour has an abundance of broken particles and should be avoided if possible.
- The next step is to get the water hydration right for the flour. Some home bakers love making bread that’s as wet as possible. I’ve found the best success when not trying to impress anyone with my wet dough handling skills! Aim for the level of water that the flour needs and no more. It’ll take a few attempts to understand how much water a flour needs, but keep trying. Hydrating the flour, so it’s not too wet or dry helps gluten to be nice and strong. Here’s a guide on how much water to add to bread.
- Next is the kneading action, and it must contain two methods. The first gently hydrates the gluten and encourages it to unravel. Some bakers might use an autolyse to assist here.
- Once the dough is nicely hydrated and evenly dispersed, it is kneaded aggressively. This part stretches the gluten and forms a network that will retain gas. We can use the windowpane test to see if it has been kneaded enough.
- The final stage is the rest or bulk fermentation stage. This is where the dough is left to ferment naturally, where it develops acids and ethanol, which mature the flour.
Conclusion
After reading this article, I hope you understand the science behind kneading bread dough and why it’s so important. Here’s my guide on how to knead dough if you want to learn the practicals of hand kneading. Let me know if you have any further questions in the comments below or just want to say hi!
Frequently asked questions about kneading dough
If you’ve enjoyed this article and wish to treat me to a coffee, you can by following the link below – Thanks x

Hi, I’m Gareth Busby, a baking coach, senior baker and bread-baking fanatic! My aim is to use science, techniques and 15 years of baking experience to make you a better baker.
Table of Contents
- What does kneading dough do?
- Do I need to knead bread dough?
- How does kneading work?
- The science behind kneading bread
- Slow vs fast kneading, what’s the point of changing speed?
- What does properly kneaded dough look like?
- How do no-knead recipes work?
- Kneading vs stretch and folds
- Is no-knead and no stretch and fold bread a thing?
- Do I need to do two rises after kneading?
- How to get a shiny dough
- How to make the perfect dough
- Conclusion
- Frequently asked questions about kneading dough
Related Recipes
Related Articles
Latest Articles
Baking Categories
Disclaimer
Address
53 Greystone Avenue
Worthing
West Sussex
BN13 1LR
UK


