Why Did My Bread Explode Or Burst While Baking?

Have you ever been ecstatic waiting for the bake to end to find that your bread explodes while baking? It’s really annoying, yet a common problem that many new bakers encounter – many veterans experience it too! What’s great about if your bread bursts or explodes in the oven is that this baking fault is one of the easiest to remedy. So if you want to know the answer to “why did my bread explode”, read on to learn how to avoid any type of explosion, bursting, or splitting in your bread!
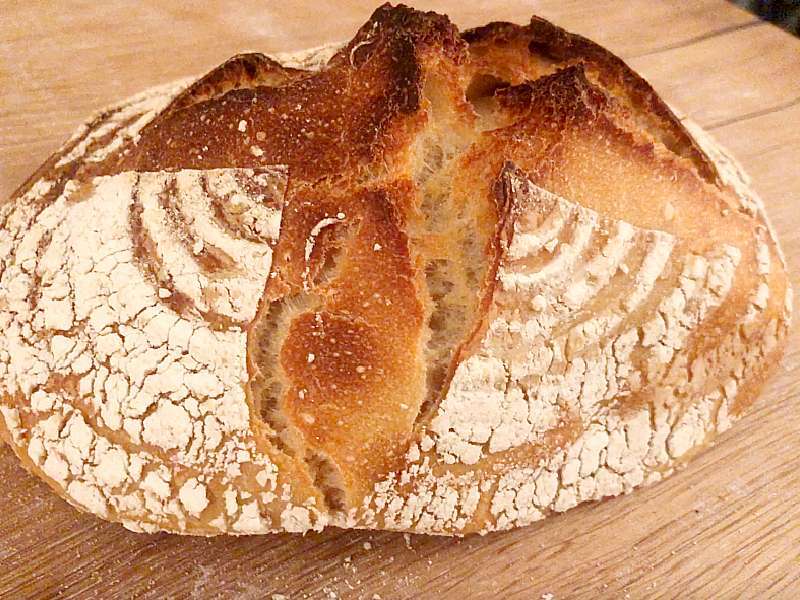
As bread enters the oven, the remaining yeast cells rapidly increase gas production during the first 2-15 minutes. This rapid gas production called “oven spring” causes the dough to rise in the oven. Faults in the dough restrict or direct the gas produced into the weak areas of the gluten matrix. This builds pressure and the gas eventually forces the surface of the bread to rupture as it breaks free leaving an unwanted appearance
Why does bread burst when baking?
Bread dough is formed of gluten proteins which develop into a strong gluten matrix where it retains gas. Yeast produces gas through respiration and the bread fermentation process. The pockets of gluten expand as they capture the gas to make the bread rise.
Though the gluten structure in bread dough is not perfectly linear, there will always be weak areas in every loaf. These weak areas become exploited by the build-up in pressure from the gas produced. As pressure builds, gas forces a way to escape the bread through the easiest route. These areas can be the seam, where the bread has been scored, the base, or in ideal situations, the bread doesn’t rupture and rises upwards evenly.
The reason for bread exploding is down to the quality of the dough or how it’s treated. There are 4 overarching reasons why your bread might explode: humidity, improper shaping, under-proofing or a lack of moisture. Let’s take a look at how and why bread bursts unevenly when baked.
#1 The dough was under-proofed
When you don’t allow your bread to rise fully before baking, it is under-proofed. The converse, of course, is over-proofing which won’t cause the bread to burst but can lead to other faults such as bread collapsing when baking.
Under-proofed bread can explode and often has a hard, dense crumb. The reason it explodes is as the dough is not matured, often called under-fermented. This means that the gluten structure is weak and irregular.
When the bread goes into the oven a vast amount of gas is produced by the yeast and the bread rockets up, often unevenly causing it to rupture the crust or vigorously expand the cuts made in the dough before baking. The result is an unappealing loaf that looks like it’s exploded.
Signs that the bread is under proofed:

If your bread rose a lot in the oven then it probably needed longer to rise before it went in. Expect to see explosions where gas rips through a weak spot in the loaf, or “ripping”. Ripping is where the cuts are severely widened during oven spring to leave rough rip marks in the cuts. This method is exaggerated and mastered somewhat when making bread with an ear.
How to fix:
Some recipes call for a specific time to proof. But since conditions and environments are often different to the recipe author, timing isn’t often accurate. Instead, it’s better to learn how the perfect dough should look when it’s ready to go in the oven.
The good news is there is a simple test that you can try out called the poke test. If you poke your finger into the bread and it bounces back right away, it’s under-proofed. If the dough didn’t come back at all, it is over-proofed. The perfect solution is when the dough bounced back at the 3-second mark.

#2 The dough was too dry
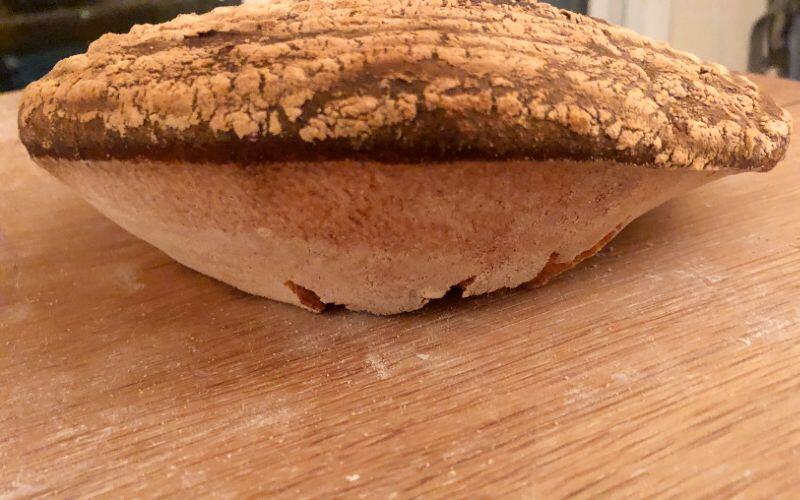
If the surface of the dough is too dry, the crust hardens early and prevents the bread from rising in the oven. There is always a weak area in the dough and in this situation this part is the area where it is moister. The softer dough expands and becomes the main route for the gas to escape.
Signs that the crust was too dry:

The baked crust will look dull and untextured and there will be a defective area (or two) where the bread has exploded. In the picture above, the gas escaped at the bottom of the loaf but this can happen at the sides, or wherever.
It’s often noted that several loaves baked at a time often adjoin when baked close to each other. The close proximity of the bread pieces protects each other from the heat of the oven which causes them to expand outwards until they meet each other.
It’s a welcome benefit when making soft batch bread or bread rolls but undesired when making crusty bread and extremely unwanted when upward expansion is prevented altogether and the gas zips out at the sides or if the bread expands at the bottom!
How to fix:
Professional bakers use a steam box proofer to proof their dough in a warm and humid environment. This ensures that the crust doesn’t harden during proofing (often called skinning up). If you suffer from this problem you could use a home proofer from Brot and Taylor, cover the dough as it rises or place a cup or bowl of hot water near the dough. This will increase the humidity to make sure the surface of the dough isn’t too dry. See my article on making a DIY proofing box.
#3 You are baking in a fan oven
A fan oven intensifies heat by drawing away moisture from the surface of the baking food. This is great for a roast turkey, but when it comes to bread, it removes moisture from the crust. The same deficiencies as the “dough was too dry” are likely to appear. You can also expect to see weird shaped bread as the constant stream of wind from the fan blows the dough into funny windswept shapes as it bakes!
To fix:
If your oven only has a fan setting you may find it better to bake bread in a Dutch oven or preheat it to a higher temperature and turn off the heat once the bread goes in. After 15 minutes the oven spring should have ended and the fan can be turned back on for the remainder of the bake.
#4 Slashing wasn’t deep enough
Bread bursts when pressure builds after the crust hardens. The best way to avoid this is to choose the pathway for the excess CO2 to escape. Slashing or scoring your bread will produce your ideal ventilation route for the gas. If done well and there are none of the other mentioned issues the bread should rise evenly and look as good as the professionals!
Signs that the slash wasn’t deep enough:
Many bakers struggle to know how deep to score the unbaked loaf. Compiled with mastering under and over proofing, it’s one of the hardest challenges beginner bread bakers have to overcome. If you are not scoring deep enough, expect to see the slash open up unevenly as the gas expands the cut.
Sometimes you might see gas exploding from another area of the bread. This is just a sign that the gas couldn’t escape from the designated route (the cut) therefore the score should have been deeper.
If the bread has been scored too deep:
The bread won’t be exploding!! It’s possible that it’ll collapse; if not you’ll likely see that the cuts expand a lot whilst the bread doesn’t gain much or any growth during oven spring.
How to fix:
The idea here is to not be shy when scoring, without being aggressive. If you are making one cut design, a good 3/4 inch deep that runs almost the length of the bread is best. For other designs, for example, the “pound sign” design is a popular scoring design for sourdough bakers. As there are more cuts, they don’t need to be as deep as a single slashed loaf. ½ inch deep slashes are perfect.

Tip: The timing of slashing and baking is also key. Make sure that the time between slashing and putting the dough in the oven is slim. Get the bread in the oven right after scoring! Too much time can close down the ventilation route and the bread can collapse or burst.
#5 The seam was exposed
The seam is where the edges of the dough seal together. When you shape bread before its final proof, a tight seal will support the bread as it rises during proofing and prevents it from being the “weak spot” when rising in the oven spring.
The seam should be placed at the bottom of the loaf so that it is not visible after it is baked. This can be confusing if using a banneton to proof bread as the dough is then flipped upside down for baking.
Signs that the seam wasn’t sealed properly:
If you reveal the seam by not placing it in the tin or proofing basket the right way round you will see a crack appear and expand as it bakes.
If it is not sealed properly you may see that the bread bursts along the joint. This is most noticeable in free-standing proofed bread such as bloomers or cottage loaves. Expect to see the seam expanding and “rips” occurring around the join area.
How to fix:
Placing the same at the base of the bread is important here – remember if using a banneton the dough should be placed seam side up as it is to be flipped before baking.
Bench resting your dough for 15-30 minutes before final shaping can lead to the perfect loaf. To further seal the seams, once the dough pieces are final shaped, pinch the seam together a few times. Finish off by rounding or rolling again so that the final shape is unaffected.
Frequently asked questions about bursting or exploding bread
If you’ve enjoyed this article and wish to treat me to a coffee, you can by following the link below – Thanks x

Hi, I’m Gareth Busby, a baking coach, senior baker and bread-baking fanatic! My aim is to use science, techniques and 15 years of baking experience to make you a better baker.
Table of Contents
Related Recipes
Related Articles
Latest Articles
Baking Categories
Disclaimer
Address
53 Greystone Avenue
Worthing
West Sussex
BN13 1LR
UK


Leave a Reply