Stretch and fold can sound like a complicated and unnecessary step. But after a couple of attempts, you’ll notice the power of stretch and folds, so much so that you’ll be using them all the time! If you’re new to bread baking (or this technique) I’m going to explain why stretch and folds are important, when to use them, how often to do them, and (importantly) how to do stretch and folds. In this guide, you’ll learn two simple stretch and fold methods. There are other advanced methods that you can see on the sourdough stretch and fold page, but these two are all you need to get started!
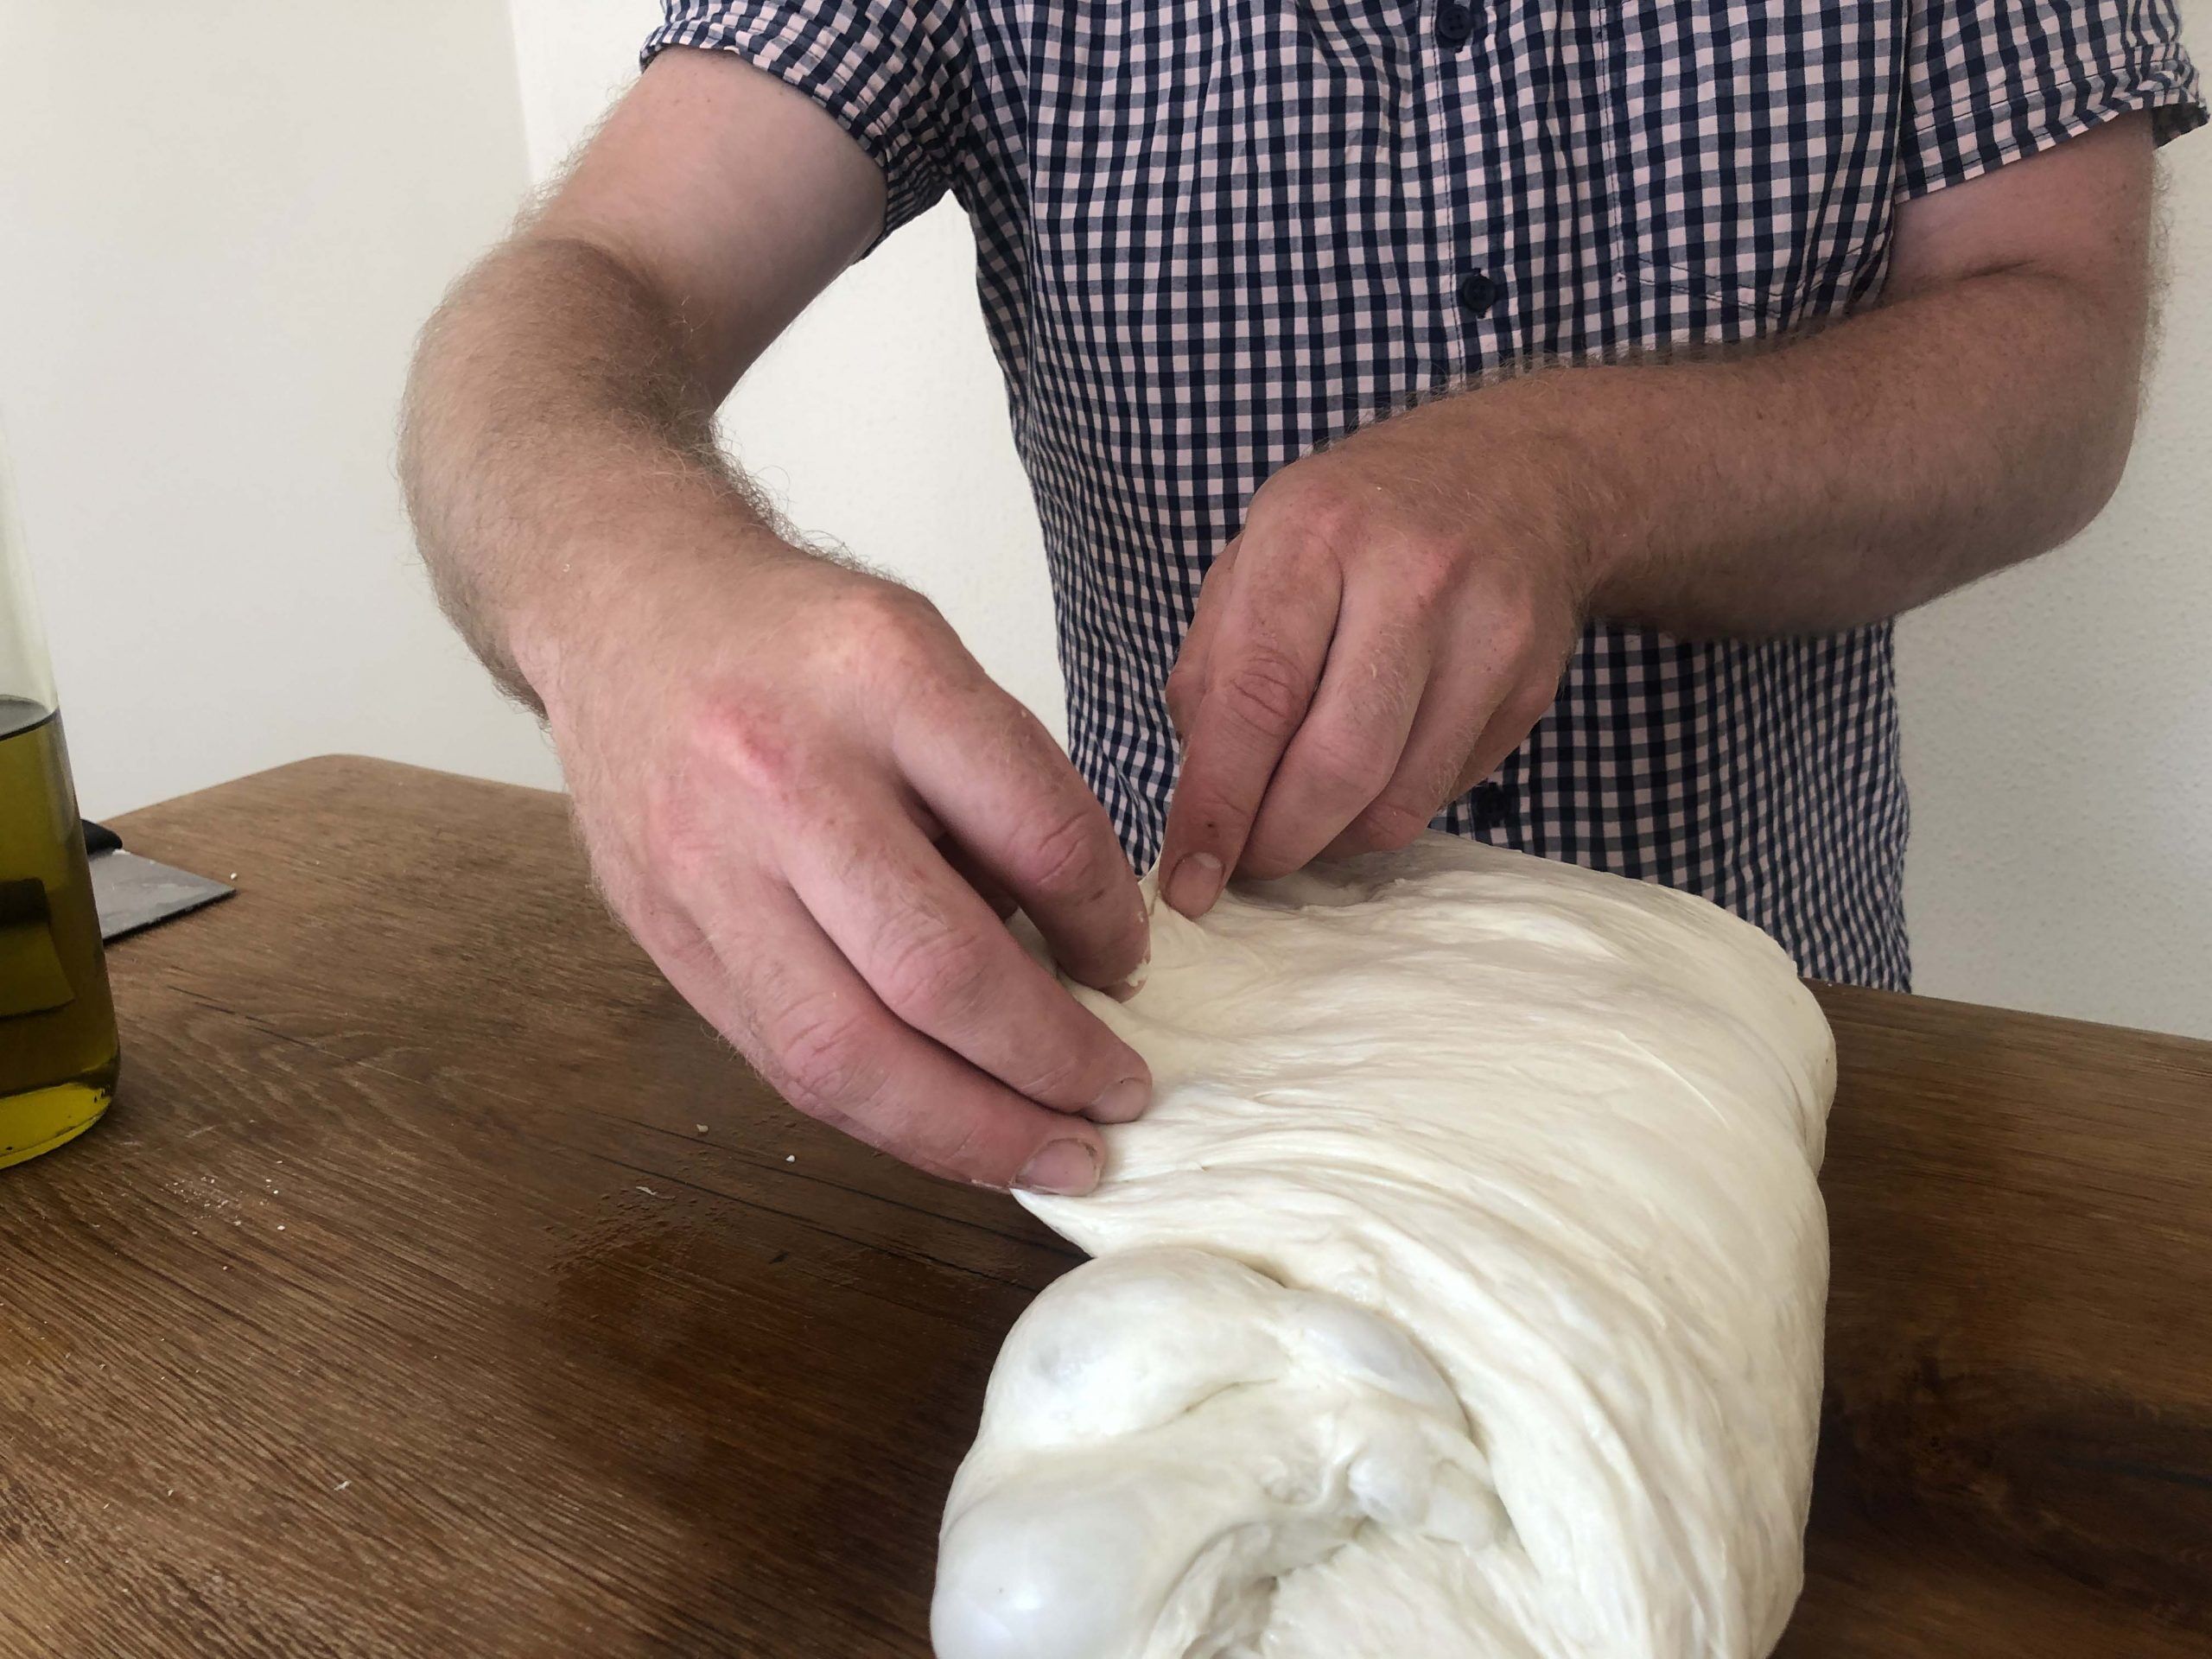
How to do a standard stretch and fold
This is the most popular method to stretch and fold. It’s quick to do and offers great gluten development. It’s also the easiest to get right!
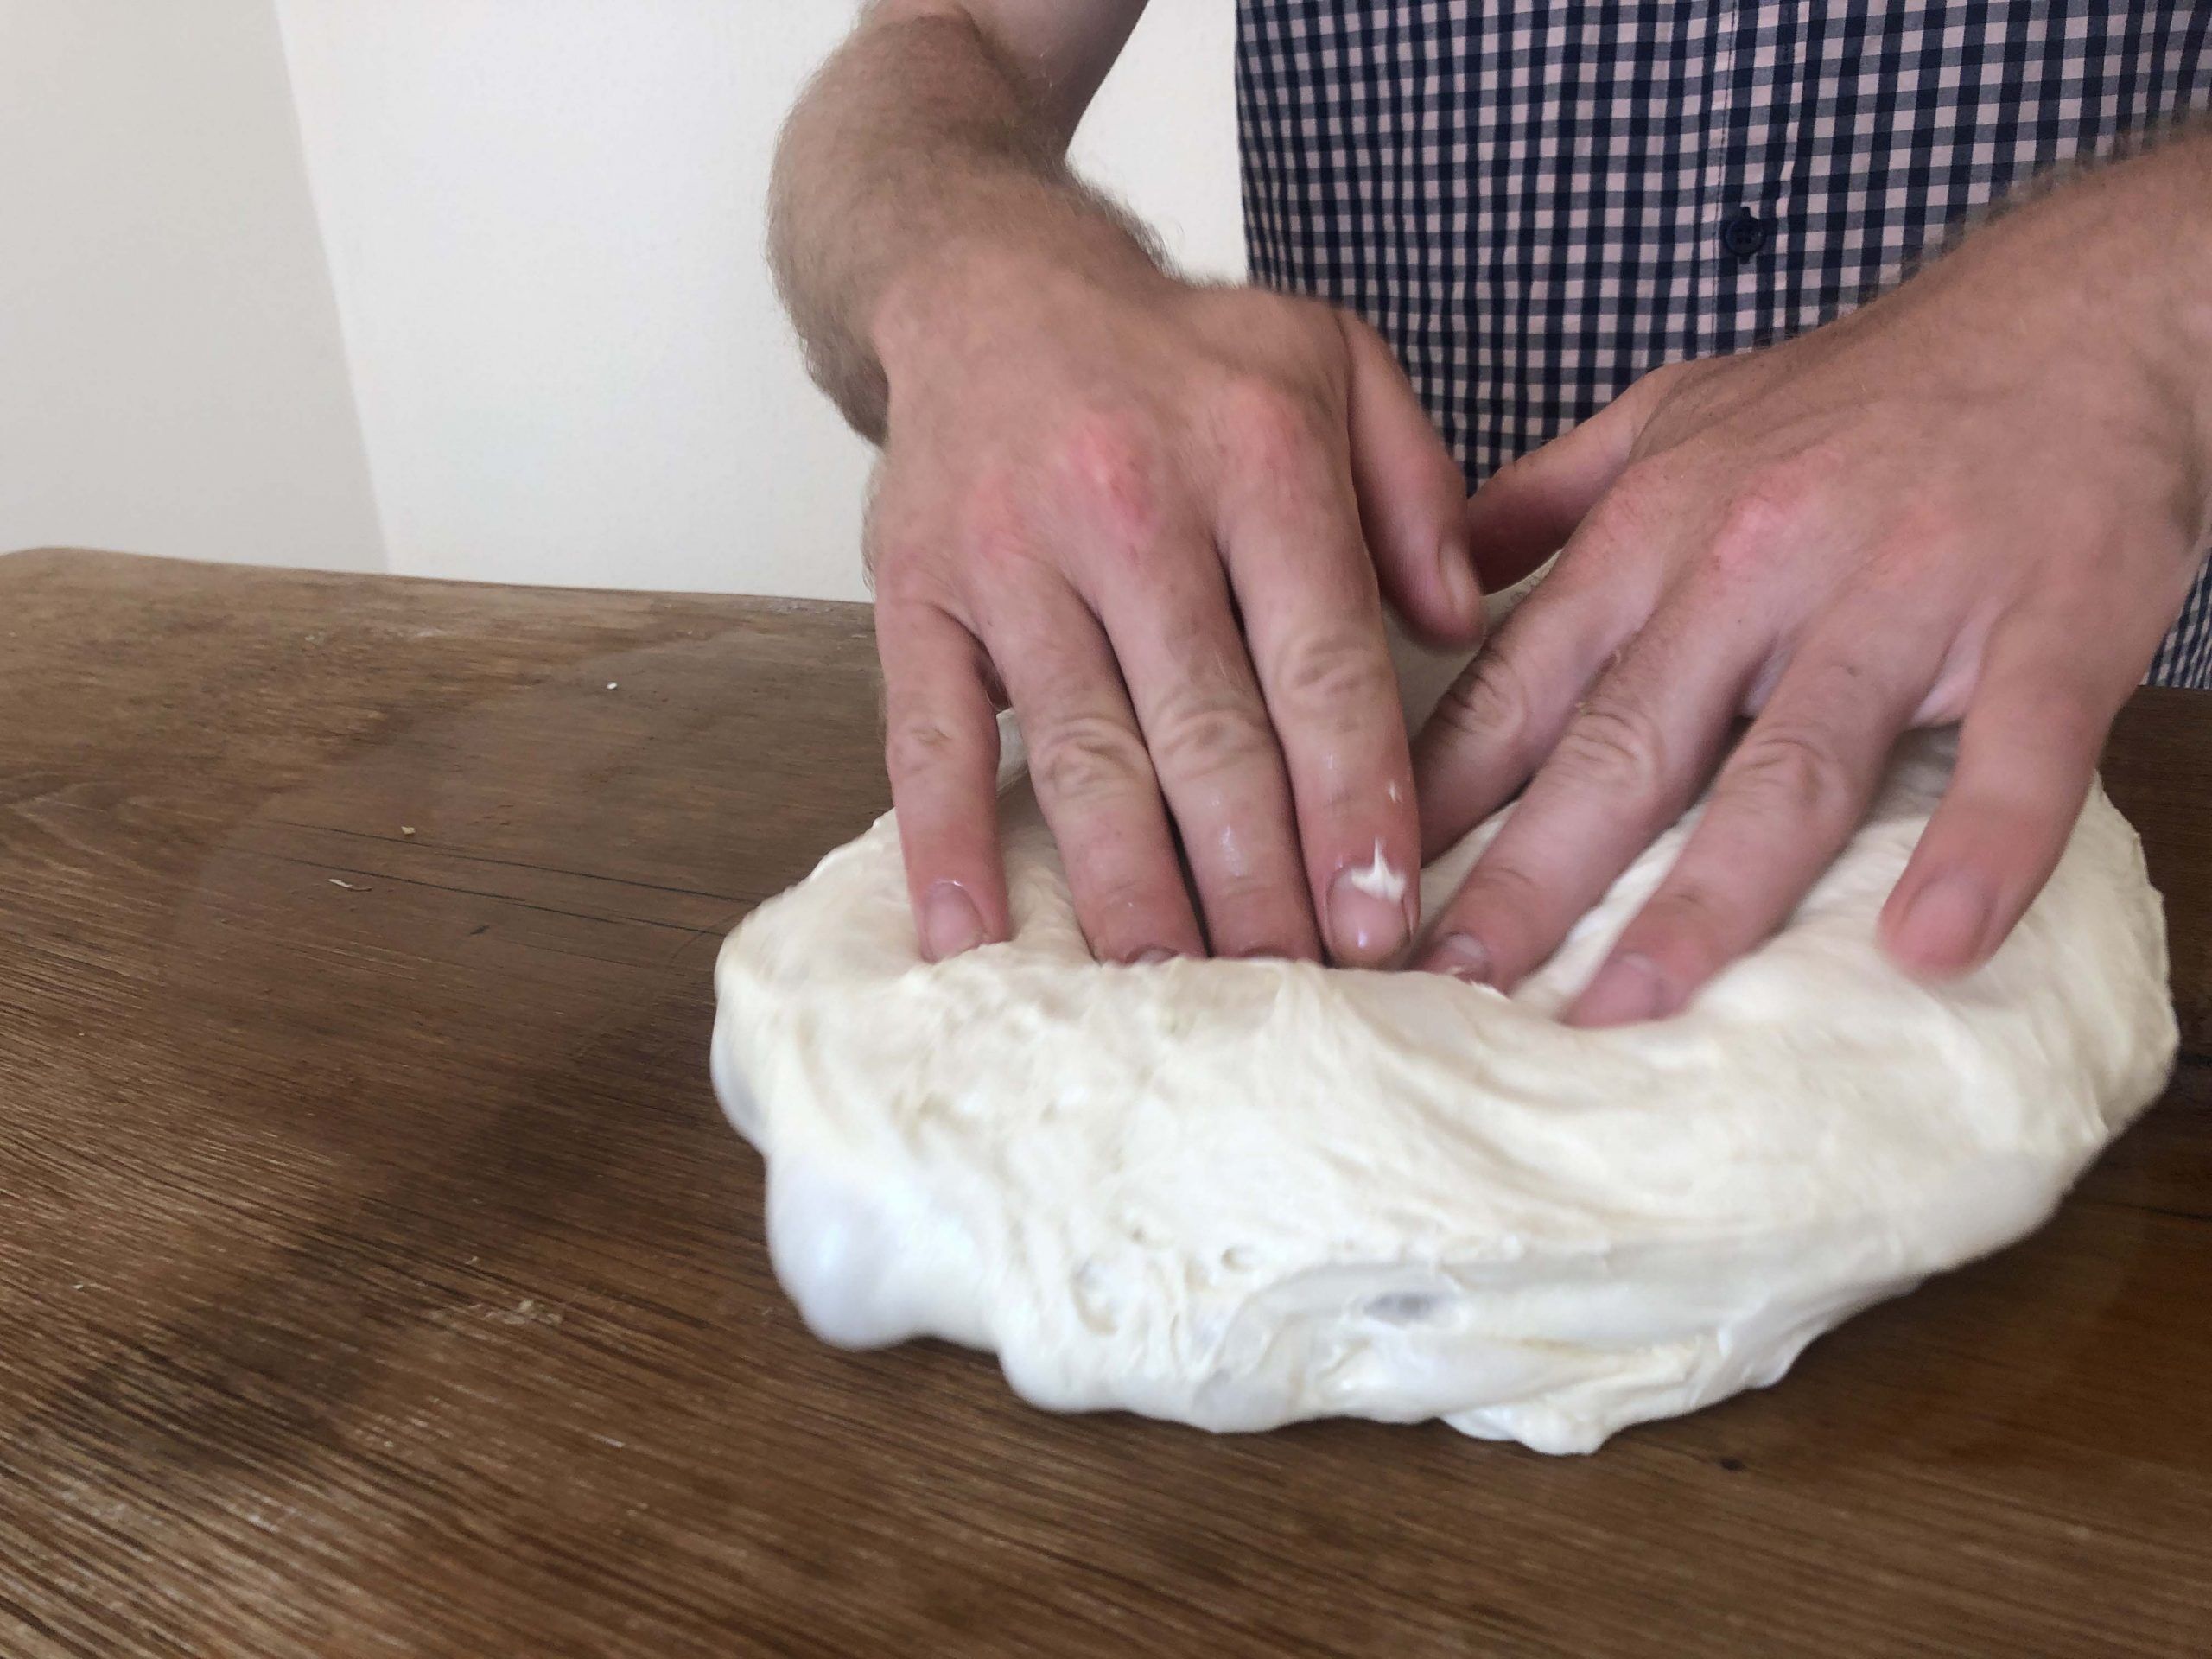
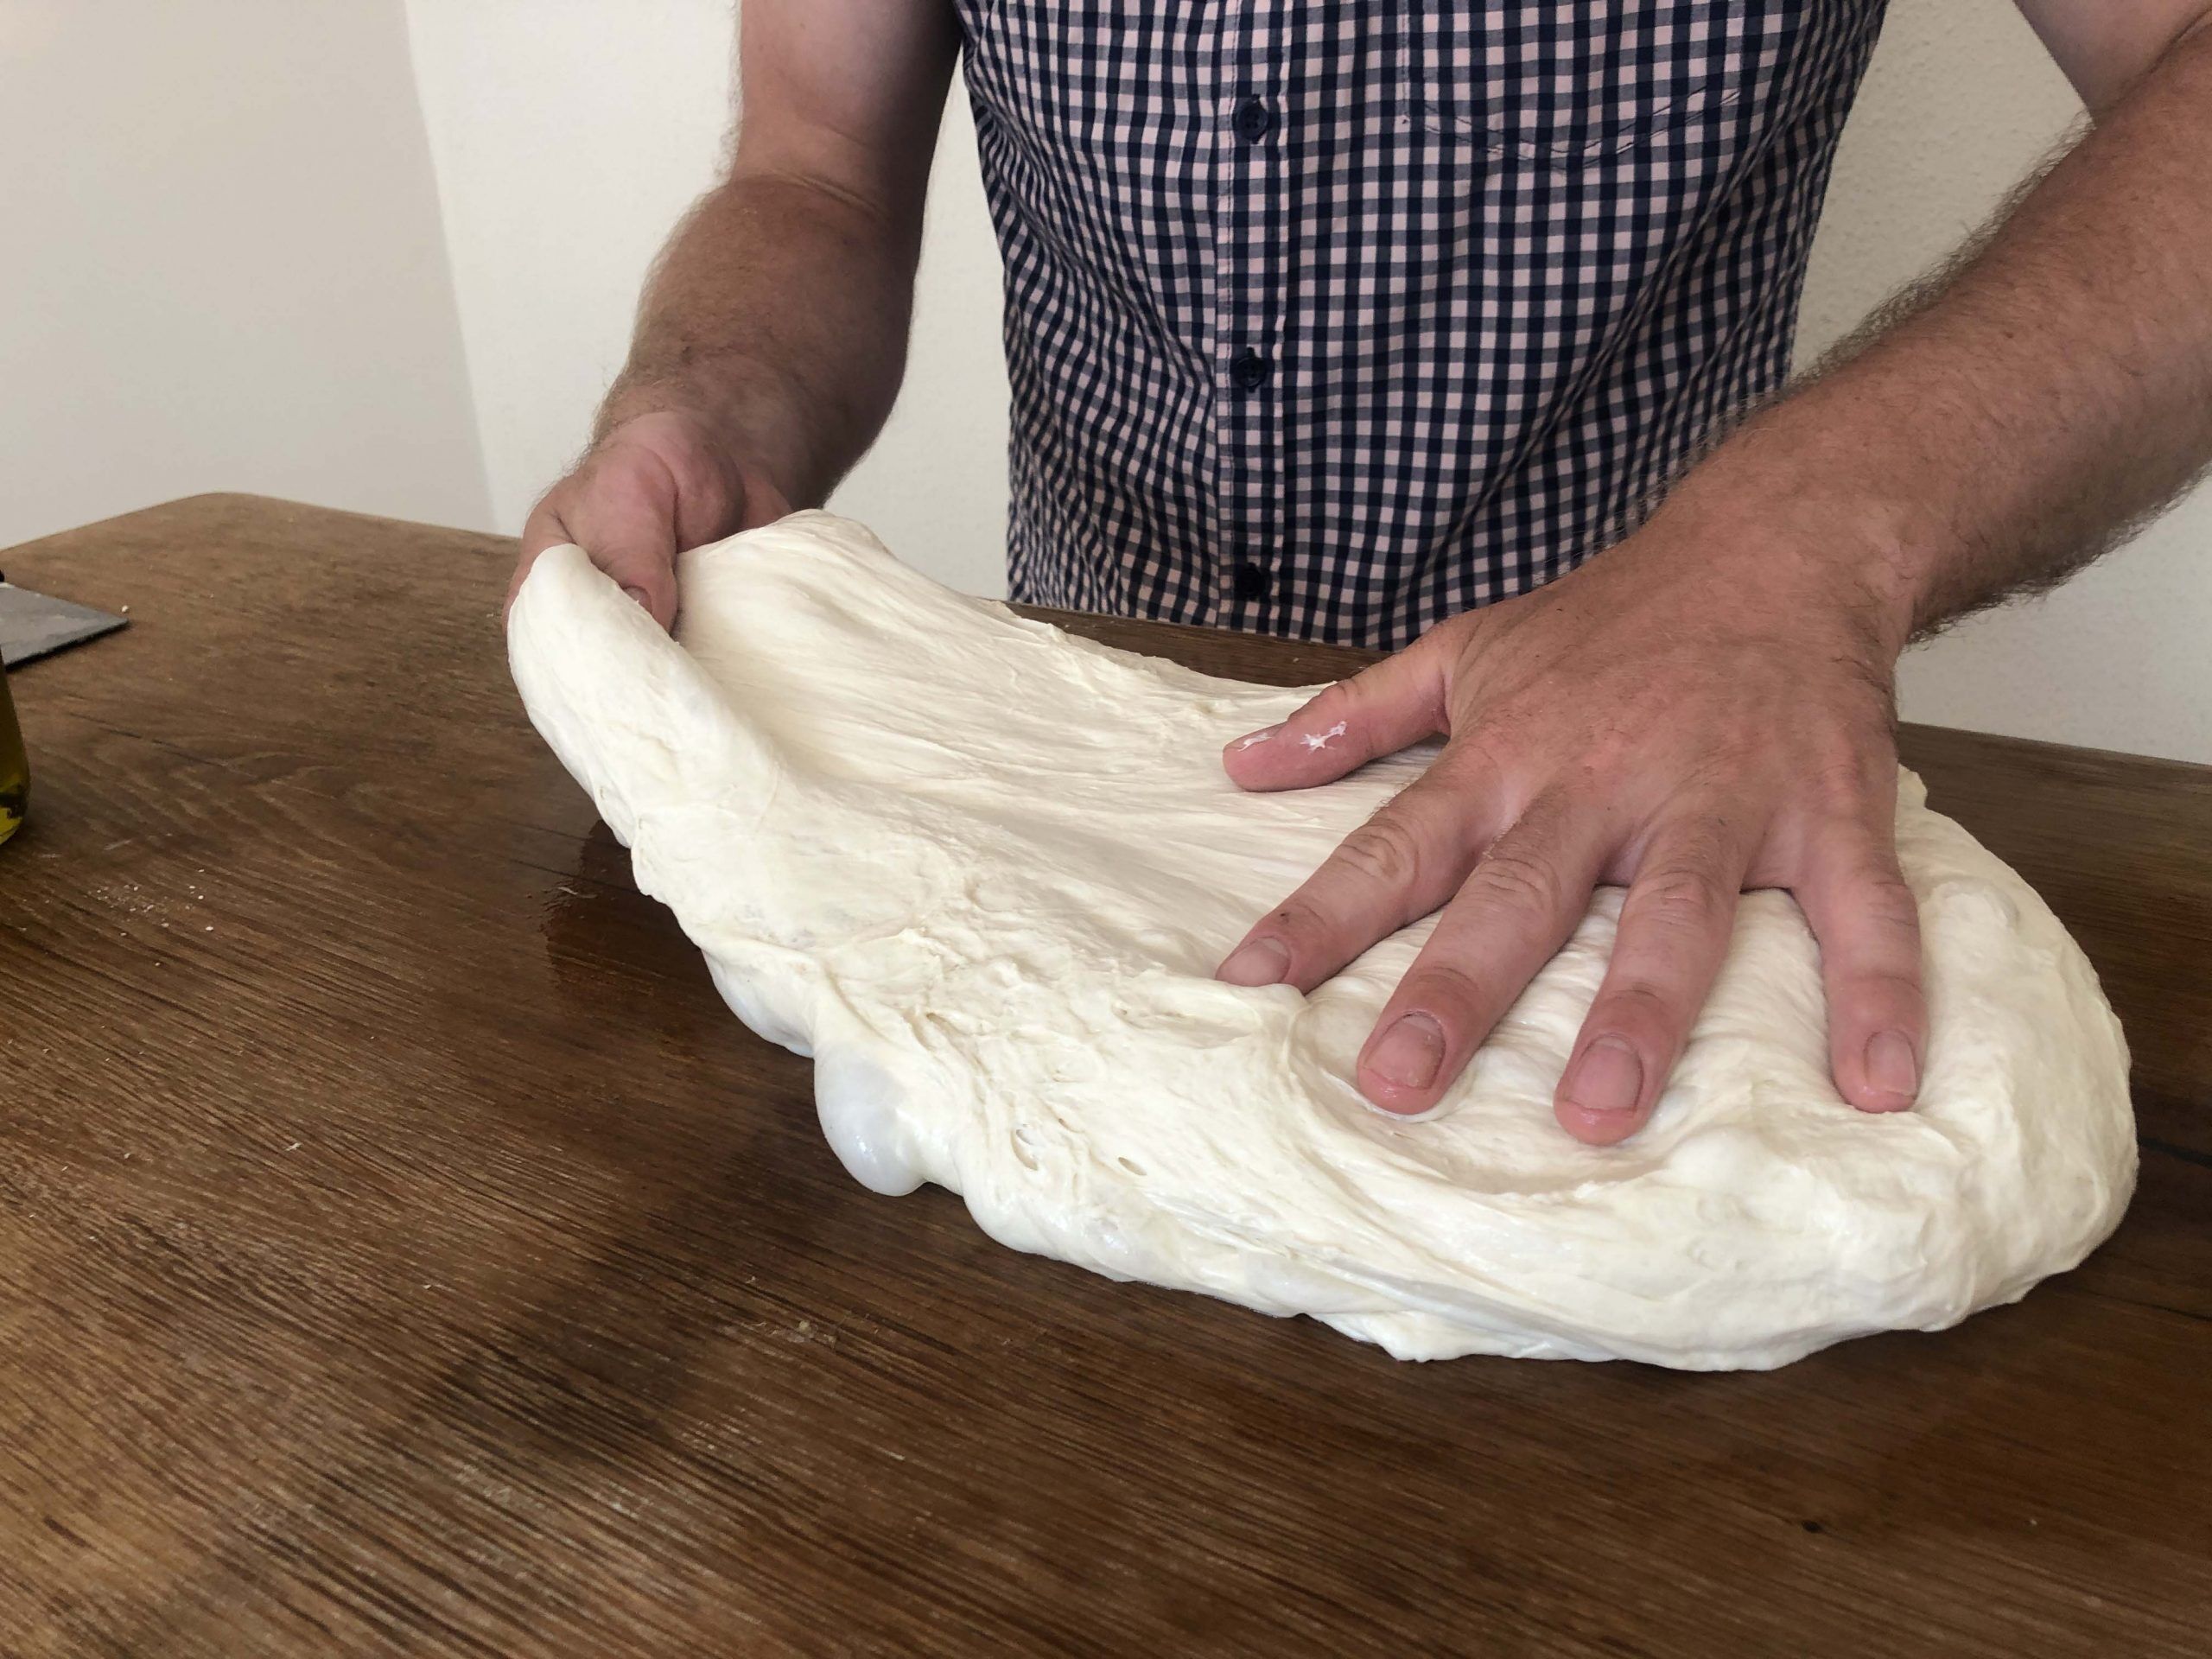
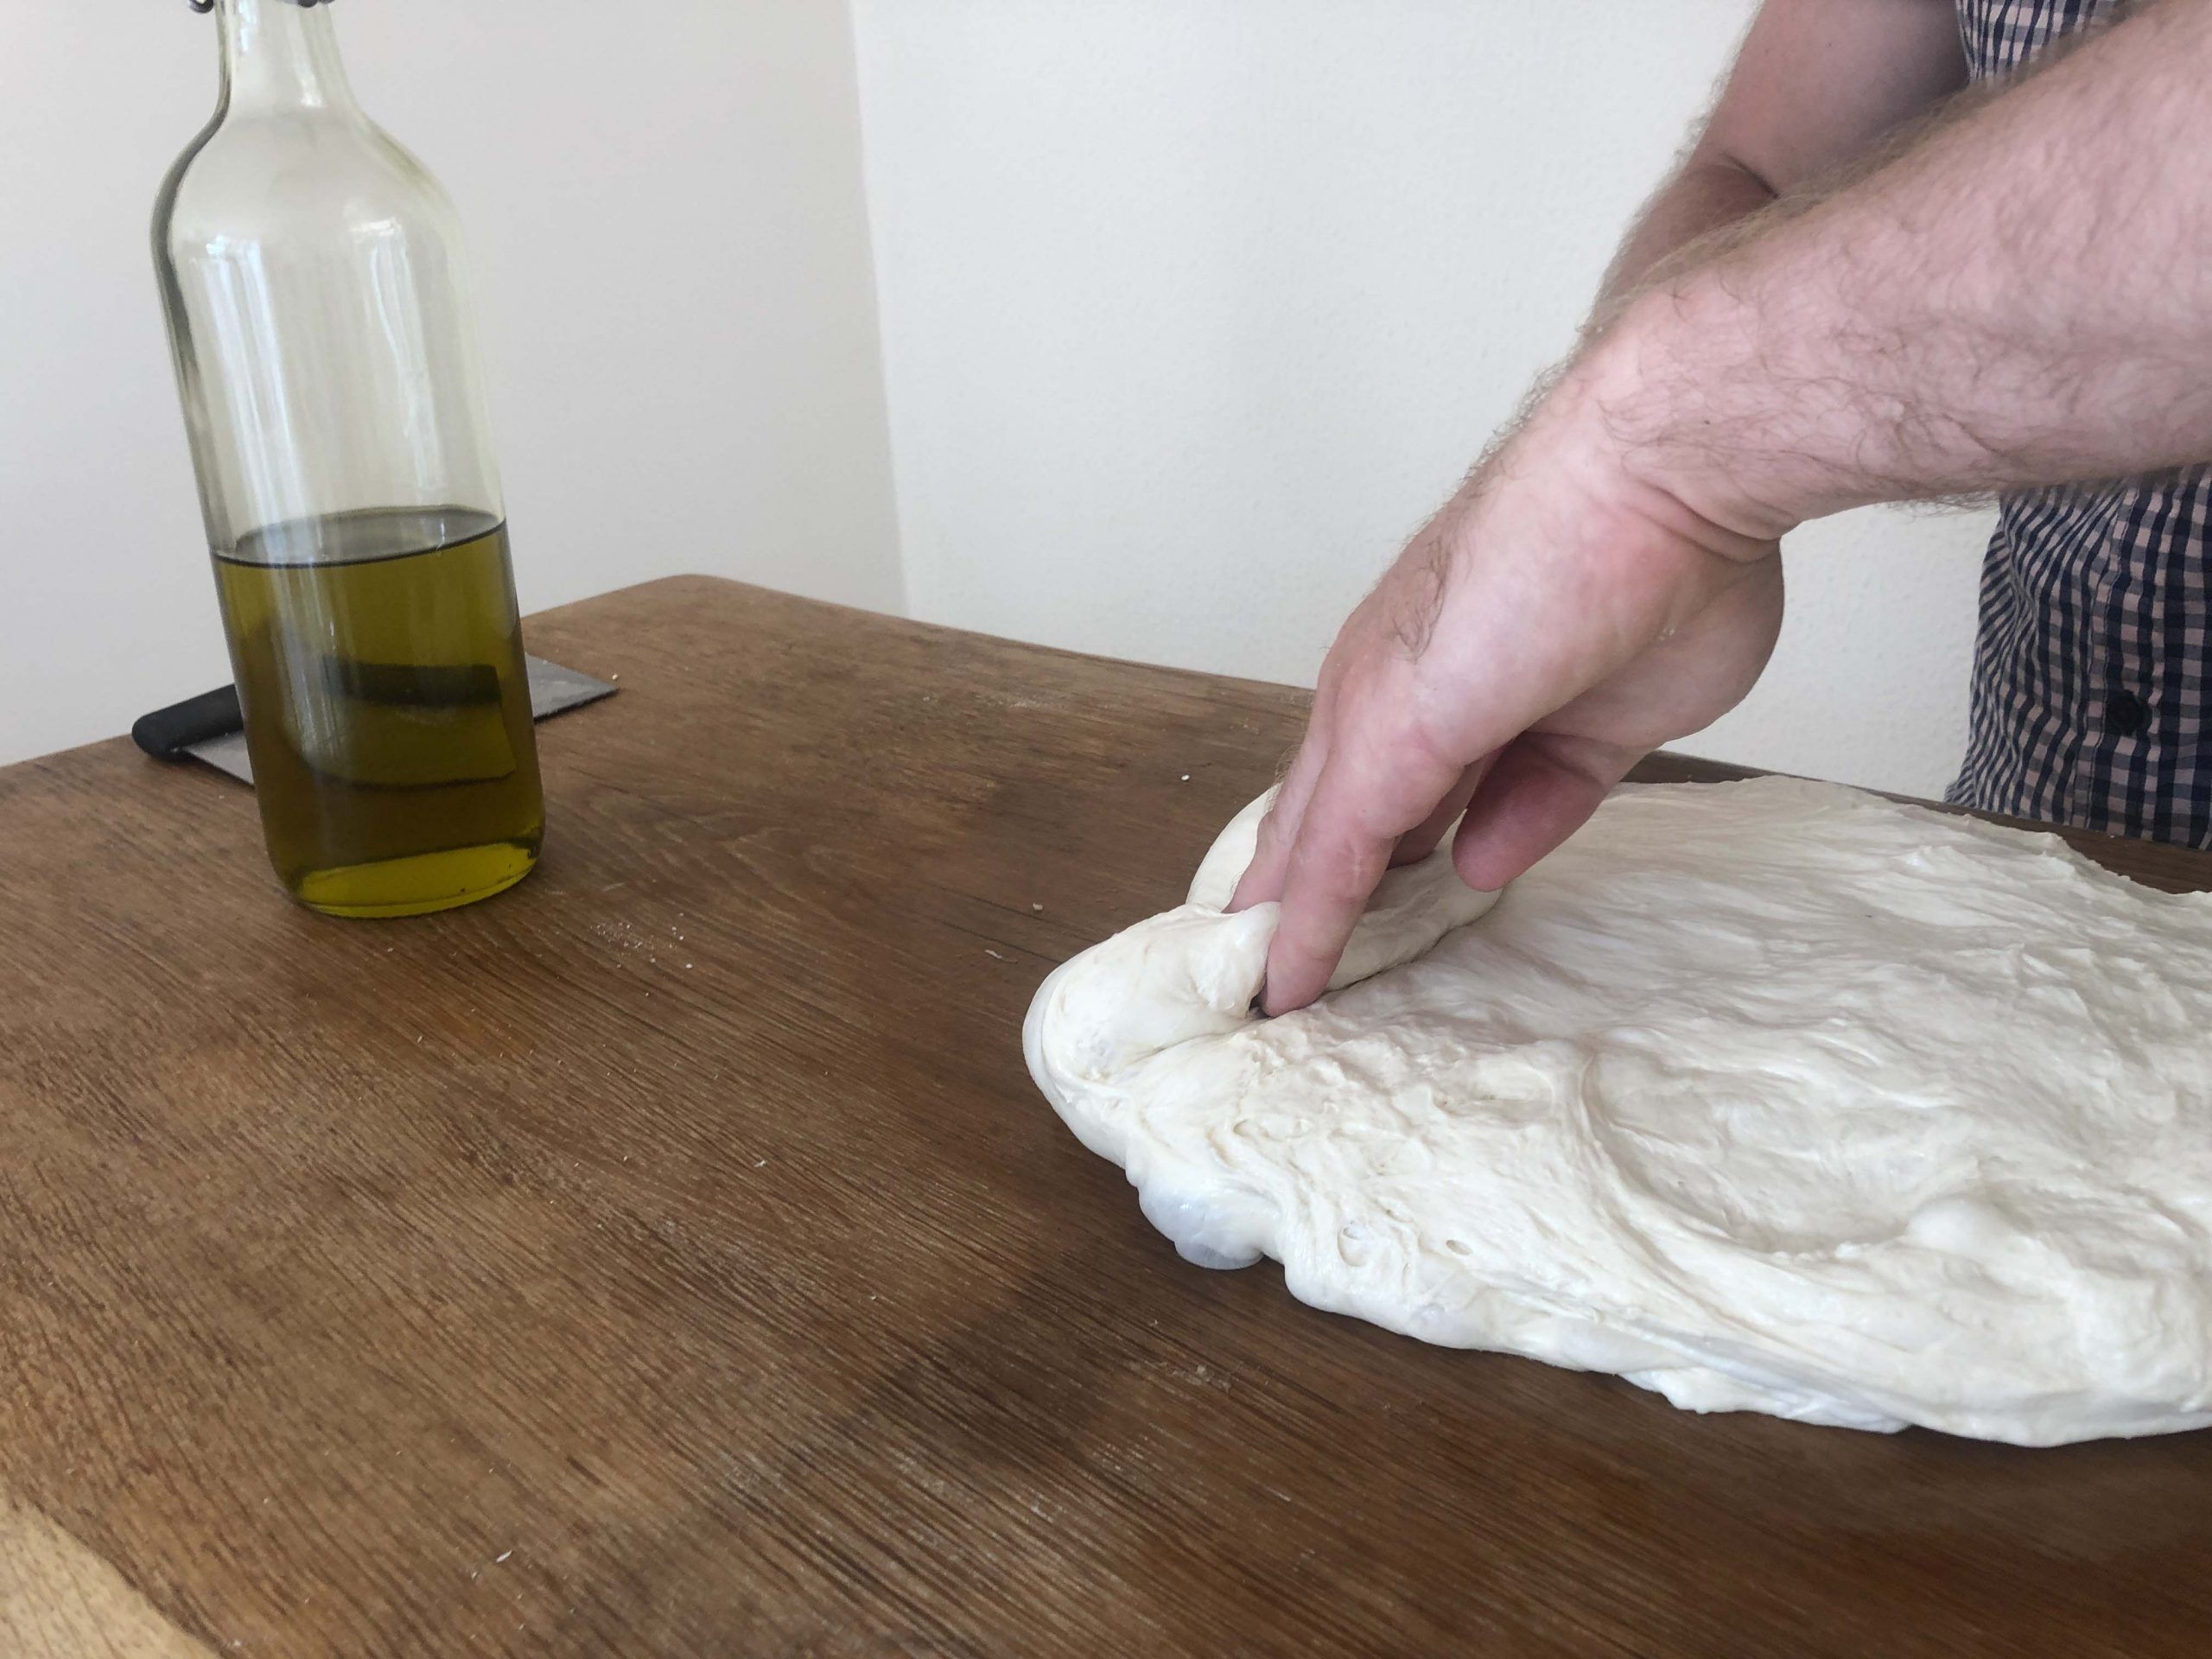
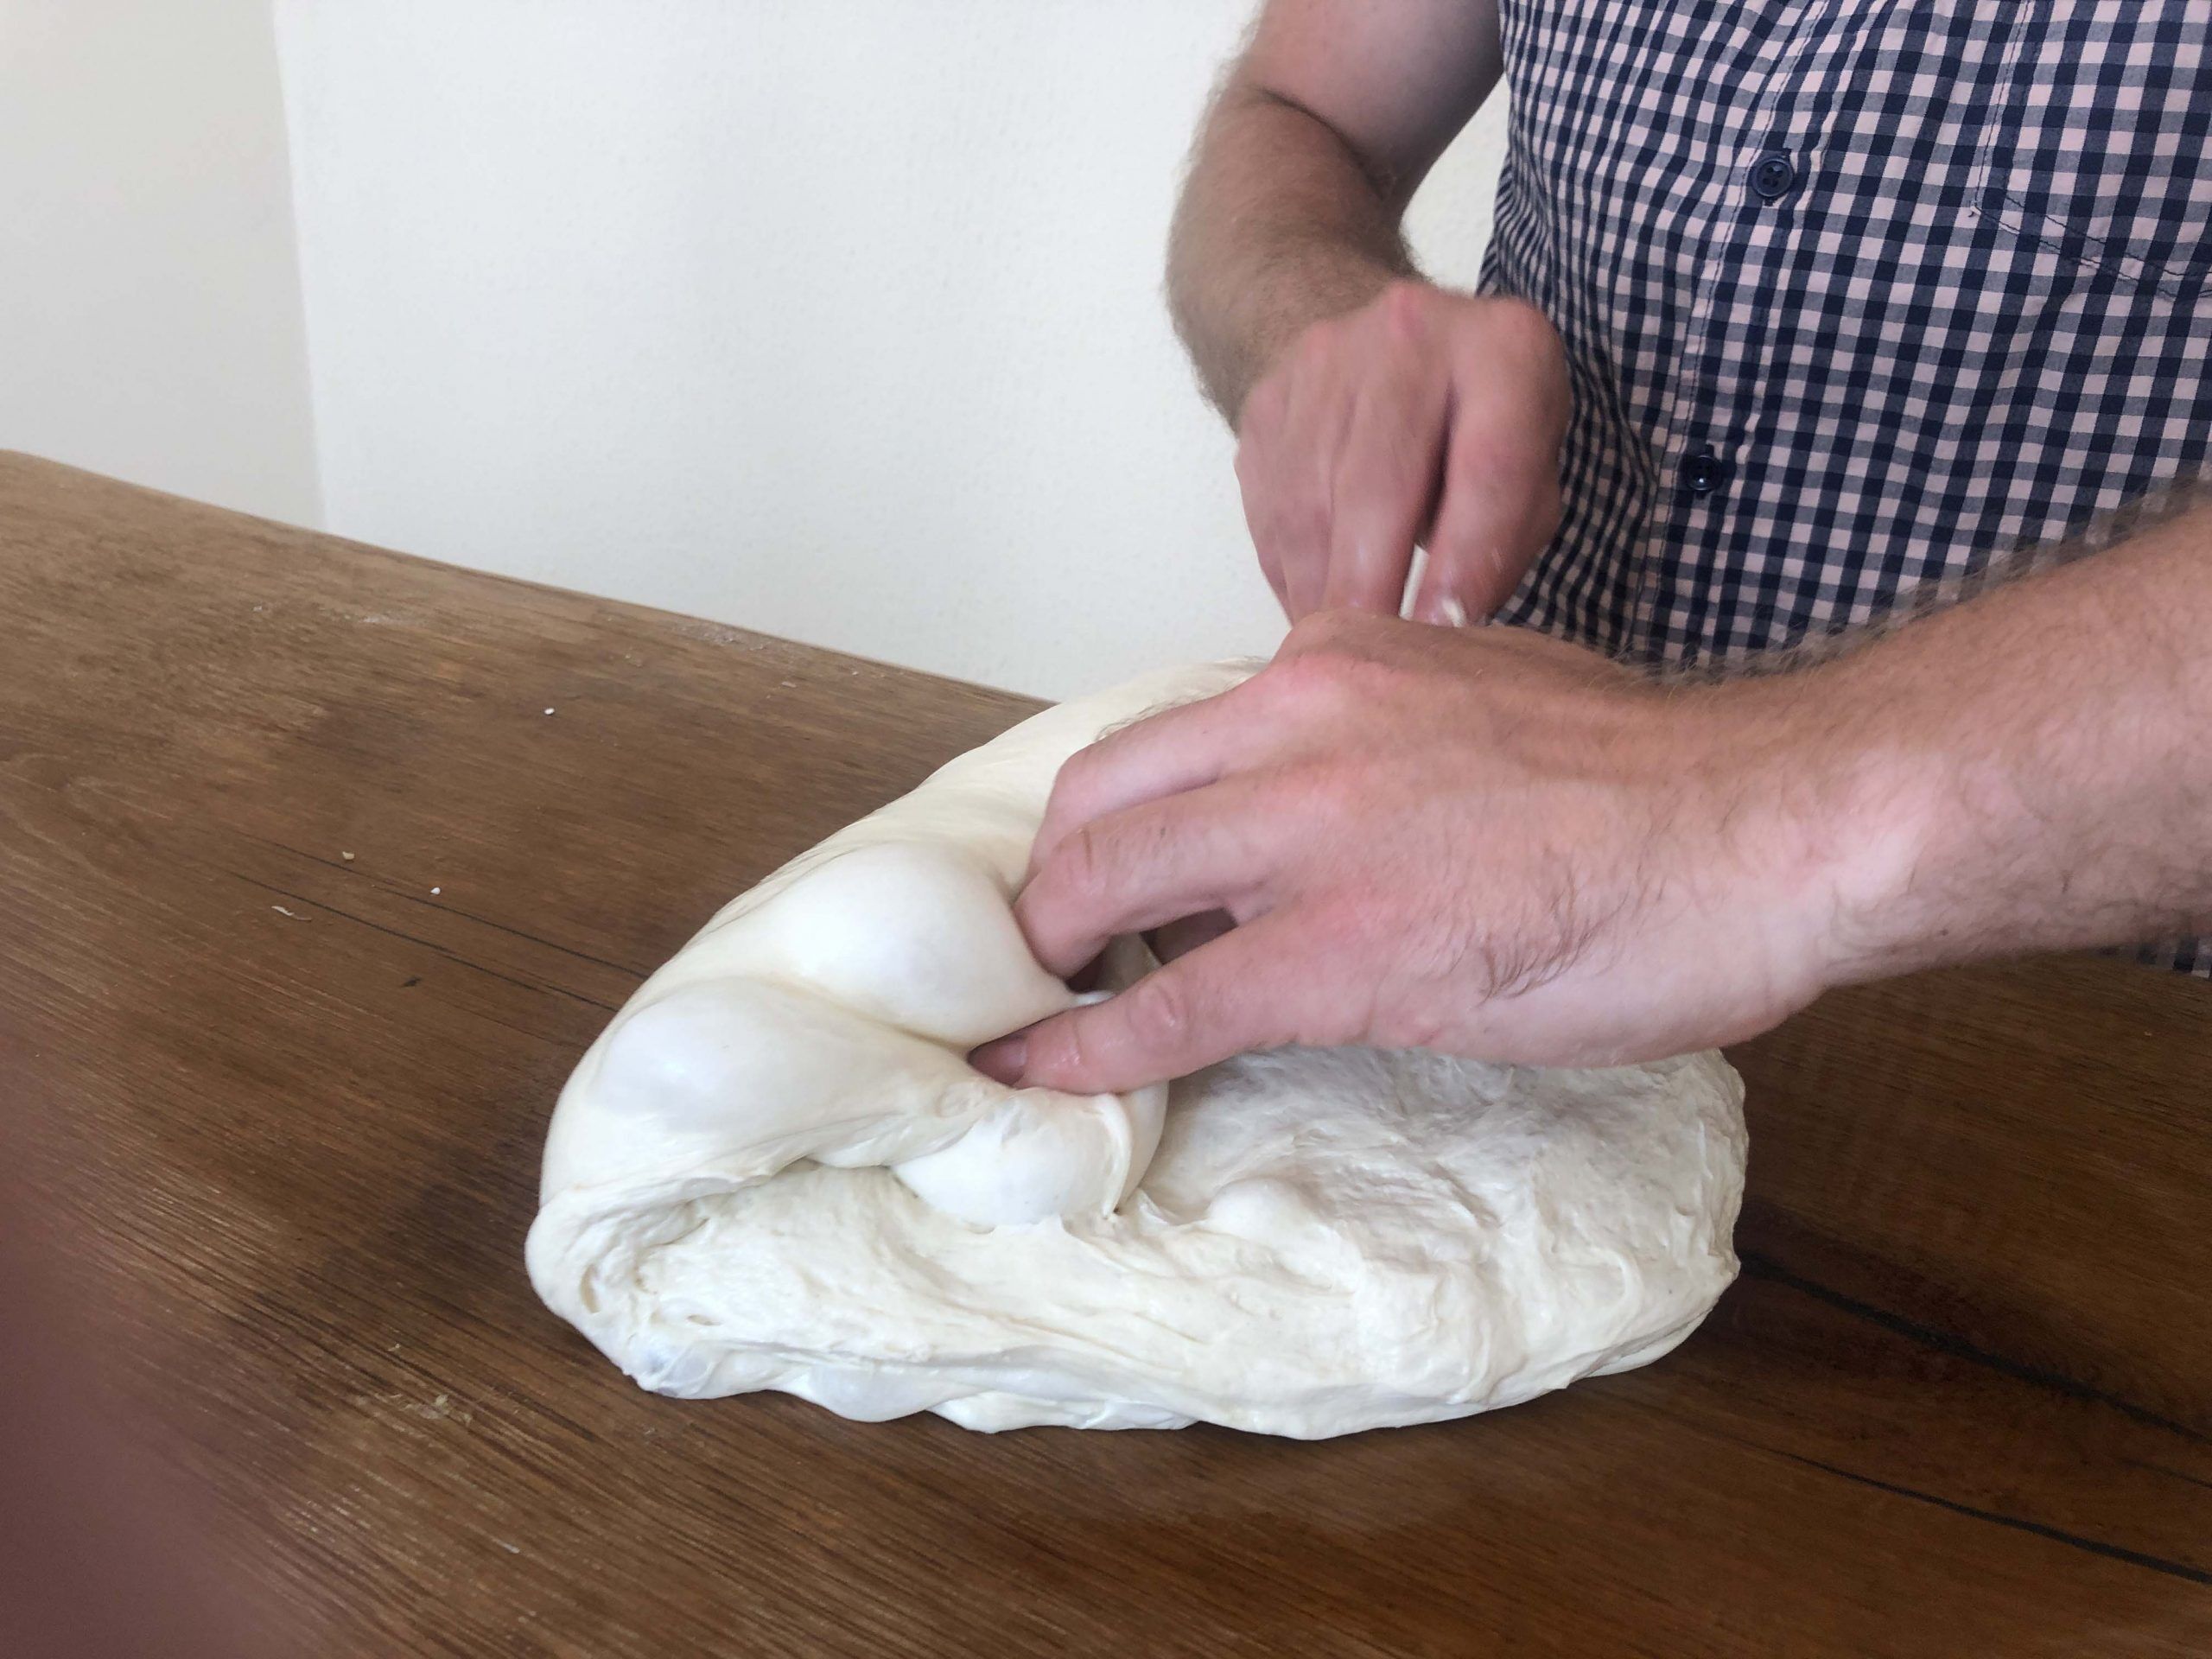


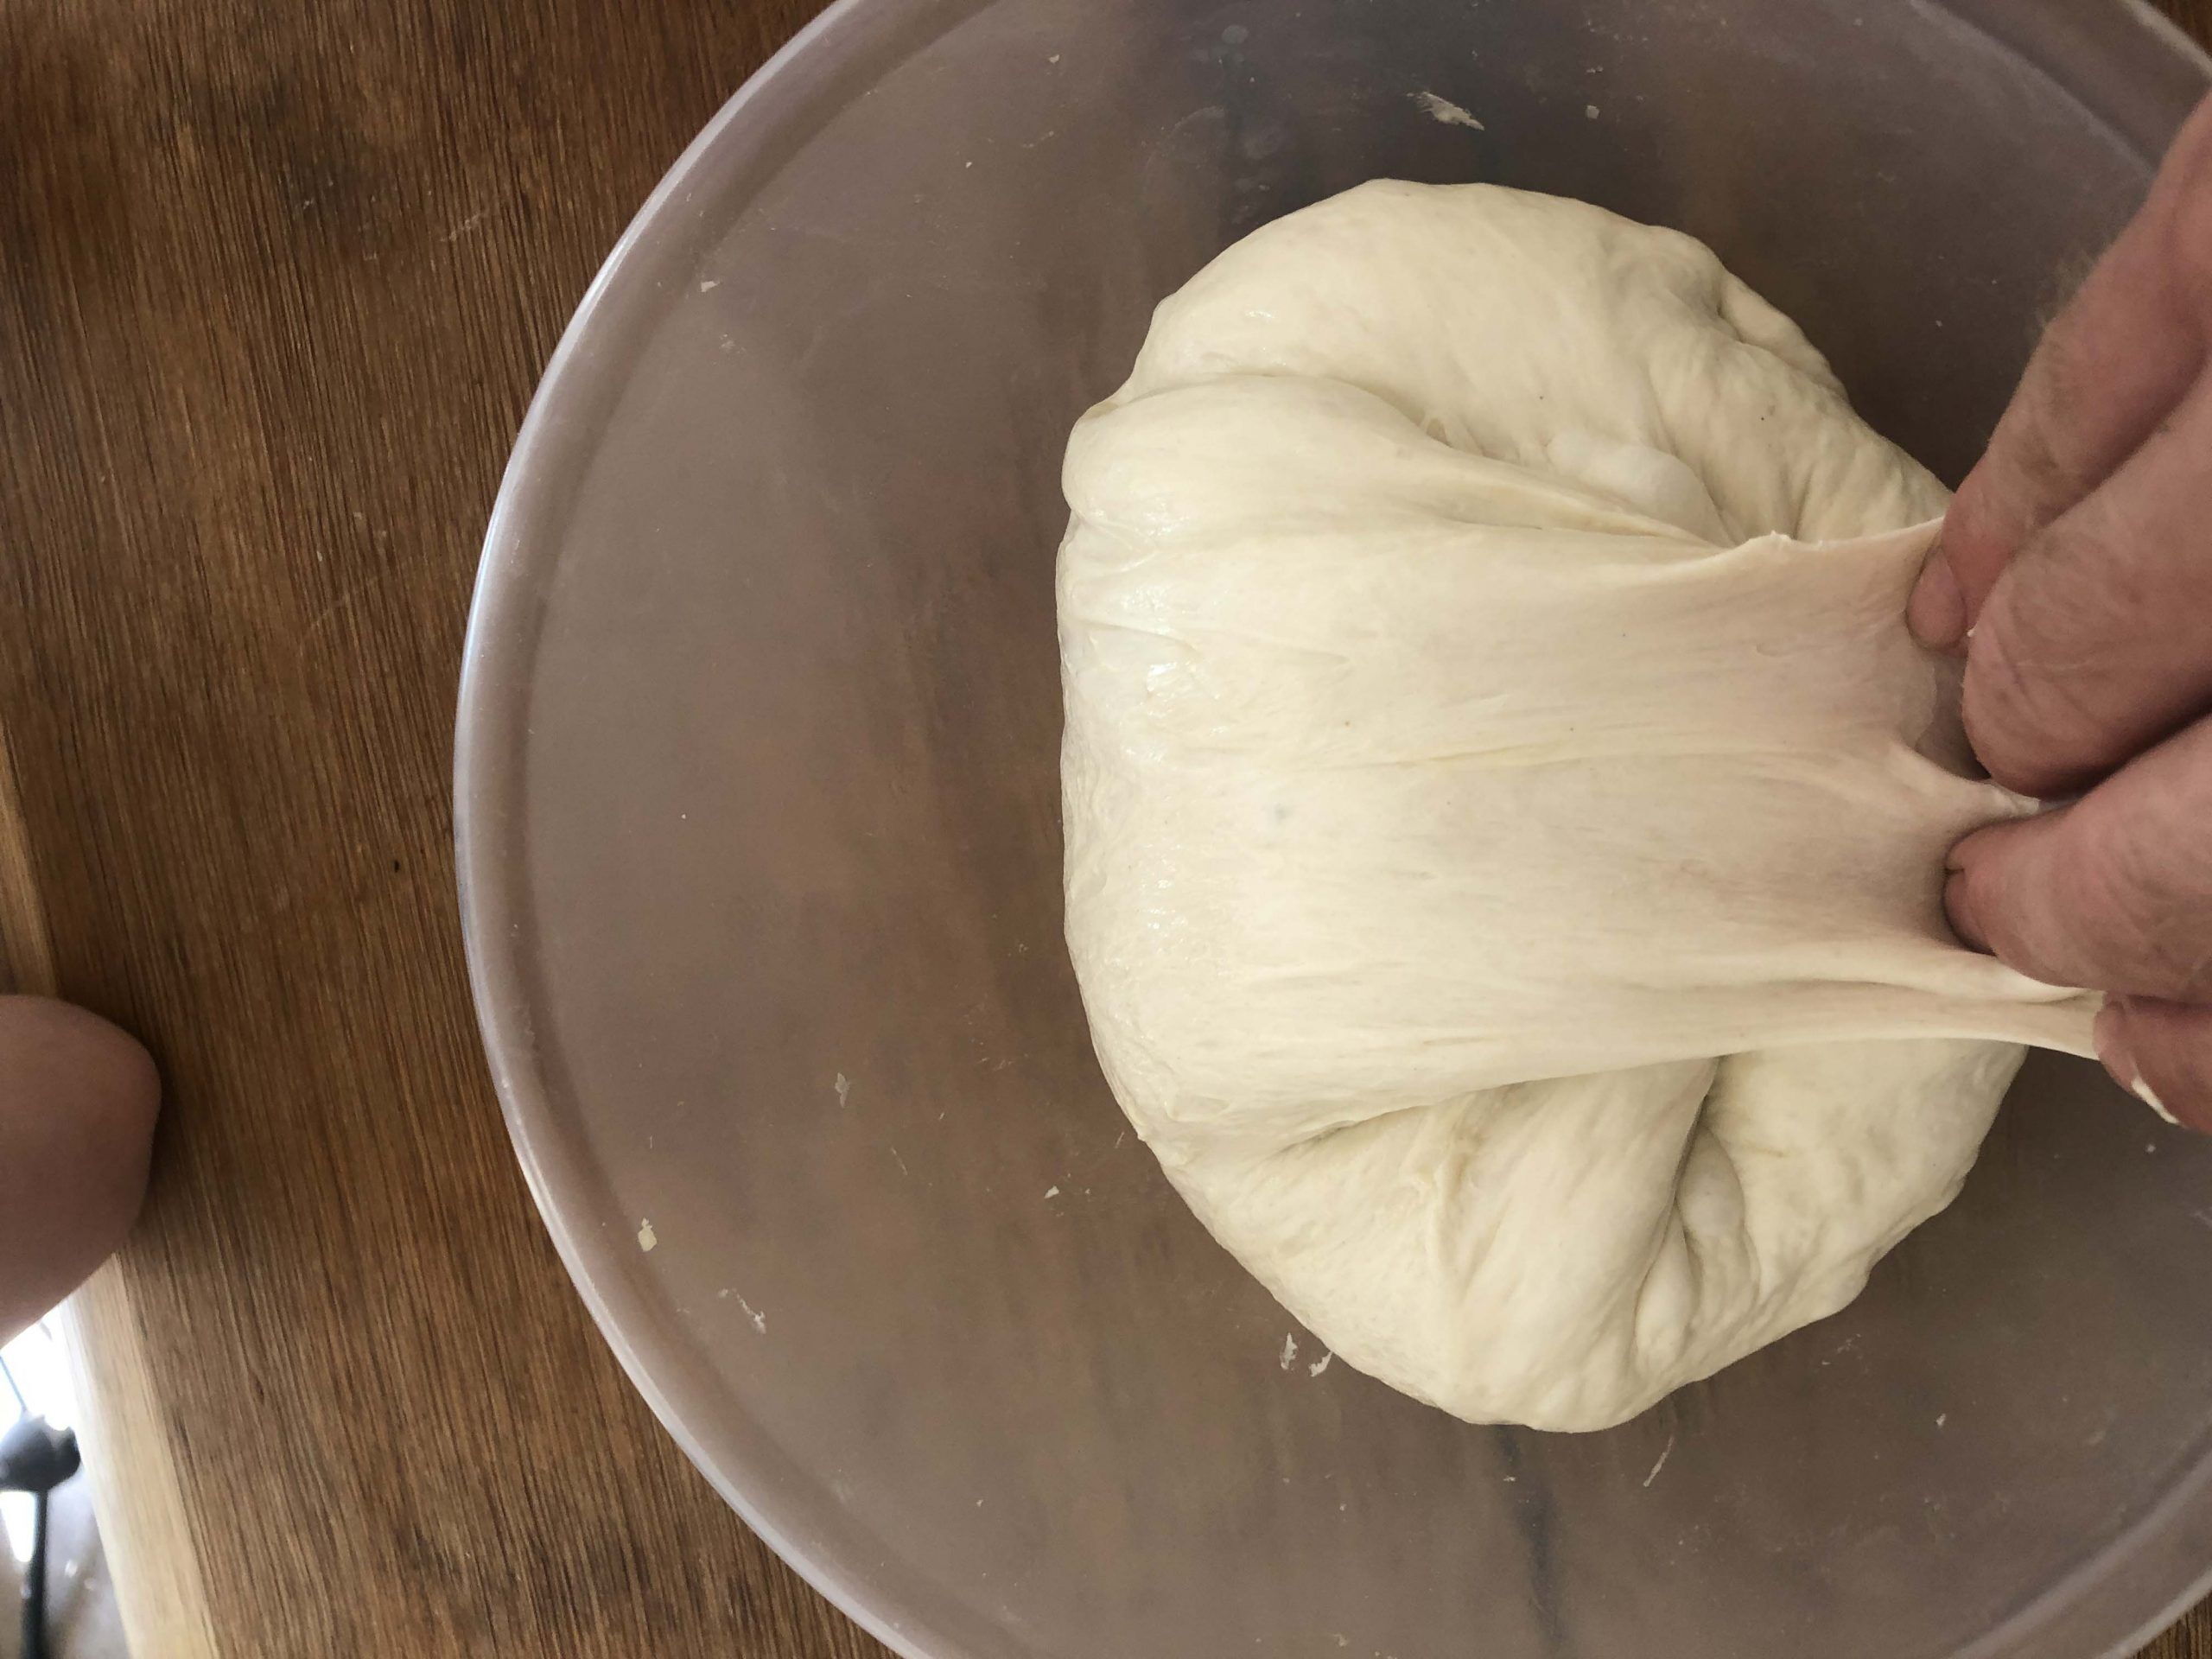
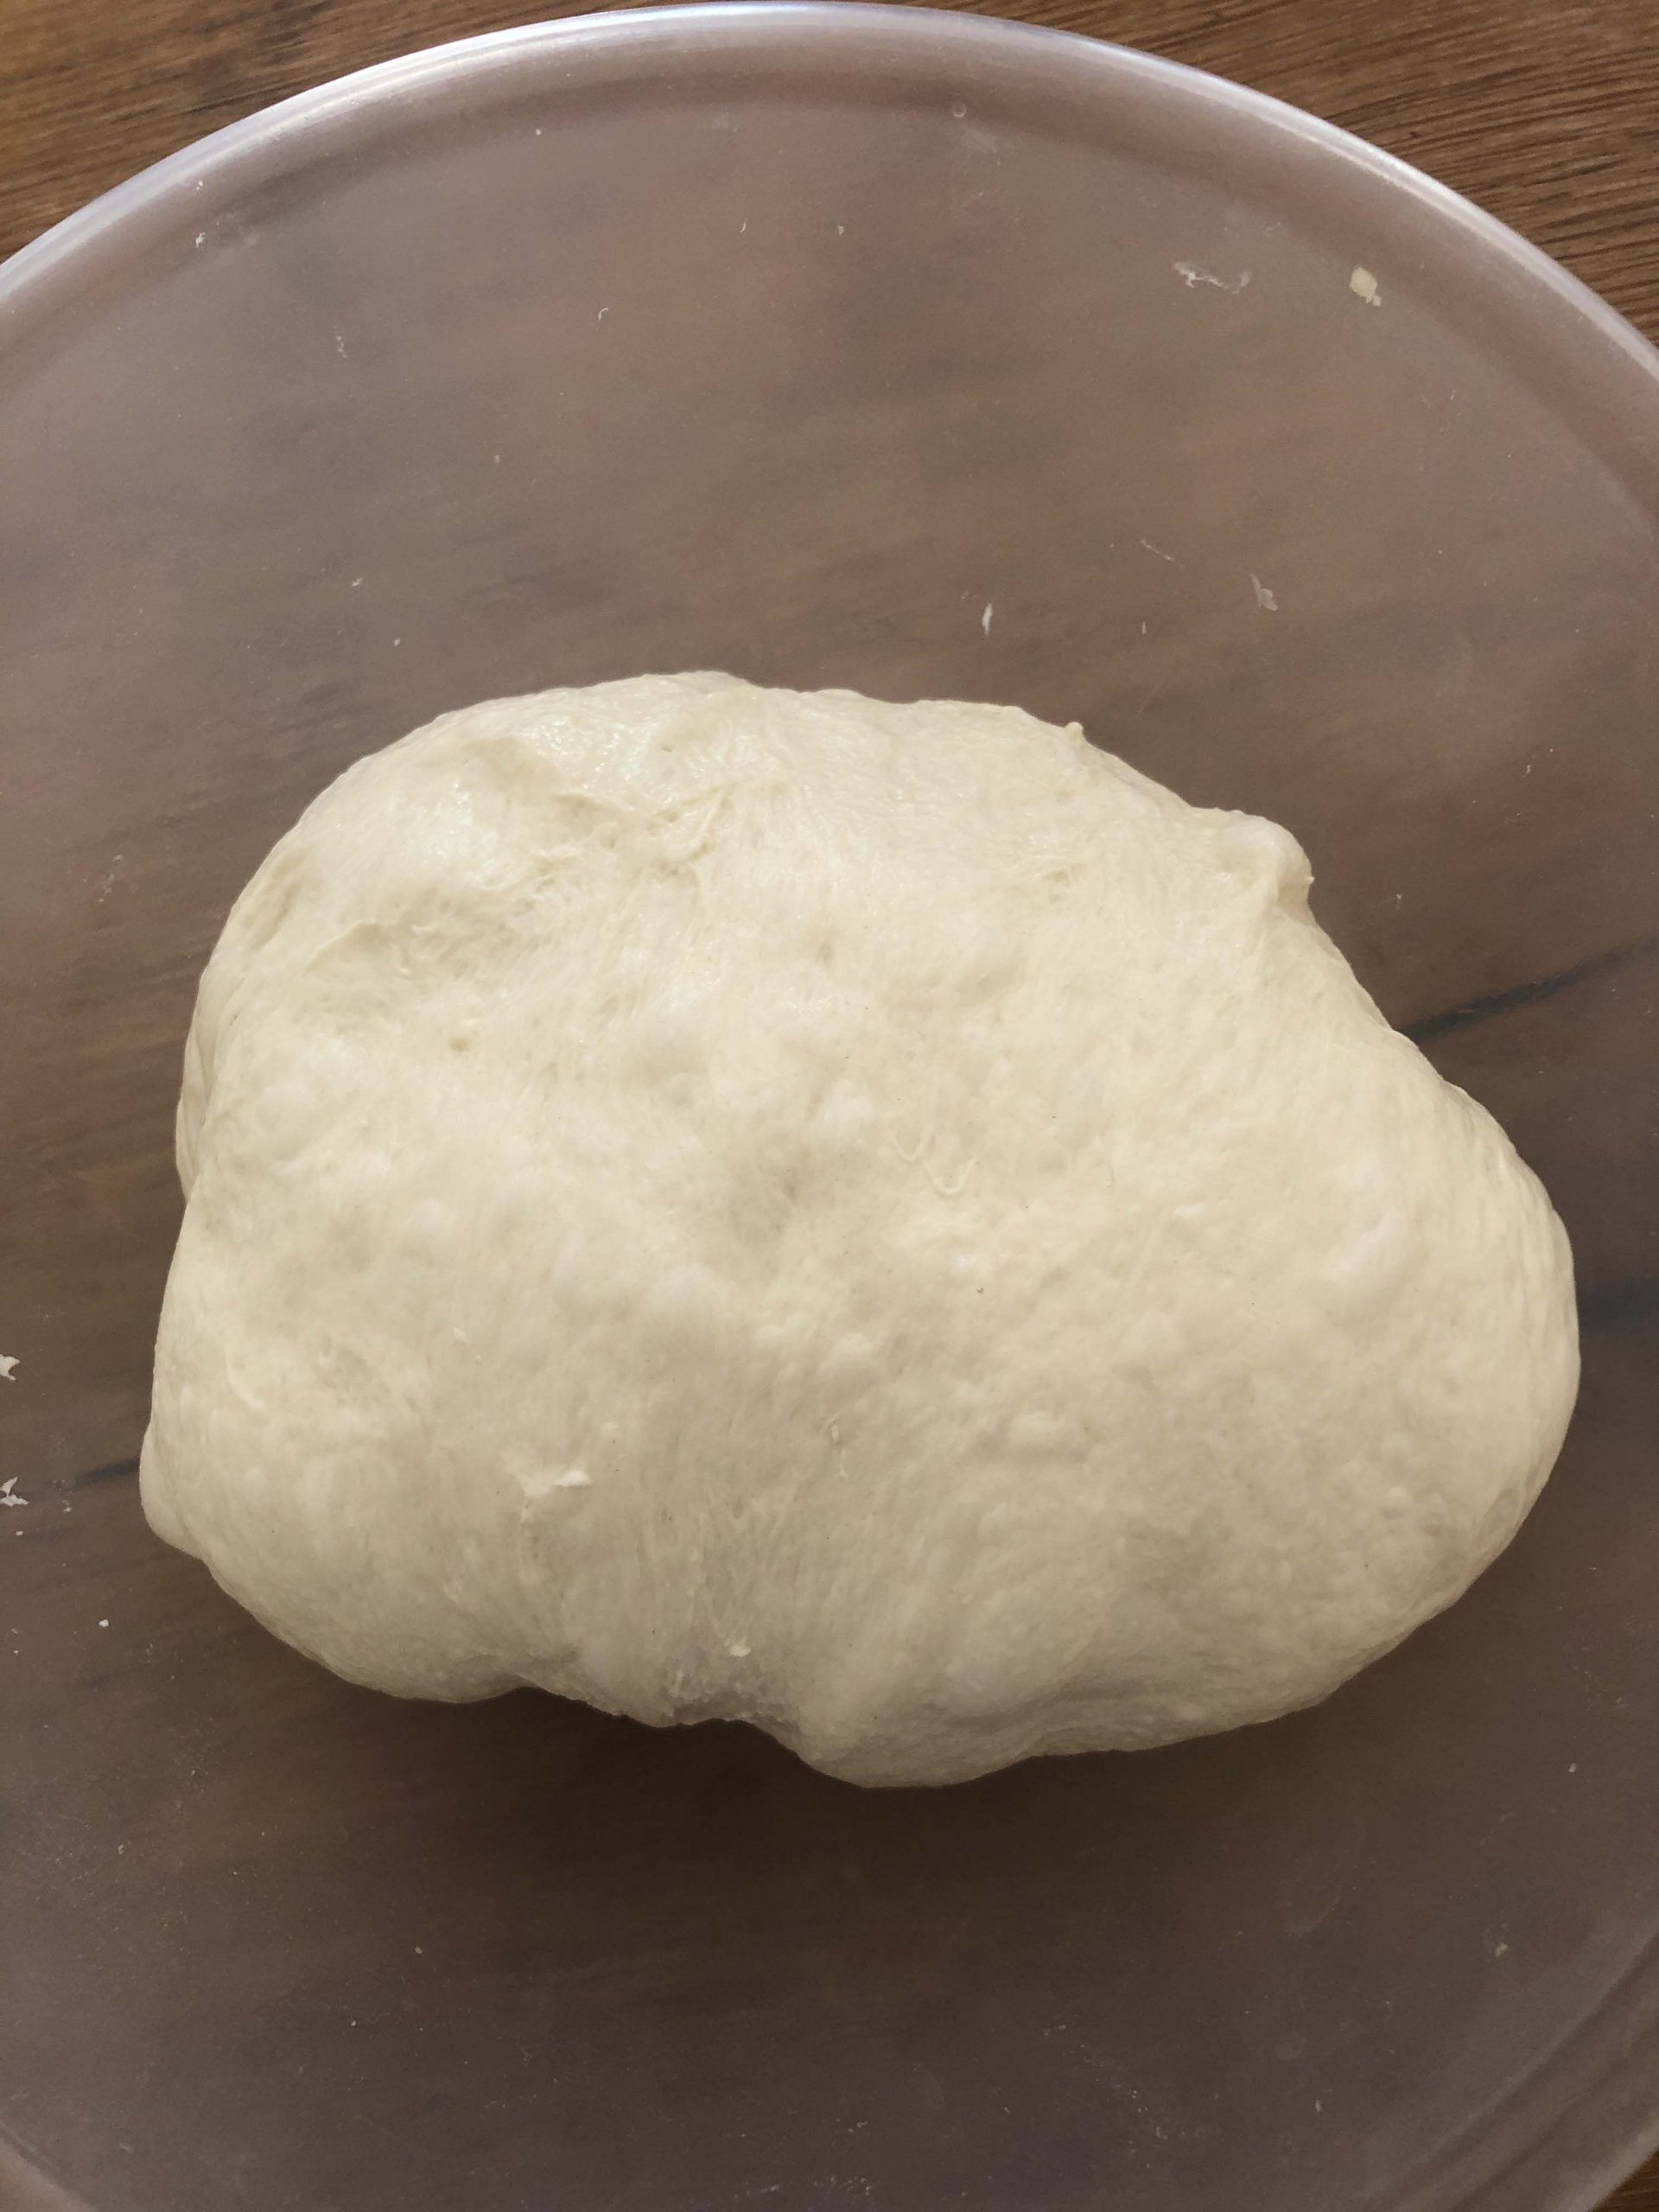
Stretch and fold method 2 – In the bowl
This way doesn’t create much strength in the dough but works wonders when strength isn’t important like in ciabatta or focaccia. It makes less mess so I use it quite a lot.




Stretch and folds vs kneading
Stretch and folds are implemented during bulk fermentation. They agitate the gluten and redistribute the ingredients in the dough. A stretch and fold technique is similar to how kneading works. The key differences are time and oxygen incorporation.
When dough is kneaded it incorporates oxygen. This is then used by the yeast to respire where it produces carbon dioxide (and a little bit of water). Yeast respiration is the most efficient way for yeast to produce gas, but this is not always the preferred option for bakers.
Without oxygen present, yeast respires anaerobically which naturally leads to lactic and alcoholic fermentation. Despite this being less prolific, it is often preferred as more outputs are produced. Ethanol, lactic acids, acetic acids and more are produced to aid maturity. Because this process takes longer, other cereal enzymes have time to naturally improve the handling and structural qualities of the dough.
So you can opt to go down the kneading-only route to produce bread. This is where the dough should be kneaded to the windowpane stage and bulk fermentation is skipped. This type of dough often benefits from added dough improvers, but this is not always necessary! Or you can gently incorporate your dough and allow the dough maturation benefits of long bulk fermentation. Thirdly, you can opt to do somewhere in the middle and knead to a medium gluten development, followed by a 2-4 hour first rise.
The issue with a long bulk fermentation is that whilst some gluten development occurs naturally as the hydrated gluten proteins relax, the gluten development could do with a boost. And this is where stretch and folds come into play!
The benefits of stretch and folds
By using a stretch and fold technique, the dough receives the following benefits:
- The gluten network gets realigned to re-bond into a stronger structure.
- Natural enzymes and sugars are redistributed so simple sugars are presented to the yeast. This increase the rate of fermentation.
- Less oxygen is incorporated into the dough to reduce aerobic respiration and the likelihood of over-oxidation
By using stretch and folds the gluten can be developed without having to risk over-oxidation. This is where the carotenoid pigments are washed away or “bleached” by too much oxygen in the dough. We get a better-flavoured bread by boosting fermentation and, if we match gluten development with gas production (the amount the dough rises), we can achieve the perfect dough for shaping at the end of bulk fermentation.
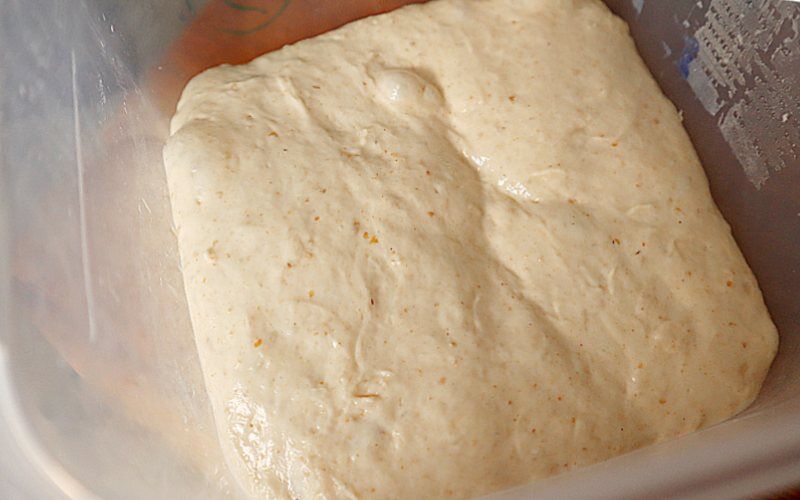
It’s important to consider the quality of the fermentation and understand it’s not all about duration. A first rise without any stretch and folds will take a longer time to achieve the same gluten maturity than if they are included.
Temperature is also a factor in bulk fermentation. If the dough proofing temperature is too warm, more stretch and folds will be required to develop the gluten in time to match the desired height of the rise at the end of bulk fermentation. Where cooler first rise temperatures are used, less stretch and folds are required.
How many stretch and folds should I do at a time?
Every baker has their own preference. Though, one stretch and fold, every hour is typical. Some like to do 3-4 rounds of stretch and folds. I advise against this as one round is enough and doing several can add additional oxygen, which you don’t want to do.
How often should I stretch and fold?
Just about every baker has a different process when it comes to how regularly dough needs stretch and folds. The true answer is to look at the viscosity of the dough. Stretch and folds should be repeated when the dough has relaxed from the previous agitation. As high-hydration doughs are more malleable the stretch and fold method can be repeated at closer intervals, say every 15 minutes. For a more dense dough, more time should be allowed between folding. For these 45-60 minutes is often chosen.
Then there is the amount of gluten development it has already undergone that should be considered. For a dough that was kneaded to 75% gluten development, it may only require 2 stretches and folds.
Stretch and fold timetable
If you are looking for rough examples of how long you should bulk ferment your dough and how many stretch and folds to apply, here’s a table of basic guidelines. In this example, stretch and folds are completed at regular intervals during bulk fermentation.
Note: High-hydration doughs require a shorter bulk fermentation duration.
| Hydration | Gluten development after kneading | Recommended bulk fermentation (BF) stretch and fold (S&F) routine |
| High | 10% | 5-hour BF with 6 S&F |
| Medium | 10% | 6-hour BF with 6 S&F |
| Low | 10% | 7-hour BF with 6 S&F |
| High | 50% | 3½-hour BF with 4 S&F |
| Medium | 50% | 4-hour BF with 4 S&F |
| Low | 50% | 5-hour BF with 4 S&F |
| High | 75% | 1½-hour BF with 2 S&F |
| Medium | 75% | 2-hour BF with 2 S&F |
| Low | 75% | 3-hour BF with 2 S&F |
| High | 100% | None, first rise skipped entirely |
| Medium | 100% | None, first rise skipped entirely |
| Low | 100% | None, first rise skipped entirely |
Should I do stretch and folds throughout bulk fermentation?
Some refer to the start of bulk fermentation as the “stretch and fold stage”, and then leave the dough alone throughout the remainder of the first rise. This practice is acceotable, but I prefer to monitor the dough and make a choice when to stop stretch and folds.
When optimum gluten development is reached (the dough passes the windowpane test), but the dough hasn’t risen much I’ll extend the bulk rise without further stretch and folds. And if the dough is rising, but the gluten hasn’t sufficiently developed I’ll either do more stretch and folds or put it in the fridge overnight.
By monitoring the dough throughout bulk fermentation, I rarely get to the point where the dough has risen too much before the gluten network has developed.
Is degassing the same as stretch and fold?
Stretch and fold is a technique that works similar to degassing. To be fair, if you don’t have the wish to learn a stretch and fold method then a simple punch down would be adequate. “Degassing” or “punching down” is where gas is pushed out from the dough. This promotes the gluten structure to rebuild into a stronger formation. Stretch and fold has more benefits in stretching the gluten and distributing the ingredients evenly.
How to stretch and fold – ending thoughts
This is a short guide on how to stretch and fold bread dough. See my beginner’s bread recipe to put this method into practice. If you want to explore other methods, I’ve compiled all the popular stretch and fold techniques in another article, which you can view by clicking the link. I’m always looking to improve my baking guides so drop a comment below if you have any questions or suggestions. I hope you notice an improvement in your bread after reading this guide!
If you’ve enjoyed this article and wish to treat me to a coffee, you can by following the link below – Thanks x

Hi, I’m Gareth Busby, a baking coach, senior baker and bread-baking fanatic! My aim is to use science, techniques and 15 years of baking experience to make you a better baker.
Table of Contents
- How to do a standard stretch and fold
- Stretch and fold method 2 – In the bowl
- Stretch and folds vs kneading
- How many stretch and folds should I do at a time?
- How often should I stretch and fold?
- Stretch and fold timetable
- Should I do stretch and folds throughout bulk fermentation?
- Is degassing the same as stretch and fold?
- How to stretch and fold – ending thoughts
Related Recipes
Related Articles
Latest Articles
Baking Categories
Disclaimer
Address
53 Greystone Avenue
Worthing
West Sussex
BN13 1LR
UK


Leave a Reply