How To Get A Sourdough Starter To Rise – Step By Step Guide

Despite best efforts, sometimes a sourdough starter just won’t rise. This sad truth has frustrated many sourdough baking beginners into giving up on sourdough altogether. If your starter is not rising, first, you are not alone. Even I have had this problem. And second, there’s an easy way to fix it! In this article, we are going to resolve the most common sourdough starter troubleshooting issues, so yours will be as fiery as those you see on Instagram. You will know what to do if you can’t understand why your starter doesn’t rise or is missing the big bubbles you desire.
A sourdough starter becomes sluggish when there are low levels of wild yeast and lactic acid bacteria. It could also be supporting the growth of the wrong bacteria which can produce unusual and unpleasant smells! The way to fix a starter that doesn’t rise is to give it warmth and the right food.
Why is a sourdough starter sluggish?
Many bakers run into issues making a new sourdough or reviving an old one after it’s been in the fridge for a while. Before we look at ways to fix a starter that won’t rise, let’s break down why there is little levain activity and what makes a sourdough levain rise in the first place.
What makes sourdough active?
The ingredients in sourdough are flour and water. To make bread rise the mixture needs to develop lactic acids and wild yeasts. And to do this, the culture requires warmth. Acid bacteria and yeasts are absorbed from the environment or exist in flour and water. As the starter ages, their population increases, changing the environment’s acidity and alcohol content. This leads to different, more suitable species of yeast and acid bacteria taking hold. Only once the acidity of the starter drops below 4.2pH and rises regularly can the correct species populate so it is ready for use. The challenge is how to achieve this!
For the starter to be fully active, we need to give it plenty of fresh flour (food), water, warmth, and plenty of time. Anyone can produce an active levain with these four things. When one of them is missing, we start running into problems.
When should I start a new sourdough starter?
Do you have problems with your starter and think you need to start again? Unless it has signs of mould or a really rancid smell, I advise that you stick with it and follow these tips to bring it back to activity.
If you were to start again and follow the same process you did last time, expect the same results and another failure. An unripe starter will have some beneficial maturation, so you might as well work at improving it rather than starting over.
How to fix a starter that doesn’t rise
I fix a struggling starter by simply giving it a big feed and placing it in a warm place until it rises. This forces the yeast’s and bacteria’s enzymes to work harder and build a more active starter. The starter should rise in half a day, but you can repeat the large feeds until it does. Here’s how to do it:
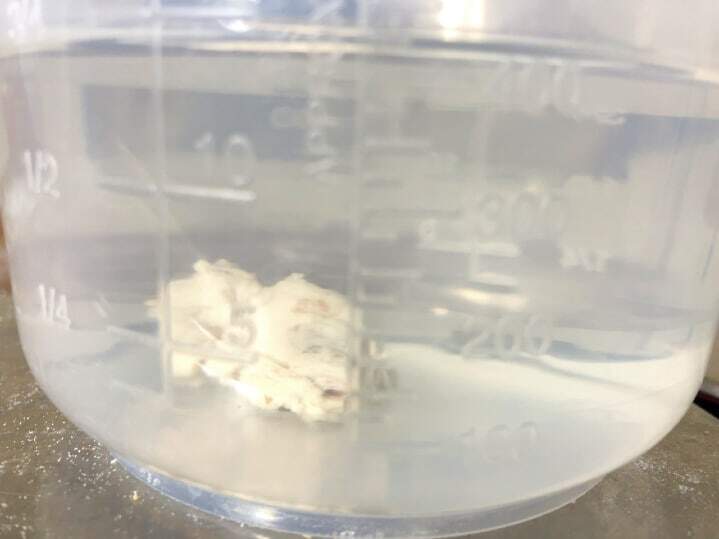
Measure 20 grams of your sluggish starter into a bowl, add 150 grams of water and give it a mix. Pour in 120 grams of white bread flour and 30 grams of rye flour and stir until no lumps remain. Cover and leave in a warm place until the starter rises. When the starter peaks, repeat the feeding ratios again. Keep repeating until your starter rises within 8 hours.
This method produces a runny starter that has plenty of food to consume. This, combined with putting it in a warm place, means that the bacteria and enzymes work quickly. In doing so, organic bacteria and wild yeasts become more prevalent, and after a few days, a robust ecosystem of cultured yeasts and bacteria suited to the environment is produced.
Once the starter is active, go back to using equal quantities of flour, water and starter in further refreshments, or whatever ratio works best for you!
There is an argument against this tactic!
Some bakers suggest that the good bacteria in the starter will dilute too much. I understand their views, yet in 20 grams, there will be plenty of “good stuff” to populate. If the yeasts and bacteria were stretched too thin, the starter would take a few extra days to become active, but it won’t die.
Factors that contribute to making a starter rise
I’ve just explained what I do to reinvigorate a weak starter, but how about maintaining it? Below I’ve explained the critical priorities in keeping a starter active and how to select the ingredients and environment to do just this.
1- Feed the starter when it peaks
When your starter has just been fed, the population of organic acid bacteria and yeasts are low. As the starter ferments, these products multiply until it is fed again. The perfect time to refresh (feed) a starter is when it is at its peak, as it contains the highest ratio of active organisms. Fortunately, it will stay at its peak for a couple of hours. During this time, fermentation slows, so the same amount of gas is produced as escapes. At its peak, the starter’s height remains the same, but bacteria continue to multiply. This is handy if you want to make sourdough bread more sour. Some sourdough bread recipes “take” their starter before it reaches its peak to make bread with. This method is used in the Tartine method as it produces a sweeter, less acidic levain that, despite being less active, produces an arguably superior tasting bread.
When a starter is left unfed past its peak, it collapses. This is largely due to the sugar supply running out and the bacteria and yeasts consuming the gluten protein instead. The weakened structure, which is now heavier due to the gas it retains, collapses. Although the leavening power can be strong, a collapsed starter doesn’t contain the ideal properties as a levain. If it happens occasionally, don’t worry!
What happens if my starter doesn’t rise?
Expect to see some bubbles after a few hours, but a new starter won’t rise. This makes it hard to know when to feed a new starter. I used to continue feeding it with fresh flour and water every 12 hours. But recently, I’ve found that leaving the starter for 36-48 hours before the refreshment works just as well. It should develop plenty of bubbles during this time, and after the second refreshment, you should see it starting to rise. At this point, aim to feed your starter when it is at its peak.
2- Increase the feeds to boost the sourdough starter
When using the popular 1:1:1 ratio of starter, water and flour for your refreshments, you will need to feed it multiple times a day once it becomes fully active, and who wants to do that? One way to prevent this is to increase the refreshments’ fresh flour and water ratio. This provides more food for the starter to consume. Therefore, it can be left for longer between feeds. A less viscous starter is also slower to rise. I use a ratio of 1:4:5 of starter, water and flour so that I don’t have to feed it as often.
3- Increase the temperature of the starter
Sourdough works best in warmer temperatures. A fermentation temperature between 25-35C (77-95F) is best. To find out how temperature will affect the flavour of your starter, view the best temperature for a sourdough starter post.
If the temperature falls below this range, the rate of fermentation activity will reduce. If you live in a cooler climate, it’s a good idea to warm it up. You can make a DIY proofer, or better still, get this one from Brod & Taylor. Your bread will benefit from it as well!

View the best price here, or try Amazon
Daily feeds at room temperature are usually ok for sourdough fermentation, but for some extra oomph, keep it warm! I offer some top tips on warming a sourdough starter. A weak starter is not so resilient to cold conditions. The best starters are kept at a constant temperature, so again, a home proofer comes in handy!
You can also store a starter in the fridge once it becomes fully active, but not before. Refrigeration slows down activity, so you don’t need to feed it daily. This saves time and a lot of wasted flour. See my sourdough starter feeding routines for a recipe and feeding schedule that you can fit around a busy lifestyle.
NOTE: Keeping a starter in the fridge means its activity slows down. It's not ideal for storing an unripe starter (unless you are not around to feed it) as this will slow its climb to maturity. You can put it in there for a day or two if you will not be around to feed it, though.
4- Selecting the right flour for your starter

Good quality bread flour with a hint of rye is my preferred flour choice for sourdough. Flour with plenty of micro bacteria and minerals provides food for the wild yeasts and enzymes in the culture. Here is how to select the right flour for a sourdough starter:
Use bread flour in a sourdough starter
High gluten flour contains more proteins, ash and thus, minerals. This means that the enzymes in the starter have more to consume, thereby slowing the rate of fermentation and extending the time it takes to rise. This makes the starter more vibrant and actually increases its leavening properties.
Gluten takes a long time to break down in hydrolysis, making it especially helpful to use a high protein flour in a starter. A starter made from high-protein flour also improves the dough’s gluten structure.
Rye flour makes a more powerful levain!
Trading 5-20% of white flour for rye flour will rocket-power a sourdough starter! Complex starches in rye or whole grains slow the fermentation rate as they are harder to break down. Like high gluten flour, the additional flora found in rye provides more food for the starter. Rye flour is a boast of controlled energy for a starter– A game-changer for many sourdough bakers!!
In terms of flavour and rise, there are always improvements with the inclusion of rye flour. It has always helped my starters! If you can’t get rye flour, a mix of whole wheat flour alongside white flour is almost as good, especially if the flour is organic or stoneground!
Use stoneground flour
Most modern flour is roller milled. It can make a better starter if you find flour milled using the traditional stone grinding method. Stoneground flour contains more bran and germ than roller milled. This means it’s packed full of the necessary nutrients for your starter.
Switch to organic flour for the best starter
Flour is filled with proteins, starches, fibre and bacteria. Organic flour contains the same amount as non-organic flour. The benefit of using organic flour is that mill uses weaker cleaning agents. During a fantastic presentation at Bakerpedia, Dr Lyn stated that the gentler cleaning materials in organic flour production leave more bacteria in the flour. The extra flora increases fermentation activity to produce a more active levain.
The impact of changing the flour – IMPORTANT!!
Changing the type of flour will upset the ecosystem of your starter. A new flour introduces different ratios of sugars and bacteria than the previous. The starter has to produce different enzymes or a different enzyme balance to break down the new flour. Initially, activity will worsen, but as the starter learns to cope with its new food source, the ecosystem becomes balanced and good things will happen! After 3-4 days of regular feedings, the starter’s ecosystem will be returned to balance. The necessary enzymes will develop, and the new flour can be consumed efficiently.
Temporary weakening in activity can even occur for a new packet of the same type of flour. If you choose to switch the flour after reading the previous points (or have to when you run out), just expect it to take 3-4 days until you can use it. You can also split a starter into two if you want to try a new grain before committing to it. If you run out of flour, use what you have. It’s better to feed it something than to let it starve.
5- Change the water

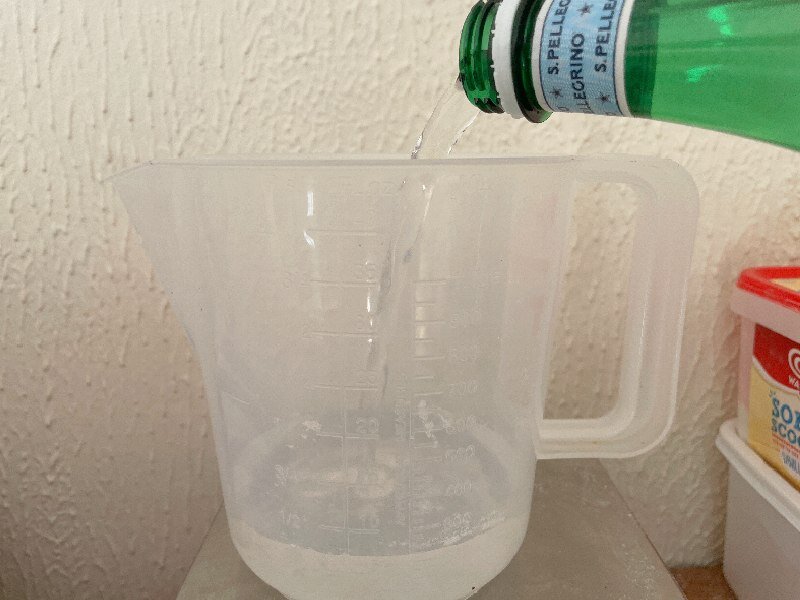
Many bakers ask, “Does changing the water help a sourdough starter rise?” The last thing to consider changing is to swap tap water for bottled water. There is rarely a need to change water to make decent bread. As long as it is drinkable, it is safe to use. However, there are a few cases where you should consider bottled water:
Too much chlorine
Sometimes the amount of chlorine in your tap water is very high, killing off the sourdough starter’s bacteria. I can’t say it has ever happened to me, but it can. To fix this, leave the water on the counter for 30 minutes for the chlorine can evaporate before using it. A water filter can also fix the problem in certain areas.
The local water is soft
Similar to increasing the minerals and flora by switching flour, the water’s hardness can affect the rate of gas production. Soft water has fewer minerals which means the rate of fermentation accelerates at first. Yet, the starter will have a shorter rise and be inevitably weaker.
Hard water is preferred for bread making, but the difference is often negligible. The hardness of the water is unlikely to be the cause of a poor-performing starter.
If you think the quality of your tap water is causing your sourdough starter to not rise, try bottled water to see if it makes a difference.
6- Keep things clean!!

Sourdough is created by the multiplication of acid bacteria and fungus (yeast), which undergo fermentation. Introducing the wrong bacteria is not helpful for a healthy starter. Flour provides enough bacteria to make sourdough. Dirty hands and equipment will introduce new, unnecessary bacteria, which unsettle the balance of the starter.
Any foreign bacteria will be broken down by starters enzymes, but it changes the ecosystem, much like switching the flour. This diverts energy away from consuming flour which makes the starter less effective.
You may have been told to use dirty hands or jars with crusty starter stuck to the edges. The theory is to incorporate more bacteria into your ecosystem, but this is not the bacteria you want! Keep everything as clean as you can.
7- Give it more time

Have you given your starter enough time? Sometimes it takes longer to develop, so repeat daily feeds for at least 14 days before making another tweak.
How long does it take for a new sourdough starter?
If you are making a new starter and you don’t see bubbles after a few days, it doesn’t mean to say that nothing will ever happen. A starter can be ready as soon as 5 days, but most bakers wait three to four weeks until using one.
My starter won’t pass the float test!!?

The float test is not accurate or necessary, so I don’t recommend that you use it. The best way to tell if a sourdough starter is strong enough to raise bread is to watch it after it is fed. It is mature once it doubles (at least) in 6-10 hours and smells pleasantly aromatic. Further reading: why does my starter sink?
Conclusion – Have these tips fixed your starter?
There has not been much scientific testing on the production of sourdough. This is why there are many varying ways to make sourdough bread. Bakery scientists simply don’t know all the answers! But there are a few myths that I hope we have discredited, and you now know the best way to get a starter to rise! Let me know if these sourdough starter troubleshooting tips have worked for you by dropping a comment below! Need more help? Just ask away down there too!
Popular sourdough starter troubleshooting questions
If you’ve enjoyed this article and wish to treat me to a coffee, you can by following the link below – Thanks x

Hi, I’m Gareth Busby, a baking coach, senior baker and bread-baking fanatic! My aim is to use science, techniques and 15 years of baking experience to make you a better baker.
Table of Contents
- Why is a sourdough starter sluggish?
- What makes sourdough active?
- When should I start a new sourdough starter?
- How to fix a starter that doesn’t rise
- Factors that contribute to making a starter rise
- 1- Feed the starter when it peaks
- 2- Increase the feeds to boost the sourdough starter
- 3- Increase the temperature of the starter
- 4- Selecting the right flour for your starter
- 5- Change the water
- 6- Keep things clean!!
- 7- Give it more time
- How long does it take for a new sourdough starter?
- My starter won’t pass the float test!!?
- Conclusion – Have these tips fixed your starter?
- Popular sourdough starter troubleshooting questions
Related Recipes
Related Articles
Latest Articles
Baking Categories
Disclaimer
Address
53 Greystone Avenue
Worthing
West Sussex
BN13 1LR
UK


