
Sourdough Bread Not Rising? 8 Ways To Fix Your Sourdough

Is your sourdough bread not rising? I take no shame in saying I’ve encountered sourdough bread that doesn’t rise.
So I know that terrible feeling when you realise that your prized creation is a dud!!
So why can’t you make a good loaf of sourdough bread like others? Could it be the Water? The Temperature? Kneading? The Recipe?
Maybe. It may be one of those factors, but the most common reason why sourdough bread is not rising is the starter.
When the starter is fully active, your bread will rise correctly in most circumstances.
And if the dough does rise, but not entirely, it’s likely because it was underfermented.
To remedy these typical sourdough rising issues, ensure your starter is fully mature before using it by feeding it regularly.
You’ll also want to allow sourdough bread dough to bulk ferment for at least 4 hours and rise a second time (after shaping) for 3-4 hours.
Let’s expand on why sourdough bread doesn’t rise (or doesn’t rise much!) and discuss many more!
We’ll begin with the starter itself.
#1 The Sourdough Starter Is Not Fully Active
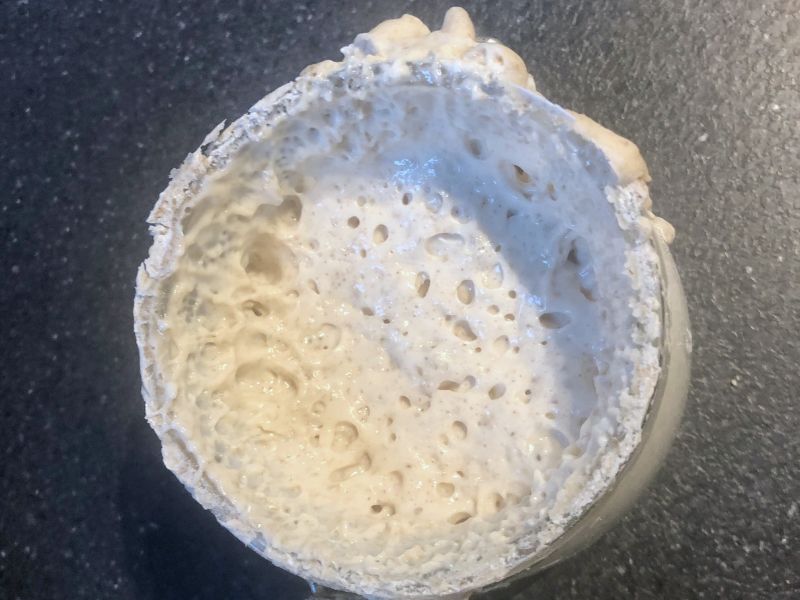
Often, sourdough bread doesn’t rise because your starter is not in peak condition.
When you make a starter for the first time (I call it parenting), it’s tempting to begin baking as soon as you see bubbles!
Whilst you can cultivate a sourdough starter in 3 or 4 days, it requires perfect conditions, careful monitoring and some experience.
For most home bakers, their first starter takes much longer!
It’s common for starters to take 3-4 weeks to mature fully, with deeper layers of flavour and activity developed after a couple of months.
To remedy a weak starter, you have two choices:
- Add a small amount of baker’s yeast to your dough recipe to gain some of the organic acid benefits of sourdough whilst having a loaf that rises.
- Continue feeding the starter at least once daily until it matures.
How to boost a sourdough starter
Contrary to popular opinion, you don’t need to do anything to improve the activity of a starter other than feed it (at least) once a day as it reaches its peak rise.
Yeah, you can use a higher protein flour, include some rye flour, change the viscosity of your recipe and warm up your starter.
These tricks will benefit the starter, but the most important is feeding it regularly when it peaks.
The moment you feed your starter is significant.
If a starter is left to rise and collapse between feeds, the wrong bacteria and enzymes are encouraged to multiply.
Feeding your starter too early (long before peaking) dilutes the necessary wild yeasts and bacteria, which weakens and slows activity.
A mature starter will triple in size within 6 hours and smell deeply aromatic.
Aside from being too young, there are other suggestions to consider in a starter. These won’t prevent bread from rising completely, but will lower activity:
The starter was fed a new flour, and it didn’t rise
Flour introduces bacteria to the starter’s ecosystem.
Enzymes in the starter break down bacteria and starches in the culture to become simpler substances.
Simplified sugars supply food for the yeasts and lactic acid bacteria to consume and produce gas.
Changing the flour you feed your starter forces the enzymes to adapt to the new bacteria.
During this adjustment period, the activity of the starter temporarily deteriorates as it creates the enzymes necessary to break down the flour.
I’ve had many complaints over the years where a baker has listened to (sound) advice and added rye flour to their starter when feeding.
Including rye improves the starter’s organic activity in the long run but will slow activity during the first few days.
If you change the flour in your starter, expect around three days to adjust.
The starter discard was used cold from the fridge
Bread can be made from a starter that is stored in the refrigerator.
Keeping a starter in the fridge slows its activity to an almost dormant state.
It’s a great starter feeding routine for casual bakers as it doesn’t require feeding as often. But when using it directly in a bread recipe, the sleepy bacteria are slow to act.
Aside from this, the gradual weakening of activity (caused by a lack of food) means a starter used straight from the fridge can take longer to raise your bread dough if it’s been stored for several days or weeks.
When keeping your starter in the fridge, refresh it twice before adding it to your bread recipes or remove a portion of the dormant starter (otherwise called a child) from the Mother and refresh that piece twice.
The starter wasn’t fed recently
If the starter rose past its peak and then collapsed, it did so because it ran out of food (flour).
Underfeeding leads to hooch, a clear liquid sitting at the top of the starter.
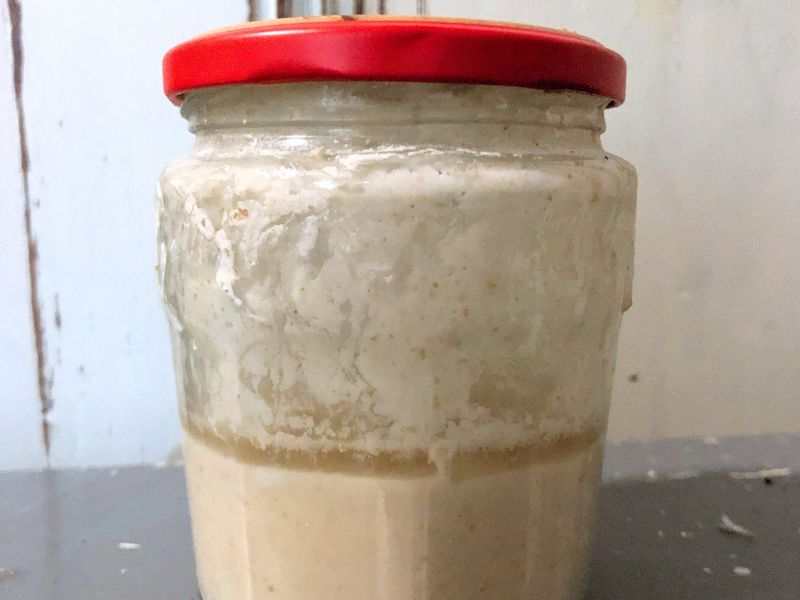
If it spends a couple of hours in this state, there won’t be a noticeable difference.
But if a starter is left for several days or even weeks (ambient or in the fridge) unfed, it’ll lose a lot of its activity.
To fix your starter so it’s ready for breadmaking, return to regular feeds at room temperature (or warmer).
After regularly feeding at the correct rise point, it should be ready to use again after 2-3 days.
We’ve covered the basics of a healthy starter. I recommend clicking the links in the text to learn more.
But what are the other reasons for sourdough bread not rising beside the starter?
#2 It’s Too Cold For Sourdough Bread To Rise!
Fungi and bacteria operate best when warm.
The ideal temperature band of bacteria and enzymes in bread dough ranges between 25 and 38C (77-100F).
However, a more comprehensive range of 18-40C (64-104F) produces bread of excellent quality.
If your kitchen is cooler than this, you’ll want to warm your dough in a warm spot or, better still, in a proofer.
Having your own controllable “warm spot” could sound like a far-distant dream, but owning a home-proofing box is possible these days. Thanks to Brod & Taylor for making their affordable home proofer. It’s a fantastic tool to make baking bread at home so much easier:
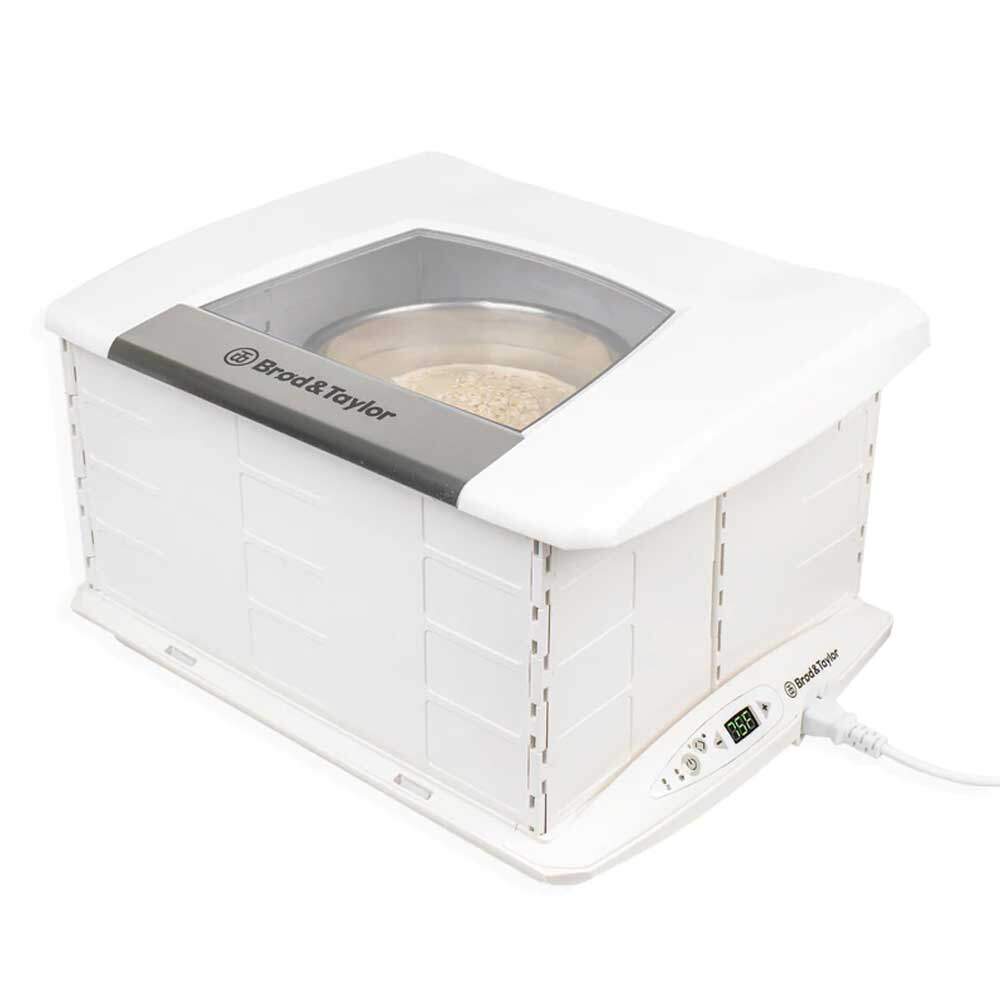
Brod and Taylor Home Proofing Box
The problem with proofing bread at home is that kitchen temperatures are often too cold and fluctuate a lot!
Fortunately, the Brod and Taylor home proofer fixes these issues!! With one of these, you can select the perfect proofing temperature and create humidity. Never have a slow-rising loaf again!
With a home proofer, you can select the exact proofing temperature and enjoy the option to speed or slow down the rise.
You’ll be able to learn how different proofing temperatures alter the acid bacteria strains to change the flavour of sourdough bread.
Whilst a designated proofing box isn’t essential, it’ll make your baking experience easier and more rewarding!
NOTE: I make arguments for proofing in higher and lower regions in my bread proofing temperature post.
#3 Warm Water Killed The Starter
Mix a starter with water over 68C (155F), and it’ll irreversibly damage its yeast cells and organic bacteria.
It’s normal to use tap-temperature water to feed your starter or make bread.
But when it’s warm in your kitchen, measuring chilled water for your dough is a common technique.
The cold water temperature slows the rise and makes your dough easier to manage.
Using cold water on a cold day leads to a slower-rising sourdough bread. In this case, you might want to warm it up.
My desired dough temperature formula shares the perfect method if you want to be confident of your water temperature.

The Sourdough Home – Starter Proofer
For the ultimate starter, you need to keep it at a constant temperature. And with Brod and Taylor’s Starter Home, you can do just this!!
Create a more robust starter, experiment with different flavours and never worry about feeding times again! The Starter Home is the perfect product for any serious sourdough baker!
#4 Not enough stretch and fold’s
The perfect bread is about developing the gluten matrix, so the leavening agent (the starter) creates gas and makes the dough rise.
Stretch and folds work alongside kneading to develop the gluten network.
The more kneading you do, the less stretch and folds you need to apply during bulk fermentation, and vice versa.
At the point of shaping your sourdough, the dough should have risen around 50%, and the gluten should stretch thinly, thus passing the windowpane test.
For a standard, 5 minute gentle knead, you will need to stretch and fold the dough every 45 minutes during a 4 – 5 hour bulk fermentation.
Using the fridge for bulk fermentation
You may have used or heard of using the fridge to store your dough when making sourdough.
It’s a common technique as the cool temperatures extend the length of the first or second rise.
Proofing sourdough (a starter or sourdough bread dough) at cool temperatures slows fermentation, causing the dough to rise slower.
The long rise with little rising activity allows bonds between gluten strands to develop naturally.
The enhanced gluten structure improves the texture of the bread, forming those long strands visible in the best quality sourdough loaves.
During the fridge rise, starches continue to be broken down into sugars. The benefits of these excess sugars include:
- Faster rise once the dough is warmed
- More voluminous rise in the oven
- Softer texture
- Sweeter flavour
The fridge rise also means you don’t need to knead or fit in as many stretch and folds into your baking schedule to develop the gluten matrix.
#5 You saw the dough rise, but then it collapsed!
If your dough rises but then collapses, the dough has likely risen for so long that the gluten becomes weak.
Dough collapsing during proofing or in the oven can be due to a long rise or bulk fermentation. But, commonly, a low-protein all-purpose flour not designed for sourdough baking was used.
Now, you don’t need to use high-protein bread flour for sourdough. Many all-purpose flours make excellent bread.
However, some all-purpose varieties are particularly weak and will collapse under the stress of supporting an inflated structure.
To resolve this issue, try another brand of flour or increase the amount of starter used in your recipe whilst decreasing the proofing time.
#6 The dough was too runny
Both professionals and home bakers commonly discuss the hydration levels of sourdough bread.
A dough that contains more water tends to have a softer crumb feel in the eating experience.
Whereas a loaf of bread made from a stiffer dough will be more chewy.
It’s common to increase the fermentation time of sourdough to generate more flavour.
One route many bakers follow is to increase the hydration of a sourdough recipe and use a higher protein bread flour, so it has a soft texture but doesn’t collapse.
Adding too much water can cause problems!
If the dough is so wet that it lacks elasticity and spreads out when moulding, it won’t rise! Whilst bubbles will appear on the surface, that will be the height of gas production.
#5 Too Much Salt Was Added
Salt slows the activity of the yeast by trapping water through osmosis.
Too much salt in your recipe slows fermentation, contributing to a slower rise.
Using so much salt that it prevents a sourdough loaf from rising at all is unlikely. It would be unpalatable if it reached that stage, but excess salt will slow things down.
Always use sourdough bread recipes from a trusted source and use a set of accurate scales to avoid measuring mistakes:
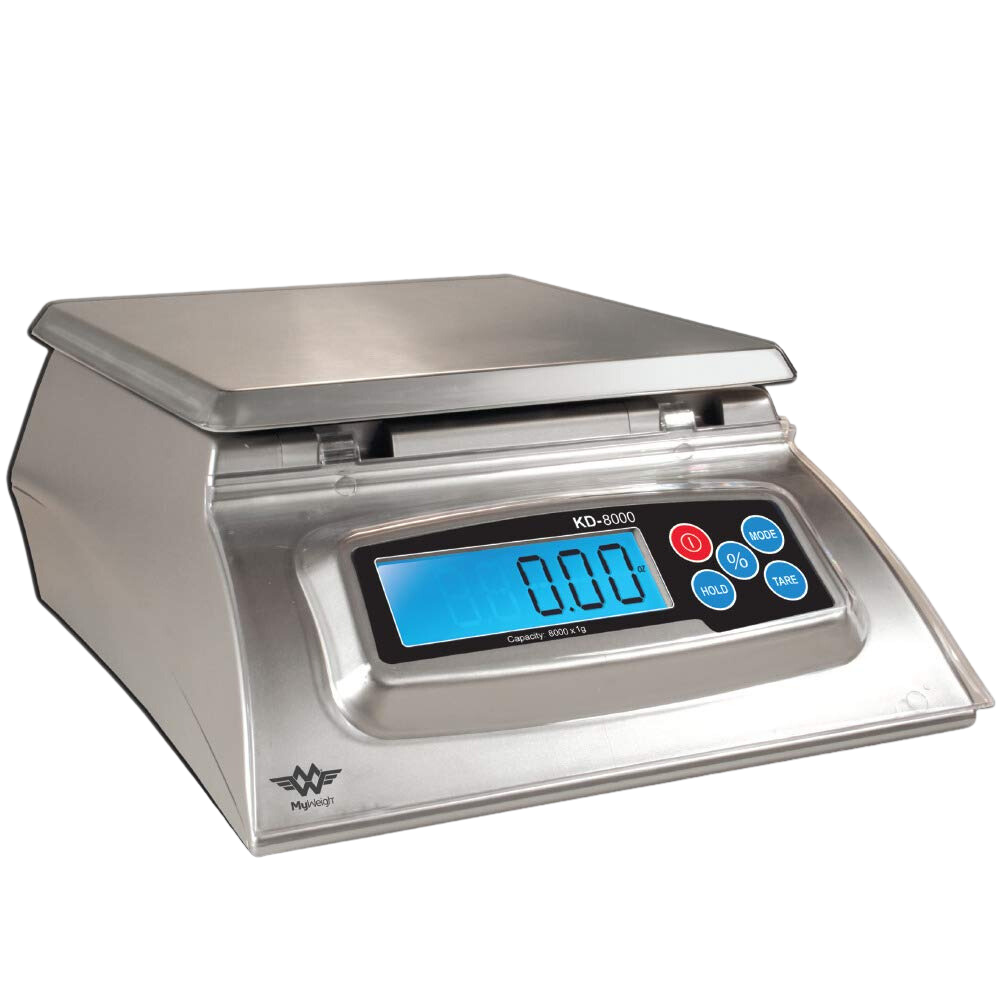
MyWeigh KD8000 Digital Food Scale
If you want to take your bread baking to the next level, a decent set of scales is a must!
The My Weigh KD-8000 Digital Food Scale is the perfect scale for bakers. It’s durable, fast to turn on, VERY responsive, and most importantly, has chunky buttons that are easily pressable when you’ve got dough on the go.
The My Weigh KD-8000 is a new version of My Weigh’s top-selling kitchen scale, updated with baker’s math and percentage weighing.
#6 Too Much Sugar!
Like salt, sugar diverts water from the yeast, slowing the yeast’s activity.
By slowing yeast respiration and fermentation, high sugar levels can prevent dough from rising.
If you want to sweeten a sourdough loaf with sugar or sweetener:
- Increase the amount of starter used.
- Add the sugar later in the development stage (near the end of mixing or midway through bulk fermentation).
- Switch to a liquid form of sugar (like honey) to be added later, which can be incorporated easily.
- Expect a long wait.
#7 There Was Too Much Fat In The Dough
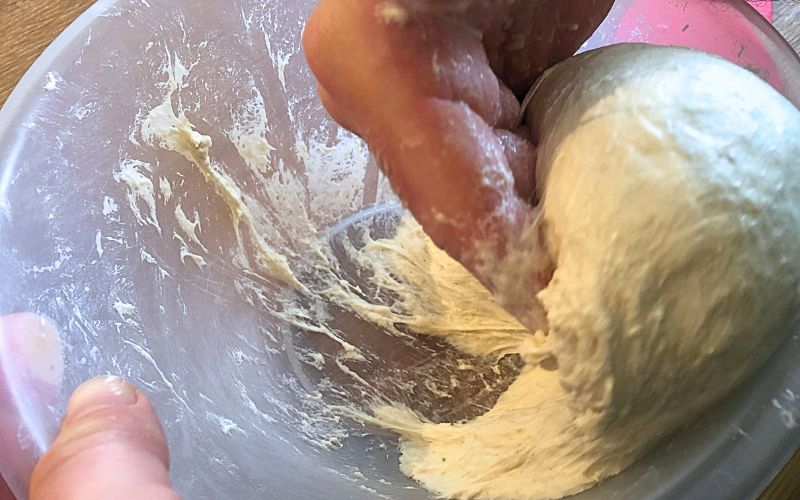
Adding fat to a dough weakens its gluten structure, making it less efficient at trapping air.
Too much fat won’t be the sole cause of sourdough bread not rising, but it can contribute to making dense sourdough bread.
It’s uncommon for sourdough bread to contain sufficient fat to slow the rise.
But if you make enriched sourdough recipes such as doughnuts or brioche, add fat at the midway point of the first rise.
Delaying the fat enables the gluten structure to develop before its inclusion.
#8 Your Water Isn’t Suitable For Making Sourdough
If your sourdough bread doesn’t rise, but your starter does, rest assured (unless you’re using a different source) that your water is not the problem.
Most of the time, the water isn’t causing an issue, but there can be exceptions.
In some areas, tap water can reduce the enzymic activity of a sourdough starter:
If your water is heavily chlorinated, fill a jug from the tap and let it sit on the counter (or fridge) for 30 minutes before measuring.
The resting period allows the chlorine to evaporate.
A water filter can accelerate the process.
If using water from a reverse osmosis water filter, you should take extra steps when making bread.
A reverse osmosis filter removes harmful bacteria from water, as well as healthy bacteria.
Unfortunately, this lowers water activity, causing the sourdough rising action to suffer.
Adding salts back is a standard solution, but it’s not perfect.
Bakers using these filters often run into issues, so you might have to use bottled water if your starter is struggling.
#9 The Dough Became Hard During Proofing
If you leave dough uncovered as it rises, it will dry out.
During the drying process, moisture leaves the outer areas of the dough to form a skinlike texture.
As the skin drys, it becomes thick and heavy, so much so that it prevents the dough from rising.
Expect to see some big rips in the bread as the oven spring explodes the crust as it bakes.
Always cover your dough whilst it is rising with a loose-fitting bag, towel or lid, but if you notice that your dough has become hard, spray or brush some water on the surface to rehydrate it.
#10 My top tip – Strip the ingredients in your recipe
If your sourdough bread is not rising, you have a severe fault in your starter, recipe or methods. Make things easier for yourself by following a straightforward sourdough recipe.
You just need flour, water, salt and a starter to make a basic sourdough bread, which will taste amazing. Using extra ingredients can lead to issues.
So, if you’re attempting to make complicated sourdough recipes with several ingredients, go back to basics and ensure that your basic techniques are solid and your starter is sufficiently mature.
So Why Did Your Bread Not Rise?
And, after reading this, you’ll know more about why sourdough bread doesn’t rise than many professional bread bakers!
Let me know in the comments why you think your bread didn’t rise.
Are there any other reasons that you think are preventing your bread from rising? I’d love to hear how you fixed your sourdough rising problem!
Frequently asked questions about the sourdough bread rise
If you’ve enjoyed this article and wish to treat me to a coffee, you can by following the link below – Thanks x

Hi, I’m Gareth Busby, a baking coach, senior baker and bread-baking fanatic! My aim is to use science, techniques and 15 years of baking experience to make you a better baker.
Table of Contents
- #1 The Sourdough Starter Is Not Fully Active
- #2 It’s Too Cold For Sourdough Bread To Rise!
- #3 Warm Water Killed The Starter
- #4 Not enough stretch and fold’s
- #5 You saw the dough rise, but then it collapsed!
- #6 The dough was too runny
- #5 Too Much Salt Was Added
- #6 Too Much Sugar!
- #7 There Was Too Much Fat In The Dough
- #8 Your Water Isn’t Suitable For Making Sourdough
- #9 The Dough Became Hard During Proofing
- #10 My top tip – Strip the ingredients in your recipe
- So Why Did Your Bread Not Rise?
- Frequently asked questions about the sourdough bread rise
Related Recipes
Related Articles
Latest Articles
Baking Categories
Disclaimer
Address
53 Greystone Avenue
Worthing
West Sussex
BN13 1LR
UK


