How Oven Spring Works – Best Explanation On How It Works!

Perfect oven spring distinguishes a good loaf of bread from a great one. While it’s natural to focus on what happens in the oven, the best oven spring occurs when each stage of the bread making process is perfected. This guide shares how to get the best oven spring when you make bread, the science behind it, and tips to improve your yeasted and sourdough bread.
What is oven spring?
When raw dough enters the oven, the warm environment forces yeast to produce carbon dioxide at a much faster rate. The gas created expands the pockets of gluten in the dough, making the bread rise rapidly during the first 10-15 minutes of baking. Bakers call this rise “oven spring”, and perfecting it leads to bread with a lighter crumb and thin, crispy crust.
When does oven spring happen?
Gas production increases as soon as the dough goes into the oven. You’ll be able to see the oven rise 2-3 minutes later, which continues for 9-12 minutes. Timings are dependent on temperature and moisture in the oven.
When does oven spring end?
When the temperature of the crust becomes 50-60C (122-140F) in wheat bread, starch coagulates (hardens) and sets the crust, preventing it from rising further.
At around the same time, the core of the bread will pass 71C (161F), which is too hot for the yeast, making it permanently inactive (or, in other words, dead).
Ideally, the “crust set point” occurs simultaneously as the “yeast kill point”.
Perfecting these points to align will produce bread with a luscious appearance, even crumb texture and a crisp crust. But it’s not easy to perfect. Thermal imaging cameras and plenty of test bakes and adjustments are carried out in commercial bakeries!
At home, we don’t have this luxury. The only way to achieve the perfect oven spring is to follow good practices, review our bakes and make adjustments.

What happens after oven spring ends?
Bread continues to bake after oven spring ends as moisture must escape the bread’s core. Water vapour is released from the baking chamber by opening the damper in a professional oven. Home bakers can replicate this by periodically opening the oven door. As water insulates the heat, releasing the steam bakes the bread faster and the crust browns and hardens. Water will also exit the bread.
How to improve oven spring to make better bread
Improving oven spring in homemade bread will make it look and taste better. Follow these steps for the best-sprung bread:
1. Perfect the quality of the dough
When improving any bread recipe, look at the dough. The majority of artisan bread recipes follow a double-rise method. They comprise of bulk fermentation, followed by a final rise or proof.
The differences between the two methods are around how the gluten structure is developed and the amount of extra organic activity (dough maturity) that occurs before the dough is shaped and risen.
When using the double-rise approach, the gluten network develops as it rests during bulk fermentation. We need a robust gluten network to be able to capture the gas produced by the yeast. This makes the bread rise more during proofing and in oven spring.
Stretch and folds during bulk fermentation
To accelerate gluten development (and yeast activity) during bulk fermentation, stretch and folds can be applied.
Stretch and folds, agitate the dough to realign the gluten strands and form a more robust structure. They are commonly used when baking sourdough bread, yet I’ll still apply a couple of stretch and folds in most of my yeasted doughs.
Long vs quickly-made methods
Yeast has two operational modes, aerobic respiration and anaerobic respiration. In long-fermented recipes, oxygen levels deplete, and the yeast respires anaerobically. This leads to alcoholic fermentation.
Yeast fermentation produces carbon dioxide (gas) and alcohol, while slow dough development supports the multiplication of Lactic Acid Bacteria (LAB). These bacteria also ferment to produce organic products such as lactic acid, acetic acid, carbon dioxide, acetate and alcohol.
Fermentation processes release enzymes to break down starch and proteins in the dough, which release flavours and alter the properties of the dough.
Yeast fermentation produces gas at roughly half the rate of aerobic respiration. However, the natural dough improvers produced mature the doughs quality.
One core enhancement of dough maturation is gluten’s ability to stretch to capture gas more efficiently. This is important during proofing but vital for a good oven spring!
Whilst a mature dough with lots of organic activity can produce bread with a good oven spring, so can one that’s quickly risen.
If you’ve read the how to fix dense bread article, you’ll know the secret to a good rise is gas retention and gas production.
In long-fermented dough, focus primarily on maturing the gluten (gas retention), but in a quickly risen bread, the priority is to produce more gas.
To increase the rate of aerobic respiration, oxygen is incorporated into the dough by kneading aggressively. Many bakeries also include an oxidising agent such as ascorbic acid to increase oxidation, but this moves towards a commercial bread recipe.
Any oxygen captured also supports the gluten strands to bond to each other, creating a temporarily enhanced dough structure. It’s essential that a well-kneaded dough should be proofed and baked quickly whilst plenty of oxygen is contained.
Once a quickly-made loaf goes into the oven, the yeast creates more gas, faster. Bread made this way tends to have more oven spring gains and characteristic “rips” at the side of the loaf that displays oven expansion.
NOTE: Flour exposed to oxygen for a prolonged period can lead to over-oxidation, which weakens the dough structure and diminishes flavour. A shorter kneading period is required to avoid over-oxidation in a long-fermented dough.
So there are two main approaches to making dough that will achieve big oven spring:
- Quickly-made doughs, where kneading is intensive, and the bulk fermentation stage is short or removed altogether.
- Long-fermented rise where the dough is lightly kneaded and left to bulk ferment for a minimum of 2 hours before shaping and rising until proofed.
No matter which dough option you choose, your role as a baker is to ensure that it is mature at the point of shaping. To review gluten maturity, you can use the windowpane test. Once the dough is fully mature it will stretch so thinly that you’ll be able to see light through it.
Hydration levels
For the best oven spring, try to learn how much water your flour can absorb. Too much water will weigh down the gluten structure, thus leading to less volume gain in oven spring. A dry dough damages the gluten strands, making them unable to stretch and retain the gas produced.
You can tell when dough is too wet when it won’t form a mass and can be poured like soup. If it is under-hydrated, it won’t form a smooth mass and is tough to knead.
The perfect hydration percentage allows the gluten to be long and extensible so it can stretch.
TIP: To master dough hydration, keep baking with the same flour and make small adjustments to the amount of water. A decent set of scales and using grams to measure is vital.
Short-fermented doughs produce water alongside carbon dioxide, so they can be low hydration and firm at the point of shaping.
The strength of the levain

Yeast should be active and not out of date.
If you are making sourdough bread it’s important that the sourdough starter is fully active. You’ll want to see it triple in size after 5-6 hours of being refreshed. Check out my sourdough starter troubleshooting article to learn more.
The same goes with a preferment like a biga or a poolish. They should be at their peak to get the best maturation benefits.
If you are baking sourdough bread, see the sourdough oven spring for a more detailed walkthrough on sourdough oven spring.
Autolyse
Autolyse is the process of soaking the flour and water before kneading.


As the flour hydrates, gluten can unwind and become nice and long. On a scientific level, autolyse encourages an increase in gluten extensibility.
It has been proved in Dr Calvel’s book “The taste of bread“ that using the autolyse method increases the volume of oven spring by around 3%.
Maturing the dough
The most common way to mature a bread dough is to extend the first rise (bulk fermentation).
To save on development time, a prefermented levain can be used.
A poolish or biga, or even a small amount of sourdough starter, can be added to a short-fermented yeast recipe to increase maturity. A best-of-both-worlds option is created as gas retention and gas creation are then at optimum levels.
TIP: Adding a teaspoon of sugar per loaf can give your bread's oven spring a boost as it provides more sugars for the yeast to consume
Kneading dough
A good kneading technique is vital to develop the gluten in the flour.
Kneading should be broken down into three stages:
- The first is a gentle stage to distribute the ingredients and hydrate the gluten.
- The second gently stretches the gluten to encourage it to lengthen.
- The third increases the speed and intensity to work the gluten hard and knock oxygen inside.
For long-fermented doughs, the third stage can be skipped.
Learn more: Best dough kneading techniques.
2. How shaping is important to the oven spring of the bread
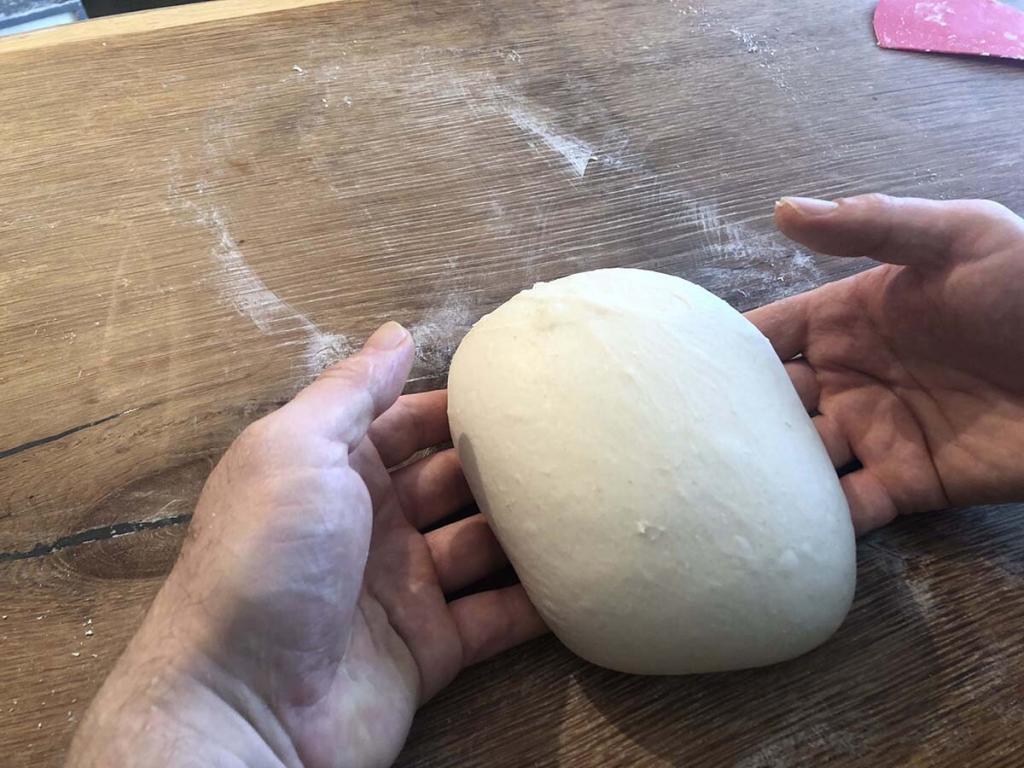
The way you shape your dough impacts the quality of the oven spring.
The standard shaping practice is for the dough to be degassed (gas is pushed out), pre-shaped into a ball or oblong, left to rest for 15-30 minutes and then final shaped.
When final shaping, the outer membrane should be stretched to provide tension that will support the dough piece as it rises and during oven spring.
When a mature and gassy dough is used, a lighter touch is preferred.
If a lot of gas has been produced during the first rise, the yeast can run out of sugars to consume, making gas production during the second rise and oven spring less prolific.
If the dough has doubled in size (or higher) during bulk fermentation, you’ll want to keep some gas inside when shaping the dough. Shaping with little degassing is one of the hardest dough shaping skills, as it requires practice to create the required tension.
3. Get the proofing right
Poor oven spring can be the result of over-proofing the dough.
To understand how proofing can make such a big difference to the amount of oven spring your baking bread receives, it’s a good time to explain the science of oven spring.
The science behind oven spring
The rise in the oven is produced by the yeast creating carbon dioxide. Yeast supplies some enzymes, yet others occur naturally in raw flour. Enzymes are proteins that break down starch into sugars.
Several reactions take place that leads to simple sugars (hexoses) remaining. These are 6-carbon sugars that are small enough to be processed by the yeast.
Yeast will either respire aerobically to produce carbon dioxide and release water or if there is no oxygen present, it respires anaerobically.
Anaerobic respiration leads to hexose sugars following the yeast fermentation process. This is where half of the pyruvates (the products of hexose sugars after respiration) produce carbon dioxide, and the other, mainly ethanol-alcohol.
Carbon dioxide is produced as a liquid, which travels to an area of low pressure in the gluten structure and becomes a gas. The gas is captured in the stretchy gluten structure, which forms air pockets that make the crumb structure of baked bread.
Yeast is a fungus that loves being warm. Providing there is an ample supply of sugars, yeast activity will increase with temperature until it reaches around 68C. At this point, yeast cells become permanently inactive.
Once the bread is placed in the oven, yeast activity peaks, creating CO2 gas at a rapid rate which inflates pockets in the gluten structure. The process is just the same as during proofing but much faster.
Depending on whether there is any oxygen remaining in the dough, gas will either be produced through respiration. But if oxygen levels have dissipated, fermentation occurs during oven spring, which means ethanol is produced.
Aerobic respiration leads to a faster rate of gas production and, therefore, a more-prolific, better oven spring. But where a gluten structure is well developed and mature, its gas-retaining properties are superior.
As the bread bakes in the oven, water vapour and ethanol evaporate upwards, pushing the dough structure up internally.
But if the dough is over-proofed, oven spring is less effective
If bread dough has been proofed too much, once in the oven, there will be fewer sugars available for the yeast (as they were already consumed). As the bread bakes, the yeast can’t produce as much gas as it could, resulting in an oven spring that’s less noticeable or holes running through the crumb structure, a common feature of over-proofed bread.
Perfecting proofing for oven spring
You usually get a larger oven spring where the dough is slightly under-proofed. However, the search for perfectly sprung bread comes at a risk!
In a less mature dough, under proofing can lead to an uneven crumb and rips appearing on the crust where a massive amount of gas can neither inflate the gluten structure nor easily escape the bread.
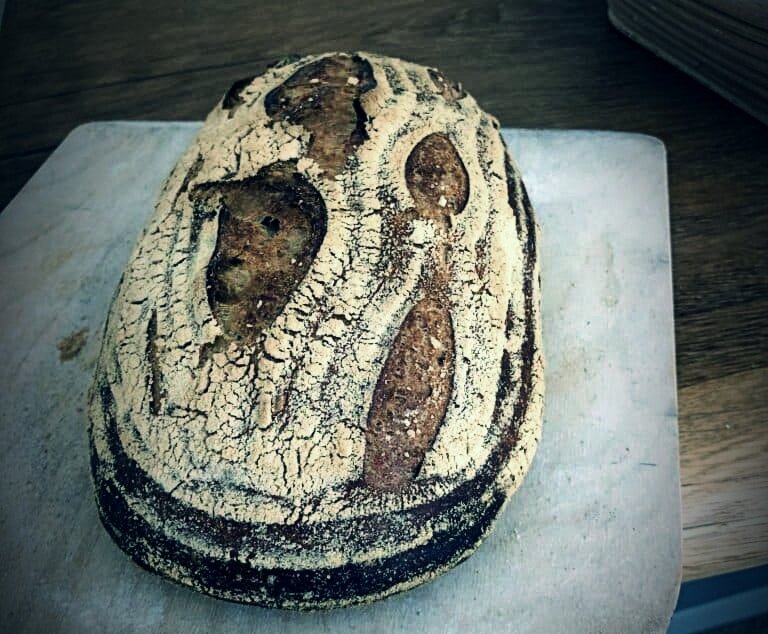
When lots of gas is produced during oven spring, a well-placed score on the crust will open up. A small amount of “ripping” caused by under-proofing slightly exaggerates the cuts, making the bread pleasant and vibrant. The crumb will also open up and be more tender if it has undergone a big rise in the oven.
It’s best to slightly underproof than over-proof. A healthy, mature dough that’s not produced much gas (during first and second rises) will tolerate and benefit from under-proofing more than an immature or overly gassy, well-fermented dough.
Bakers use a proofing percentage to explain how well-proofed bread should be before baking. It’s not an exact science, but a rough guide!
At 100% proof, the dough is at the peak of its rise, typically “doubled in size”. Much longer, and the dough will collapse. At 50%, the dough has risen to half its fully proofed height.
| Dough type | Proof Percentage |
|---|---|
| White tin loaf | 70-80% |
| Whole wheat tin loaf | 85-100% |
| Sourdough in banneton | 80-100% |
| Ciabatta | 80% |
| Baguette | 70-80% |
| Brioche | 100% |
| Soft rolls | 90% |
| Fruit loaf | 90% |
4. Score the bread firmly
As bread bakes, if carbon dioxide has no place to go, it passes through the dough to an area of low pressure, often a weak spot in the gluten structure. If it can’t escape, CO2 will congregate in this area until it forms a fracture in the structure and forces itself out through the crust. This creates crack lines or ruptures the crust, ruining the bread’s appearance.
Scoring bread dough with a lame or knife before it goes into the oven looks great aesthetically. Importantly, scoring creates a clear route for excess gas to escape during oven spring.
Unless baking with whole wheat bread flour!
Starch in white bread dough is easier to break down in the heat of the oven. The chains of sugars found in whole wheat flour are more complex, meaning gas production is slower when baking bread made with whole wheat flour.
The yeast kill and crust set point still occur at around the 15-minute point, meaning whole wheat bread has a less pronounced oven spring than white bread. For this reason, whole wheat bread is proofed to at least 85%, and not scored before baking, whereas crusty white bread is almost certainly scored every time.
If you score bread too deep or make too many cuts, too much gas will escape, leading to:
- Scores not opening up
- Less oven spring
- Possibility of the bread collapsing
If you are a baking beginner, leave the “bread art” till later and practice a simple one, or two-cut design.
How to get an ear on bread?
The elusive ear is produced when the skills described above are flawlessly achieved. The dough must be well-matured, perfectly shaped, slightly under-proofed and scored at the correct depth. A full demonstration can be found here: how to get an ear on bread.
5. Use a baking stone

A baking stone is a food-safe stone with heat-retaining properties. It is preheated for around an hour before dough is placed on top to bake. You can bake trays of bread/rolls, bread tins or go naked and slide the unbaked dough on top with a peel.
The baking stone conducts heat into the bottom of the bread. The extra warmth pushes up the bread (heat rises) to provide a more intense oven spring.
A baking stone also resolves another problem many home bakers suffer from, under-baked bottoms! When baking with a stone, the base of the bread comes into direct heat, which ensures the base of the bread is hardened.
A professional baker’s deck oven contains a fitted baking stone, but you can get some decent stones for home ovens at pretty low prices these days.
I recommend that you get a baking stone like the one below. They’re pretty thick, durable and made from cordierite which is the optimum material (fire clay is good too).
Some home bakers add multiple baking stones, fire bricks and/or lava stones to retain more heat. See how I upgraded my baking oven using these additions!
TIP: Thicker stones take longer to preheat but conduct more heat into the bread.
6. Add steam to the oven when baking
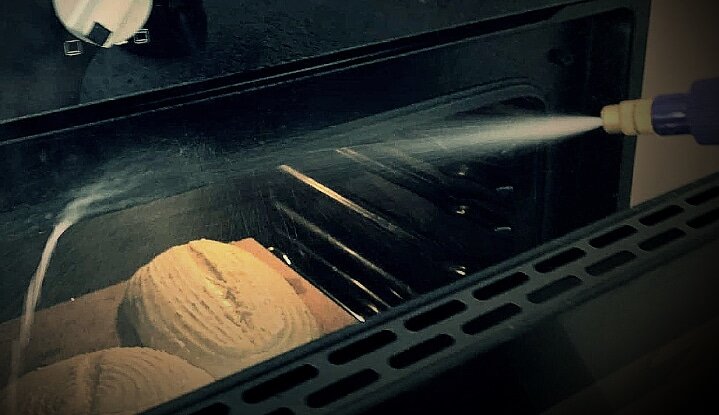
A hot oven is a reasonably dry place. In a home oven, most water vapour that escapes cooking food exits via the seals around the doors or through the casing itself.
When bread bakes in a dry oven, the exposed perimeter of the bread feels the heat of the oven the most. Gelatinisation bonds the starch particles to begin crust formation, which turns rigid, preventing the bread from rising further.
For maximum oven spring, we can delay the crust set point by lowering the exposure to heat felt on the outside of the bread. To do this, steam is created in the oven as the bread goes in to bake.
When steam is added to the oven, starch particles in the dough gravitate to the outer areas and latch onto water vapour that condenses on the bread. The free water forms a barrier around the soft dough to protect starch from gelatinizing.
Water is a heat insulator, so steam baking slows the transfer of heat from the oven into the dough. This means the outside of the dough is less exposed to heat. However, warmth travels upwards through the base of the loaf, especially when using a baking stone.
The benefits of adding steam to a bread oven are:
- Gas production inflates and stretches air pockets in the soft dough
- The core of the bread becomes lighter
- The outer membrane stretches, producing a thin crust
- The crust hardens, becoming crisp
- Baking time can be increased by 30-50% before excessive browning appears
- Starch on the outer crust absorbs water and explodes, releasing a protective sheen that is hard and brittle when baked
- More water is removed from the bread, making it drier and increasing its shelf life
- Scores open up fully
- Bigger gains from oven spring are observed
How to add steam
For professional bakers, adding steam is often as easy as pressing a button on their oven. For home ovens without steam-injecting jets, there is a manual approach.
One of the most popular solutions is to spray the inside of the oven with a water mister at the start of baking. In fact, many small bakery businesses use ovens without steam-injecting jets, so follow this approach.
There are other ways that you might prefer, including pouring a cup of water into a preheated bowl or tray in the oven. See how to add steam to a bread oven to find your favourite.
Bread can have oven spring without adding steam
Enriched doughs which contain high levels of fat, such as brioche, challah and bready cakes like Chelsea buns, do not need to be baked with added steam.
Fat has a higher boiling point than water, so it protects the outer layer of the bread from gelatinising.
Most of these types of bread are sweet, and sugar will caramelise in the oven. To avoid browning too quickly due to caramelisation and Maillard reactions, enriched bread is usually baked at a cooler temperature. The yeast kill point is then delayed so that it conveniently aligns closely with the crust set point.
Fatty bread doughs that aren’t sweet, such as croissants or Danish pastries, don’t need to be baked with steam. Bakers often add some regardless to encourage a shiny crust and a crisp-on-the-outside, soft-in-the-centre texture.

Soft breads, such as burger buns, are not baked with steam. It’s popular to include a small amount of fat and sugar to soften and tenderise these types of bread. But, in general, soft-crumbed bread does not benefit from steam baking.
Soft bread should be baked quickly with the top heating element on high and the lower one on low (or by placing the oven shelf near the top of the oven in a domestic oven). As adding steam extends the baking time, which drives moisture from the dough, steam is not helpful to a soft crumb!
There can still be a great oven spring without steam, just not quite as amazing as when steam is added.
7. Bake at the right oven setting
When it comes to baking, setting up your oven is a dealbreaker. I’ve baked in a few domestic ovens, and here is what I’ve found works best, but every oven behaves slightly differently, so you might have different results:
Preheat the oven using only the bottom heat setting if you have this selection.
Heating from the base means the stone gets properly preheated. Using the top and bottom option for preheating means the thermostat (at the top of the oven) turns the heaters off as the air is warm, but the stone is not thoroughly preheated.
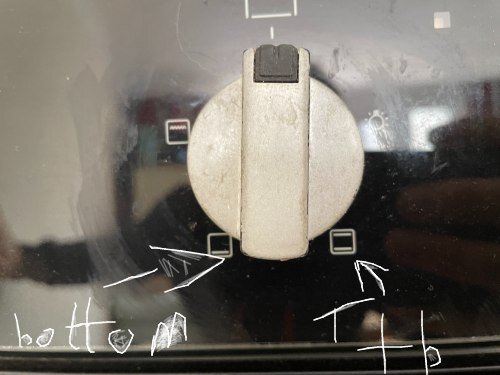
Once the stone is fully preheated (you can use an infrared thermometer), load the bread and continue to bake with just bottom heat. If you find your oven cools down severely when the bread goes in, or it takes ages for your bread to bake, try:
- Switching to top and bottom heat 5 minutes before loading the bread and leaving it on
- Switching to the top and bottom heat 5 minutes before loading up bread and turning it off after 5 minutes of baking
- Switching to the top and bottom heat for the last 10 minutes of the bake to brown the bread
- Adjusting the level of the shelf to move the top or bottom of the bread closer/further to the heat source.
Most bread recipes are baked at 220-230C (430-445F). Enriched/sweetened bread is cooler, typically 180-200C (350-390F). See selecting the best oven temperature for bread to learn more.
Releasing the steam
Open the door temporarily after 20 minutes of baking to let moisture escape and lower the humidity in the oven. Doing this makes the heat more intense for the bread so that the crust can brown and harden. It also prevents the bread from being gummy by allowing moisture to escape the loaf.
When baking high-hydration bread like ciabatta, some bakers may leave the oven door ajar for the last 5 minutes of baking to maximise moisture loss.
Using a fan oven to bake bread
Fan ovens work by circulating the air to lower the air pressure on the cooking food. It’s what makes fan-cooking food slightly quicker. But fan ovens are not great for baking bread.
When baking bread in a fan oven, moisture is blown away from the crust, making it set sooner and reducing the rise. What’s more, the side of the bread closest to the fan can set before the opposite side, resulting in some very funky-shaped bread!
If you only have a fan oven, follow the Dutch oven technique.
8. Cooling bread leads to shrinkage
As the bread cools and pressure is released, the gluten contracts, which you may have noticed if you’ve noticed an eggshell texture on a crusty loaf (or wrinkles in soft bread). Bread should cool down till it reaches 35C (95F).
Once completely cool, bread will shrink to almost the same size as before it was baked. It will weigh less. I give accurate figures on how much weight does bread lose when baked in the linked article.
Oven spring improvements and common troubleshooting:
How to get more oven spring in a Dutch oven
You can get great results when baking with a Dutch oven. A Dutch oven is essentially a personalised baking oven inside your oven. The sealed unit retains moisture, so the bread doesn’t need any extra steam.
Putting the lid on should provide enough humidity for the bread to rise in the oven. But some bakers chuck a couple of ice cubes next to the bread or spritz with a water spray for more moisture. The extra moisture can make the crust a little crispier, and bubbles appear on the crust. Bubbles are a defect in some baking cultures and something to celebrate in others. You decide!
You don’t always use a baking stone with a Dutch oven. If you struggle with under or over-baked bottoms or feel that you are not getting as much rise as you deserve, invest in a baking stone to compliment your Dutch oven.
Can I get better oven spring with a cold start?
I’m not a fan of the “cold-start” Dutch oven method. The idea is you don’t preheat your oven, but place the dough in a Dutch oven and turn the heat on.
The problem is the baking chamber takes longer to reach temperature, so the crust sets before the yeast dies. This can result in some funky bread textures as gas continues to try and push the bread upwards. The cold start/ cold dough method will benefit your bread if you have a habit of under-proofing.
Too much oven spring
You might feel that your bread has risen too much in the oven. Whilst large growth in the oven is not necessarily a bad thing. It can lead to faults in the bread.
Ruptures appearing on the crust, a gummy or dense crumb or holes running through the crumb are all signs of too much oven spring.
The cause of this is often an underdeveloped or under-proofed dough.
Dough is more resilient to under proofing if it has been sufficiently matured during the kneading and first rise stages. A well-developed gluten structure and sufficient organic maturity mean a dough will stretch and retain the gas produced. This can compensate somewhat for a lack of proofing.
If your bread is rising too much in the oven, the first step is to prove it longer. Use the poke test to help you. Other considerations include using less yeast (no more than 2.2% fresh yeast), sugar or enzymatic ingredients such as malt flour. These produce more gas during oven spring.
Ending this oven spring guide
Much can be achieved by mastering oven spring, but I think that searching for ways to improve the oven spring is the wrong way to look at it. The focus should be on the quality of the dough overall. A good dough will perform well when other techniques aren’t perfect.
Before I leave you with some frequently asked questions, let me know how you found this oven spring guide. Did you get the answers you were looking for? Will you change any part of your baking routine after reading it? Let me know in the comments below.
Frequently asked questions about oven spring
If you’ve enjoyed this article and wish to treat me to a coffee, you can by following the link below – Thanks x

Hi, I’m Gareth Busby, a baking coach, senior baker and bread-baking fanatic! My aim is to use science, techniques and 15 years of baking experience to make you a better baker.
Table of Contents
- What is oven spring?
- How to improve oven spring to make better bread
- 1. Perfect the quality of the dough
- 2. How shaping is important to the oven spring of the bread
- 3. Get the proofing right
- The science behind oven spring
- 4. Score the bread firmly
- 5. Use a baking stone
- 6. Add steam to the oven when baking
- 7. Bake at the right oven setting
- 8. Cooling bread leads to shrinkage
- How to get more oven spring in a Dutch oven
- Too much oven spring
- Ending this oven spring guide
- Frequently asked questions about oven spring
Related Recipes
Related Articles
Latest Articles
Baking Categories
Disclaimer
Address
53 Greystone Avenue
Worthing
West Sussex
BN13 1LR
UK


