How to Knead Dough Like a Pro! – 7 Kneading Methods Rated
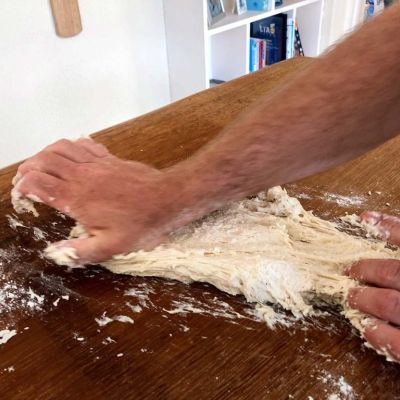
Several kneading techniques are available to make bread, but which is the best? Over the past 5ish years of running Busby’s Bakery School, I’ve transitioned from a professional bread baker to more of a home baker. During this time, I’ve tested several ways to knead bread dough. In doing this, my goal has been to discover the best hand kneading technique for bread dough. One that’ll develop dough just as well as the expensive mixers I’d used before. And after many hours, days and years, I “think” I’ve done it!
To be fair, each kneading technique has its pros and cons. There’s not really an all-around “best method”. Some work great for some types of bread yet struggle with others. This guide shows you the most popular methods and offers insight into selecting the kneading style that best suits your bread dough. I’ll also explain how to combine these methods to make some bad-ass bread at home!
The results
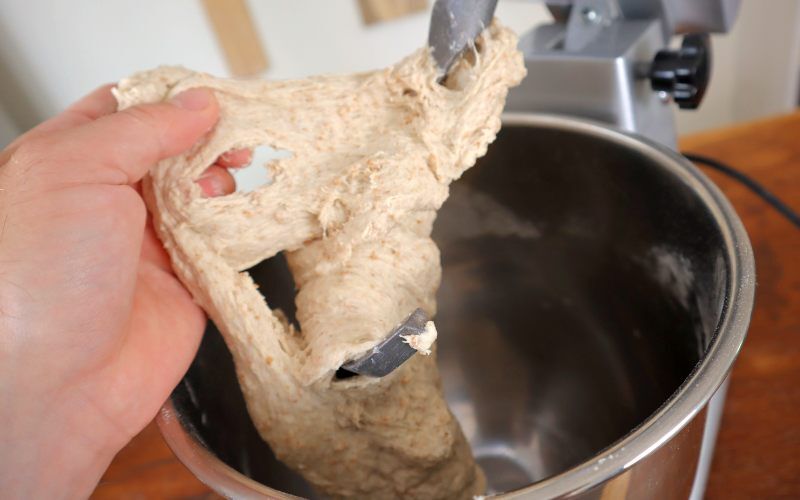
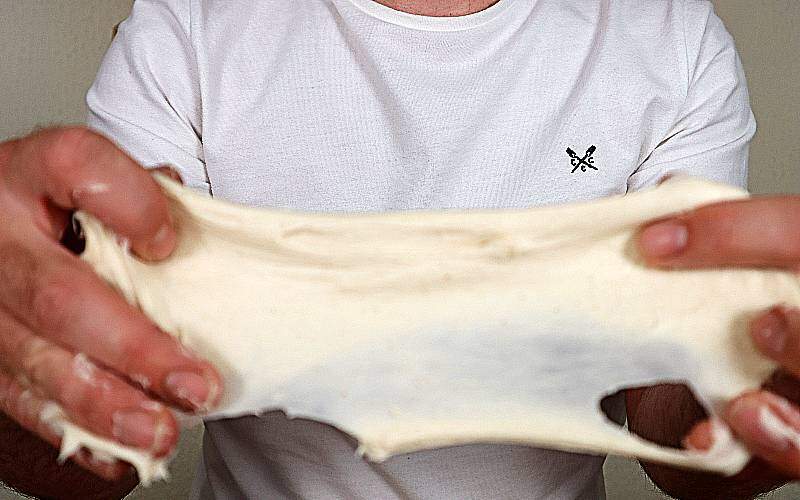
Before we start, I wanted to show you the impact of dough kneading. The images below share the same recipe, kneaded for the same time but with a different method. Look at the strength of the gluten in the second picture. It is far superior to the first. It’ll trap more gas and produce a much lighter tasting loaf, one I’m sure you’ll be proud of.
The kneading techniques covered in this guide are displayed in the table below. Alongside the name in the table is the best time to use them, which I’ll explain in a moment.
| Method | Incorp | Slow | Fast |
| Incorporation with a dough scraper | ✔ | ✘ | ✘ |
| Incorporation with the Claw | ✔ | ✘ | ✘ |
| Intermediate stretching method | ✘ | ✔ | ✘ |
| One-handed kneading | ✘ | ✔ | ✔ |
| The Rubaud method | ✘ | ✔ | ✔ |
| The French method | ✘ | ✔ | ✔ |
| Stretch, slap and fold | ✘ | ✘ | ✔ |
What is the point of kneading dough?
Kneading is the fourth stage of bread making. Its purpose is fourfold:
- Evenly distribute the ingredients
- Hydrate the flour with water
- Develop the gluten structure
- Incorporate oxygen into the dough
Each of these properties will be more drastically affected by different kneading methods. These significances make them better suited for different stages or bread types. By combining techniques in your mixing routine, you’ll be able to achieve professional-quality doughs. Since I changed from using one kneading method to two or often, three, my homemade bread turned a corner, and it was much easier on my arms too!
The stages of kneading bread dough
There are three stages of kneading; incorporation, intermediate and fast. Each serves a different purpose in working the dough:
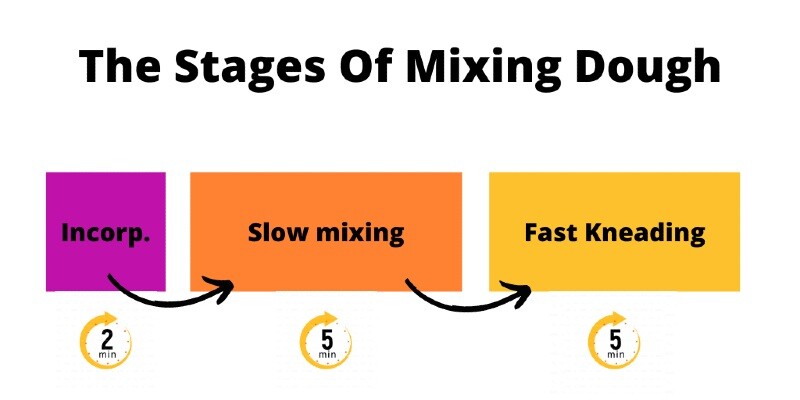
Incorporation – The ingredients are combined into a mass at the start of the mixing process. For most doughs, this stage will only last a minute or two, though large batches or stiff doughs can take up to 4 minutes.
Slow mixing – The slow mixing or “intermediate” stage follows incorporation. This is where gentle agitation with long, slow movements encourages the flour to absorb liquid and hydrates the gluten and starch. As the gluten hydrates, the strands become longer, and the dough can stretch further. This occurs without incorporating all that much oxygen.
Fast kneading is a more aggressive motion. It rapidly works and stretches the gluten whilst adding lots of oxygen. The result is a firmer dough that, provided the previous stages were completed correctly, passes the windowpane test!
In the kneading methods table, you'll notice that some methods can be used in both intermediate and fast stages. You'll simply do it harder and faster when using the same method for fast kneading instead of slow mixing.
How long should I knead bread dough for?
By hand, a typical bread dough should be mixed for at least 10-15 minutes. This consists of 1-2 minutes incorporation, 5-7 minutes of slow mixing, followed by 5-8 minutes fast. The kneading time can be reduced using an autolyse or by resting the dough between stages in the refrigerator. You can find out more in the how long should I knead bread dough for post. For now, let’s look at the techniques…
The dough scraper incorporation technique
The first technique uses a dough scraper to combine the ingredients before the kneading can kick off. If you don’t have a dough scraper, you might want to take a look at this dough scraper. They are pretty inexpensive, and you’ll end up using one all the time, so getting a dough scraper is definitely recommended! Alternatively, the claw method shown next will work just as well.
| Rating criteria | Intensity (/5) |
|---|---|
| Evenly distribute the ingredients | 5 |
| Hydrates the flour with water | 3 |
| Develops a strong gluten structure | 1 |
| Incorporates oxygen into the dough | 1 |

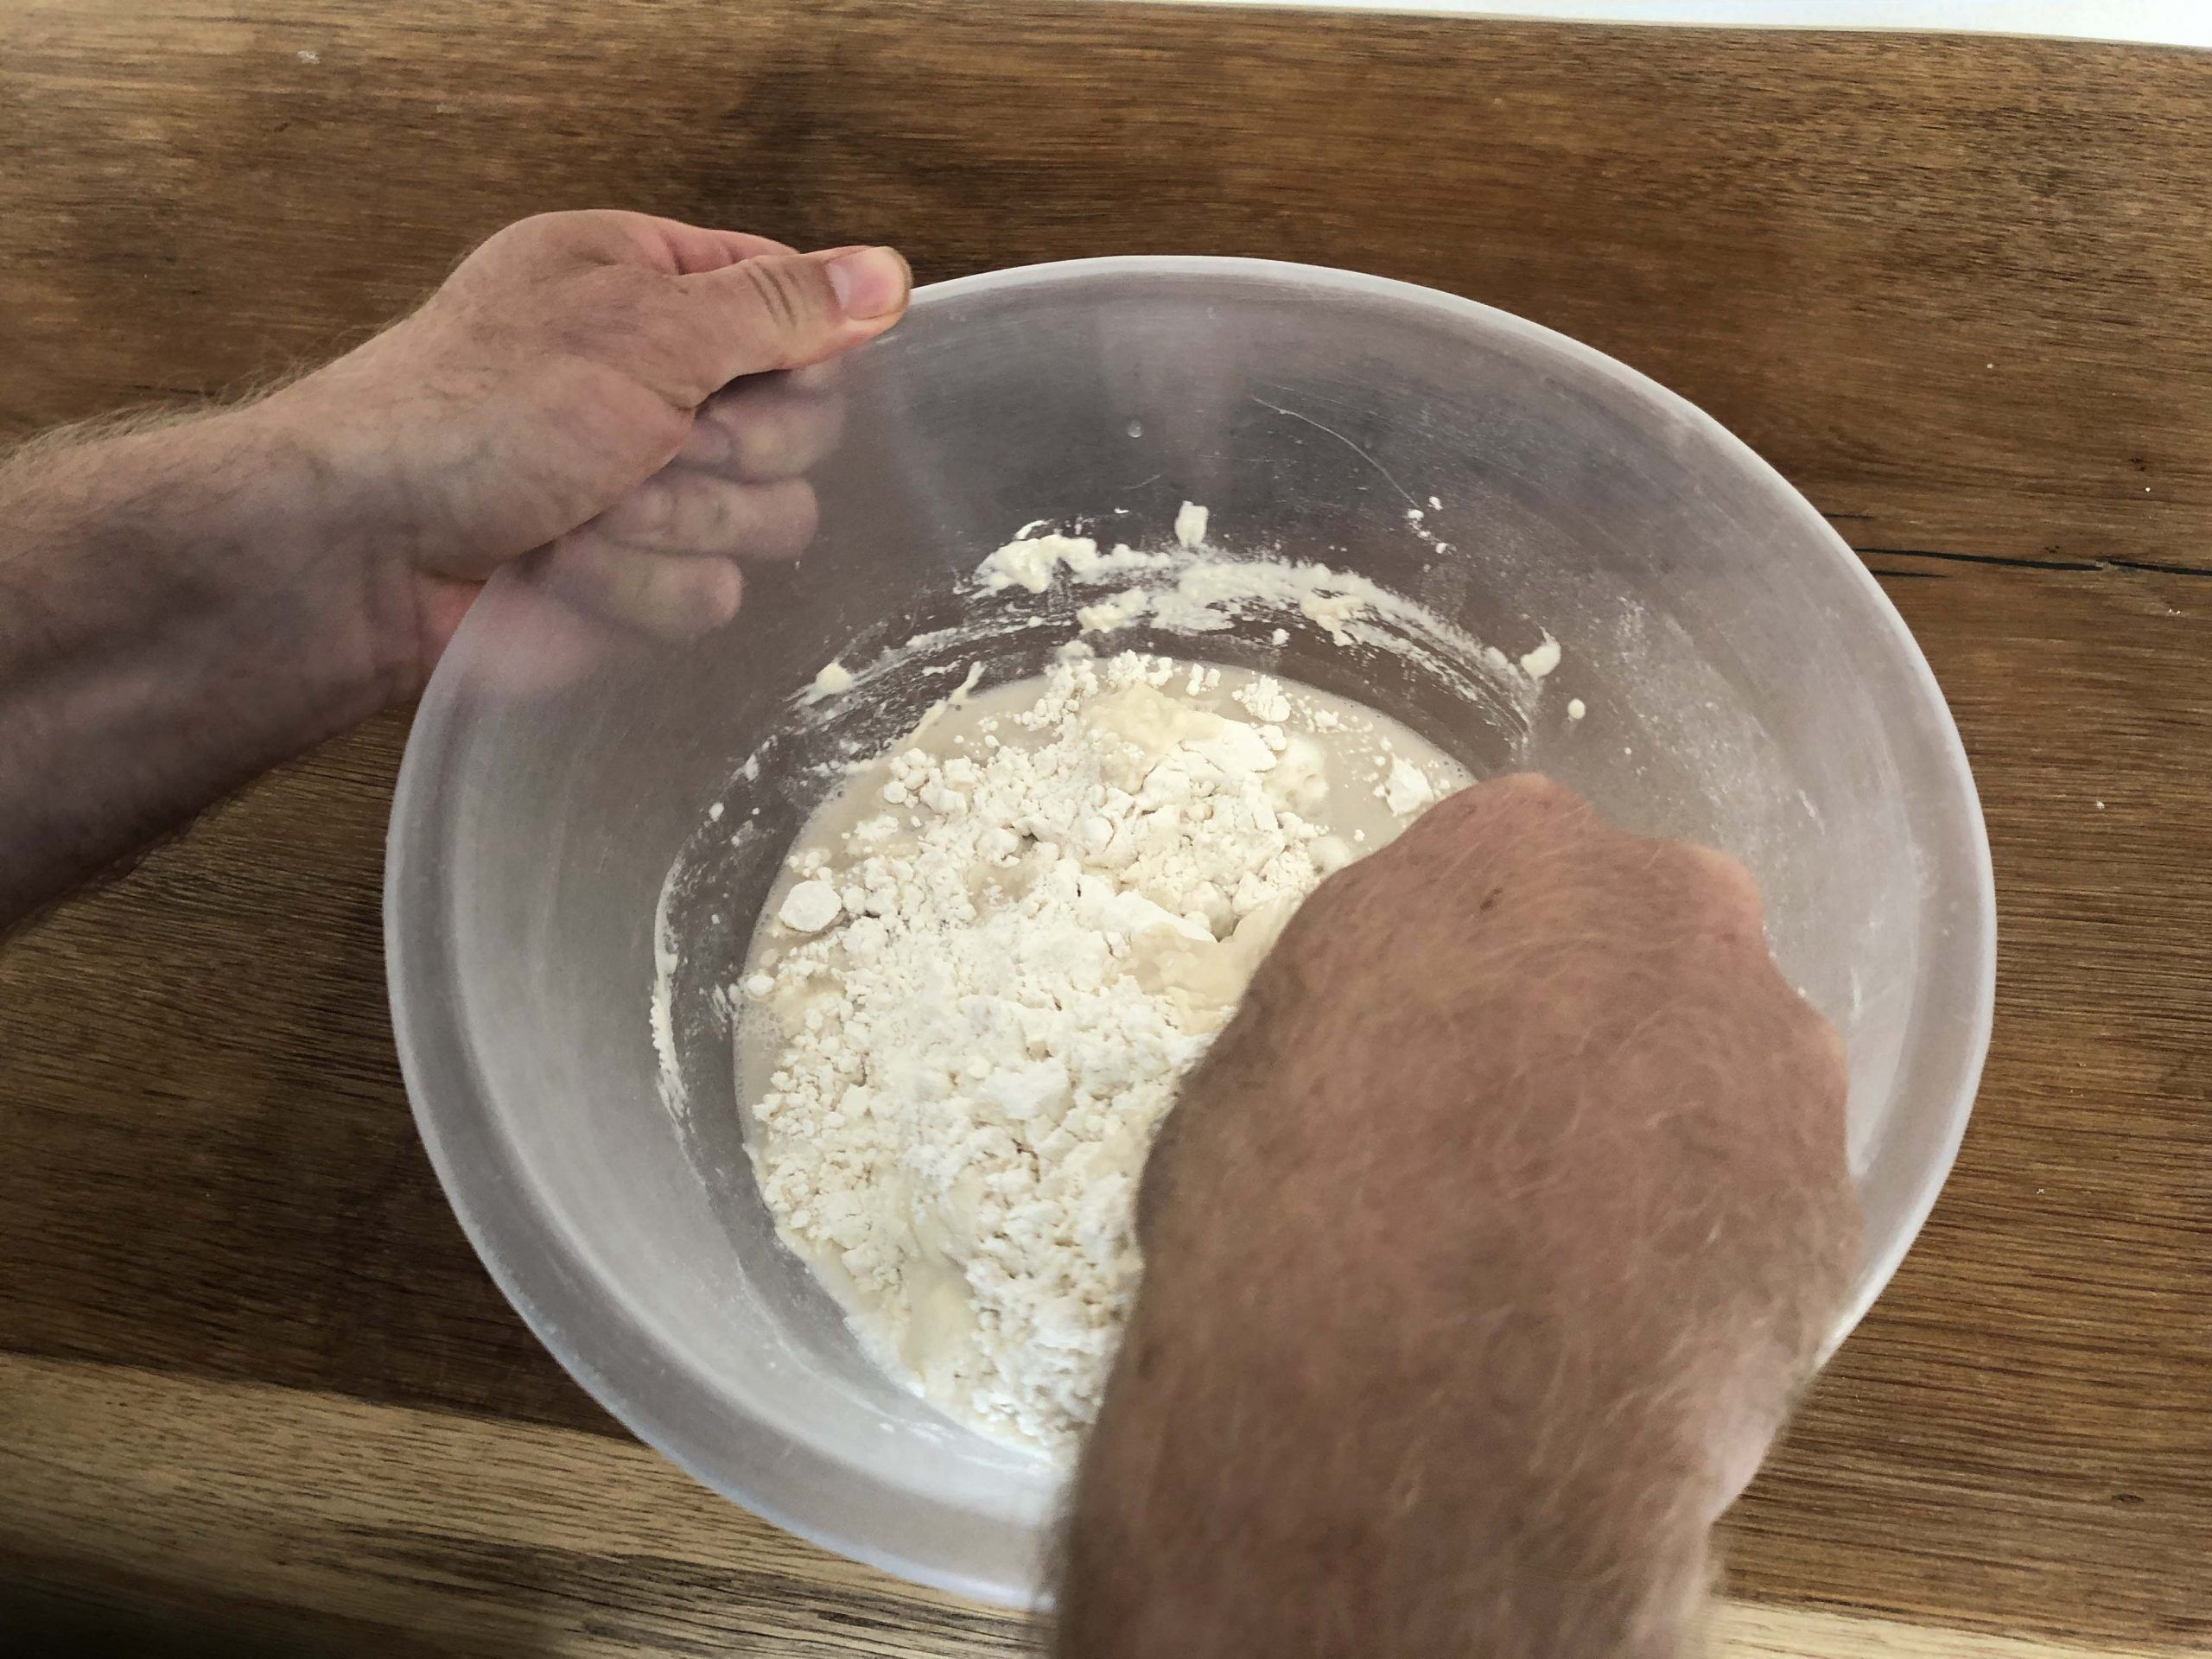

- Add the ingredients to a mixing bowl.
- Take a plastic scraper in your strongest hand and place it in the bowl at 12 o’clock, pointing the scraper towards the centre of the bowl.
- Your other hand holds the rim of the bowl at 12 o’clock.
- Use the bowl-holding hand to turn the bowl in a half-circle, bringing it down to 6 o’clock position. At the same time, move your scraper hand down to the same point.
- Your hands will both meet at the same point.
- Slide both hands back to their start positions and repeat.
- Keep repeating until the dough has combined and you feel you are making little impact. This should take 1-2 minutes.

Tip: Apply pressure on the scraper to push encouraging the ingredients to combine and form a mass.
A quick disclaimer
These methods and the results I’m describing are my own findings. I have not done any scientific readings to confirm my findings. I’ve just used my years of dough-handling experience to provide my feedback. I could be wrong. You may discover different results using the same methods.
The Claw incorporation technique
This is an alternative method of blending the ingredients. I don’t use it very often, but many bakers prefer this technique. The idea is you end up getting your hands dirty anyway, so you might as well “feel the dough”. The claw method is a great way to incorporate ingredients if you don’t have a dough scraper. It excels in lower hydration doughs where a scraper becomes redundant. It’s also a great way to get your hands dirty – if you like that!
| Rating criteria | Intensity (/5) |
|---|---|
| Evenly distribute the ingredients | 5 |
| Hydrates the flour with water | 3 |
| Develops a strong gluten structure | 1 |
| Incorporates oxygen into the dough | 1 |
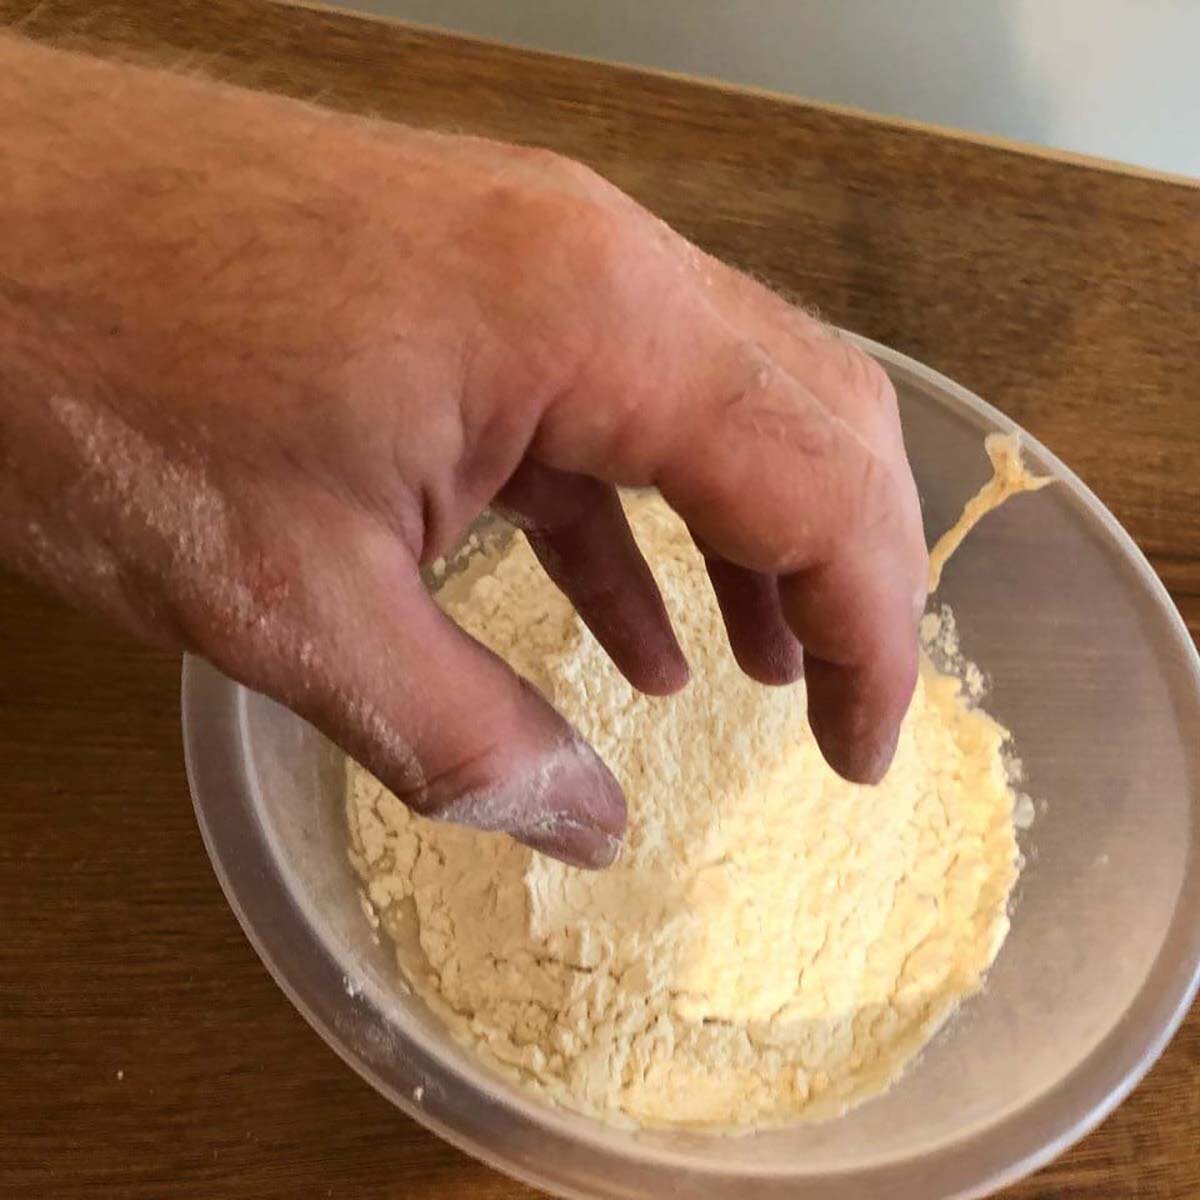

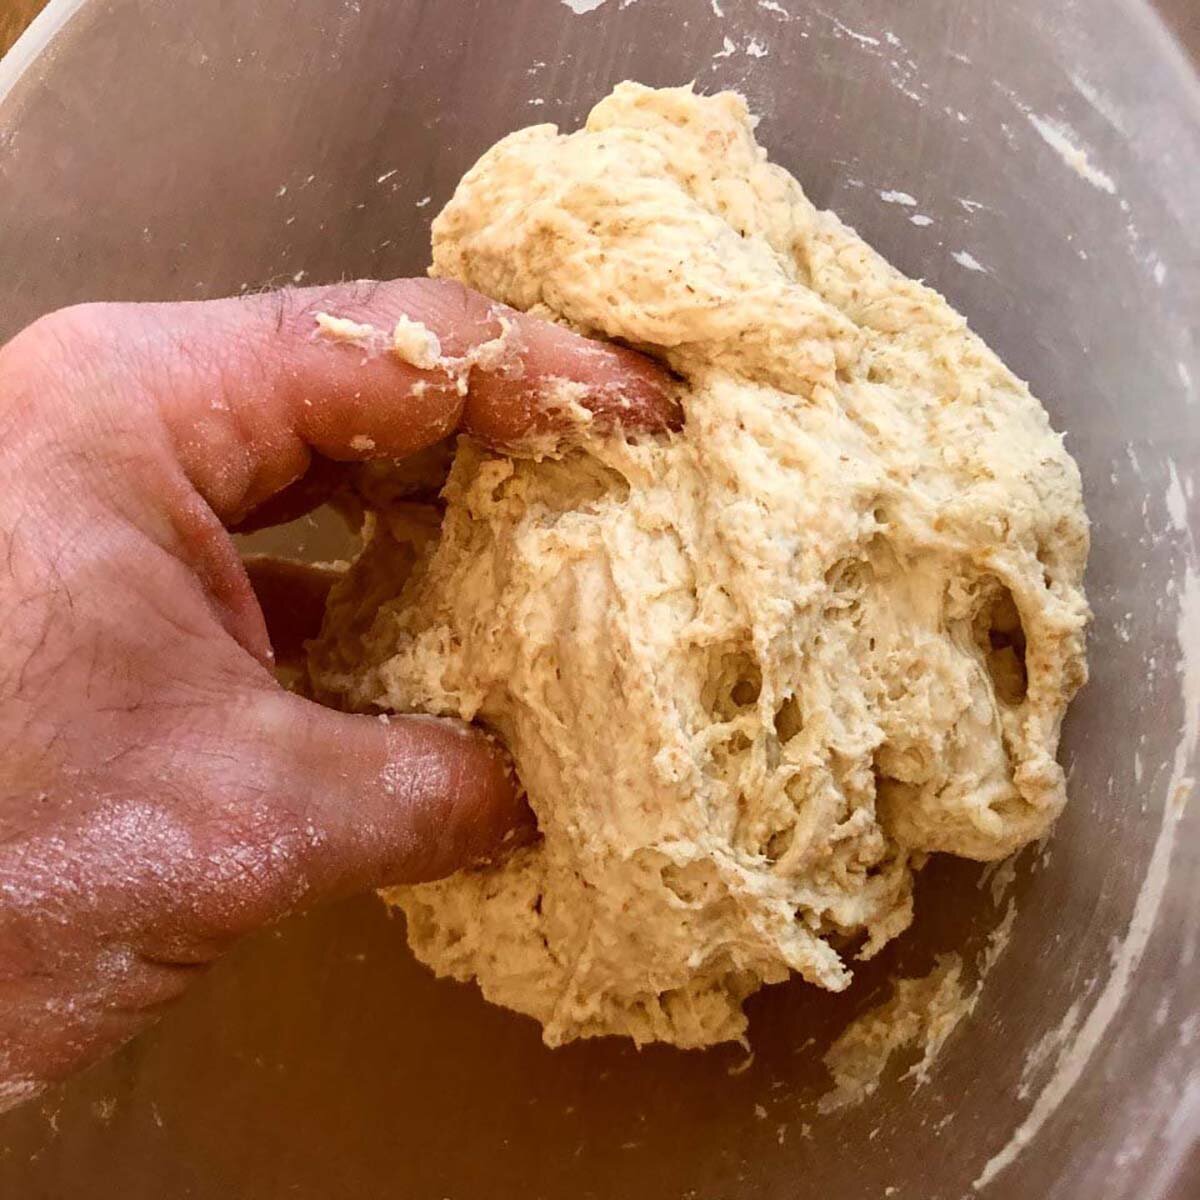
- Take your strong hand and shape it into a claw shape.
- Put your claw in the dough.
- Move it in a clockwise direction, whilst your other hand rotates the bowl in the opposite direction.
- After 1-2 minutes, the dough forms a mass.
How to knead dough with the slow method (intermediate)
Next, we move on to the slow kneading method, which makes the biggest difference in my bread dough. The dough has a lot of contact with the hands, so it will warm up quickly. That said, it really works the gluten well and supports the future development of a strong gluten structure!
| Rating criteria | Intensity (/5) |
|---|---|
| Evenly distribute the ingredients | 3 |
| Hydrates the flour with water | 5 |
| Develops a strong gluten structure | 3 |
| Incorporates oxygen into the dough | 1 |

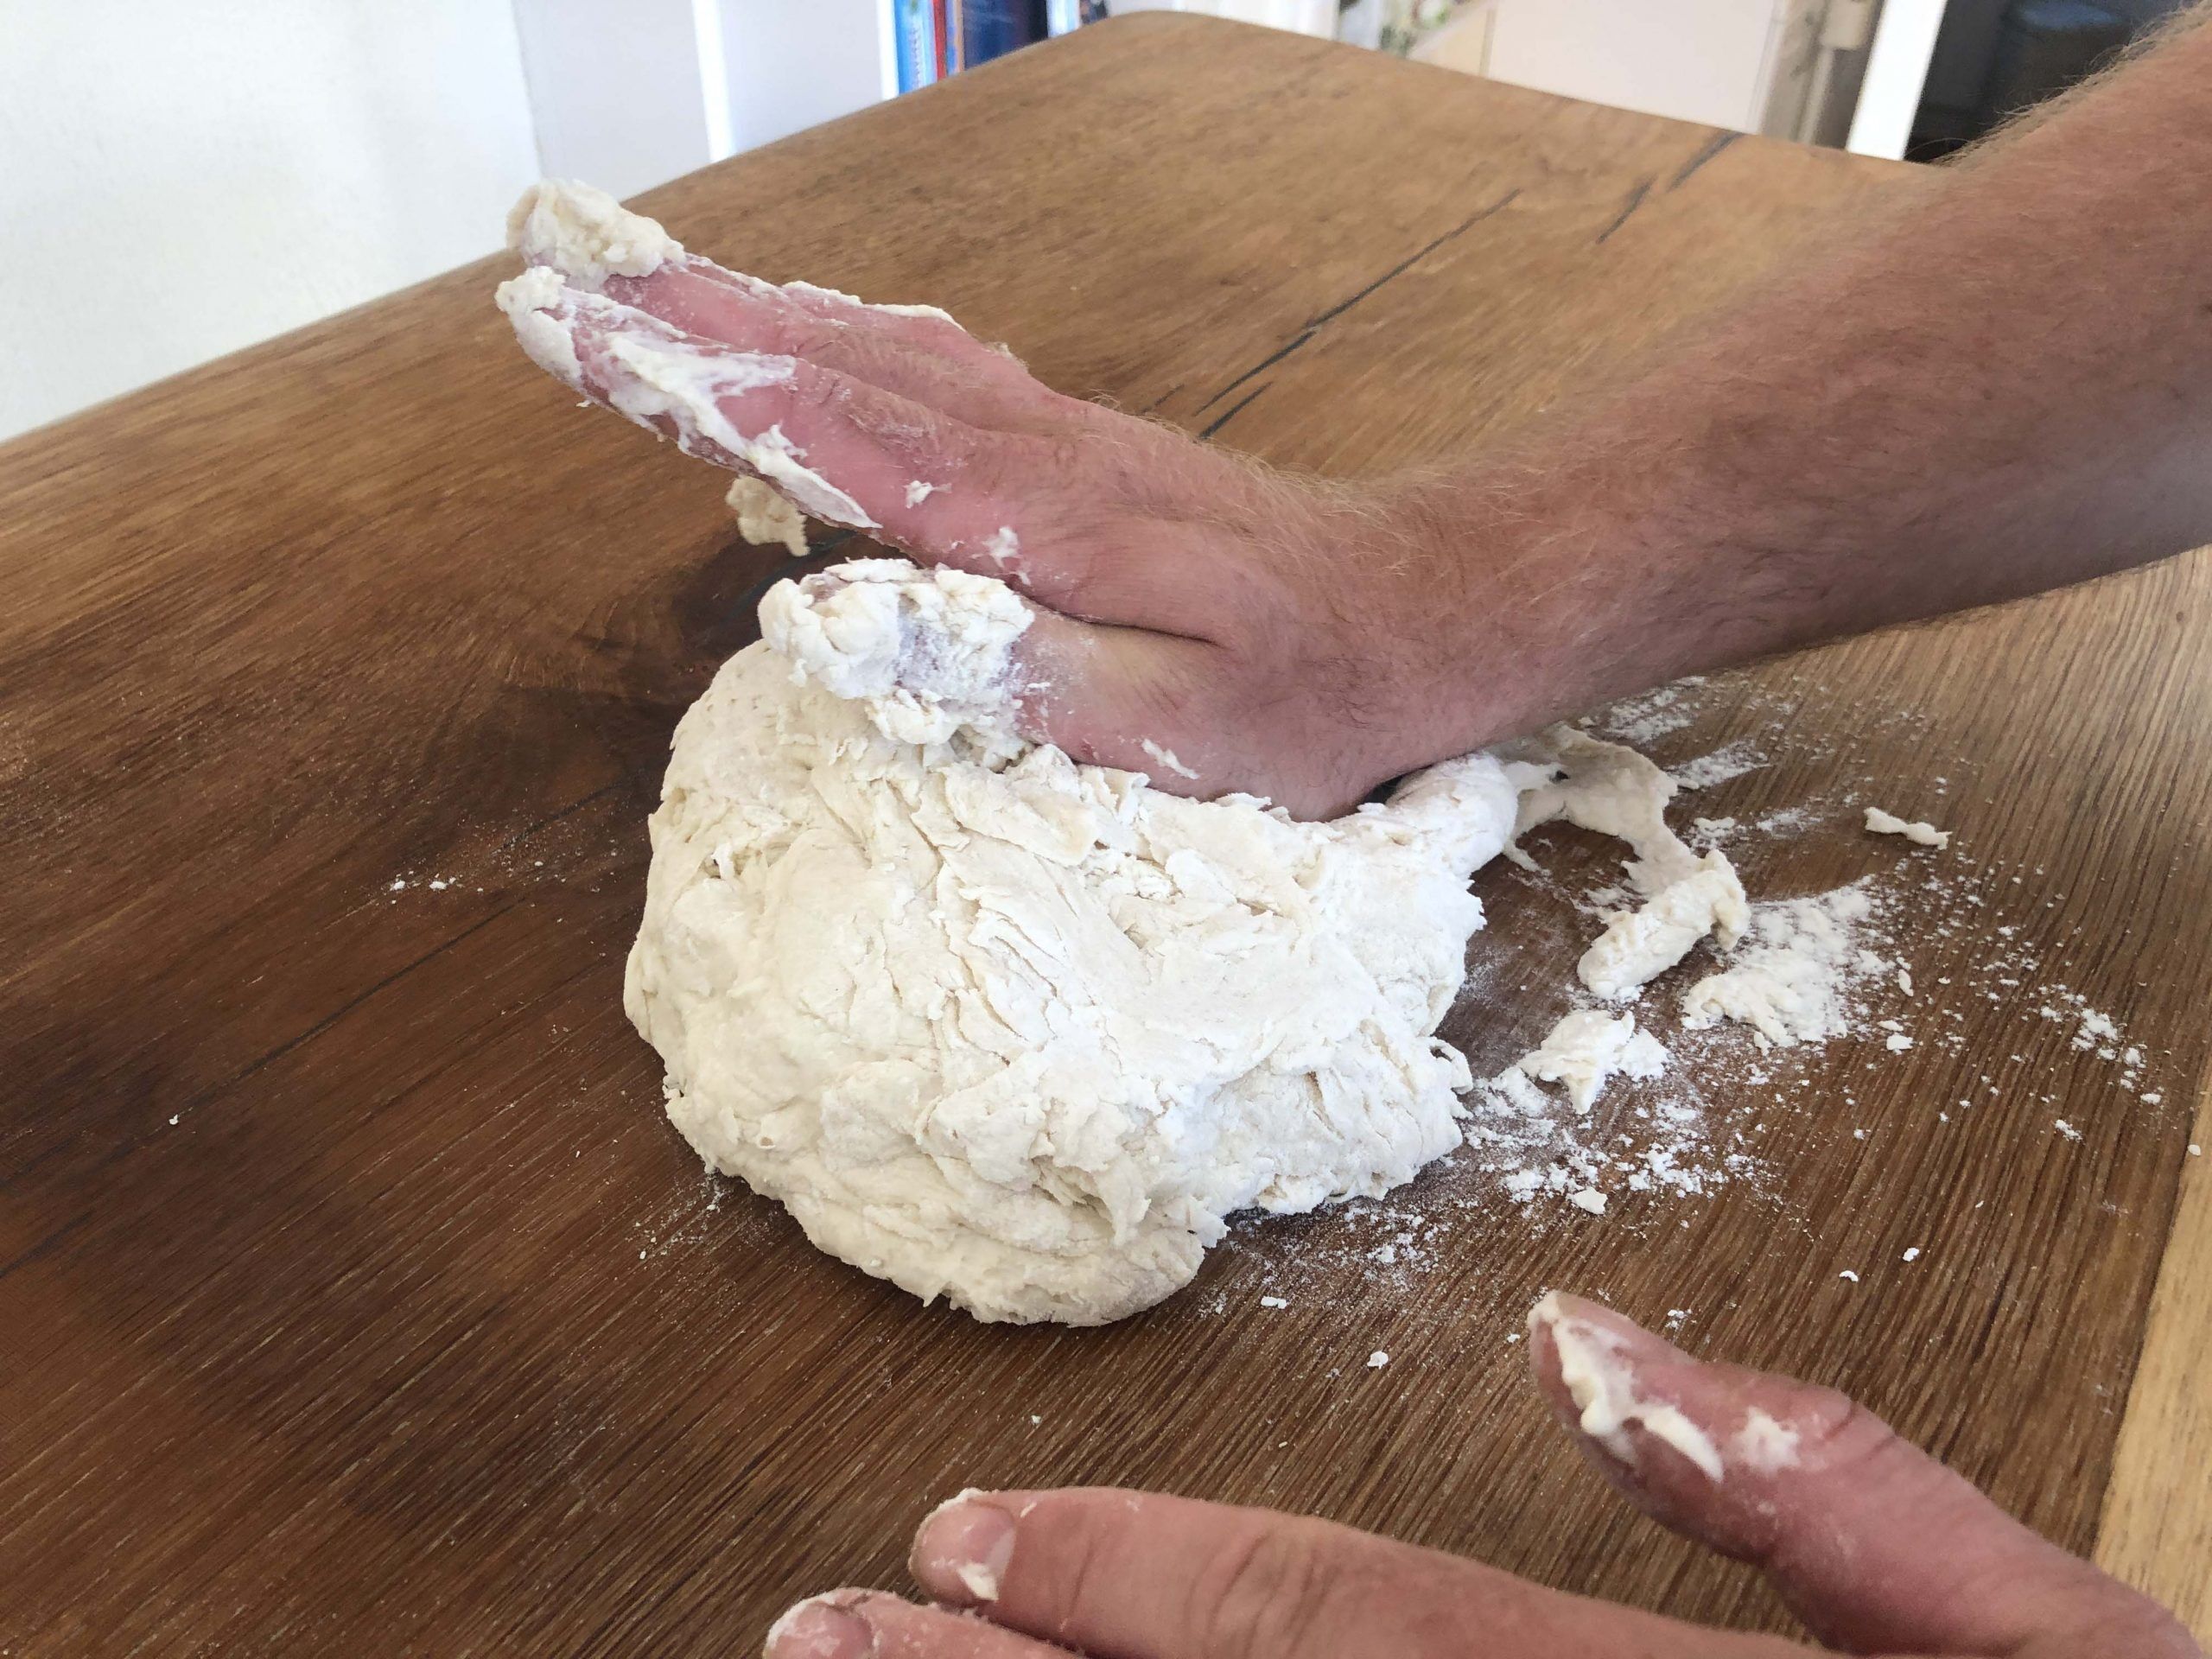
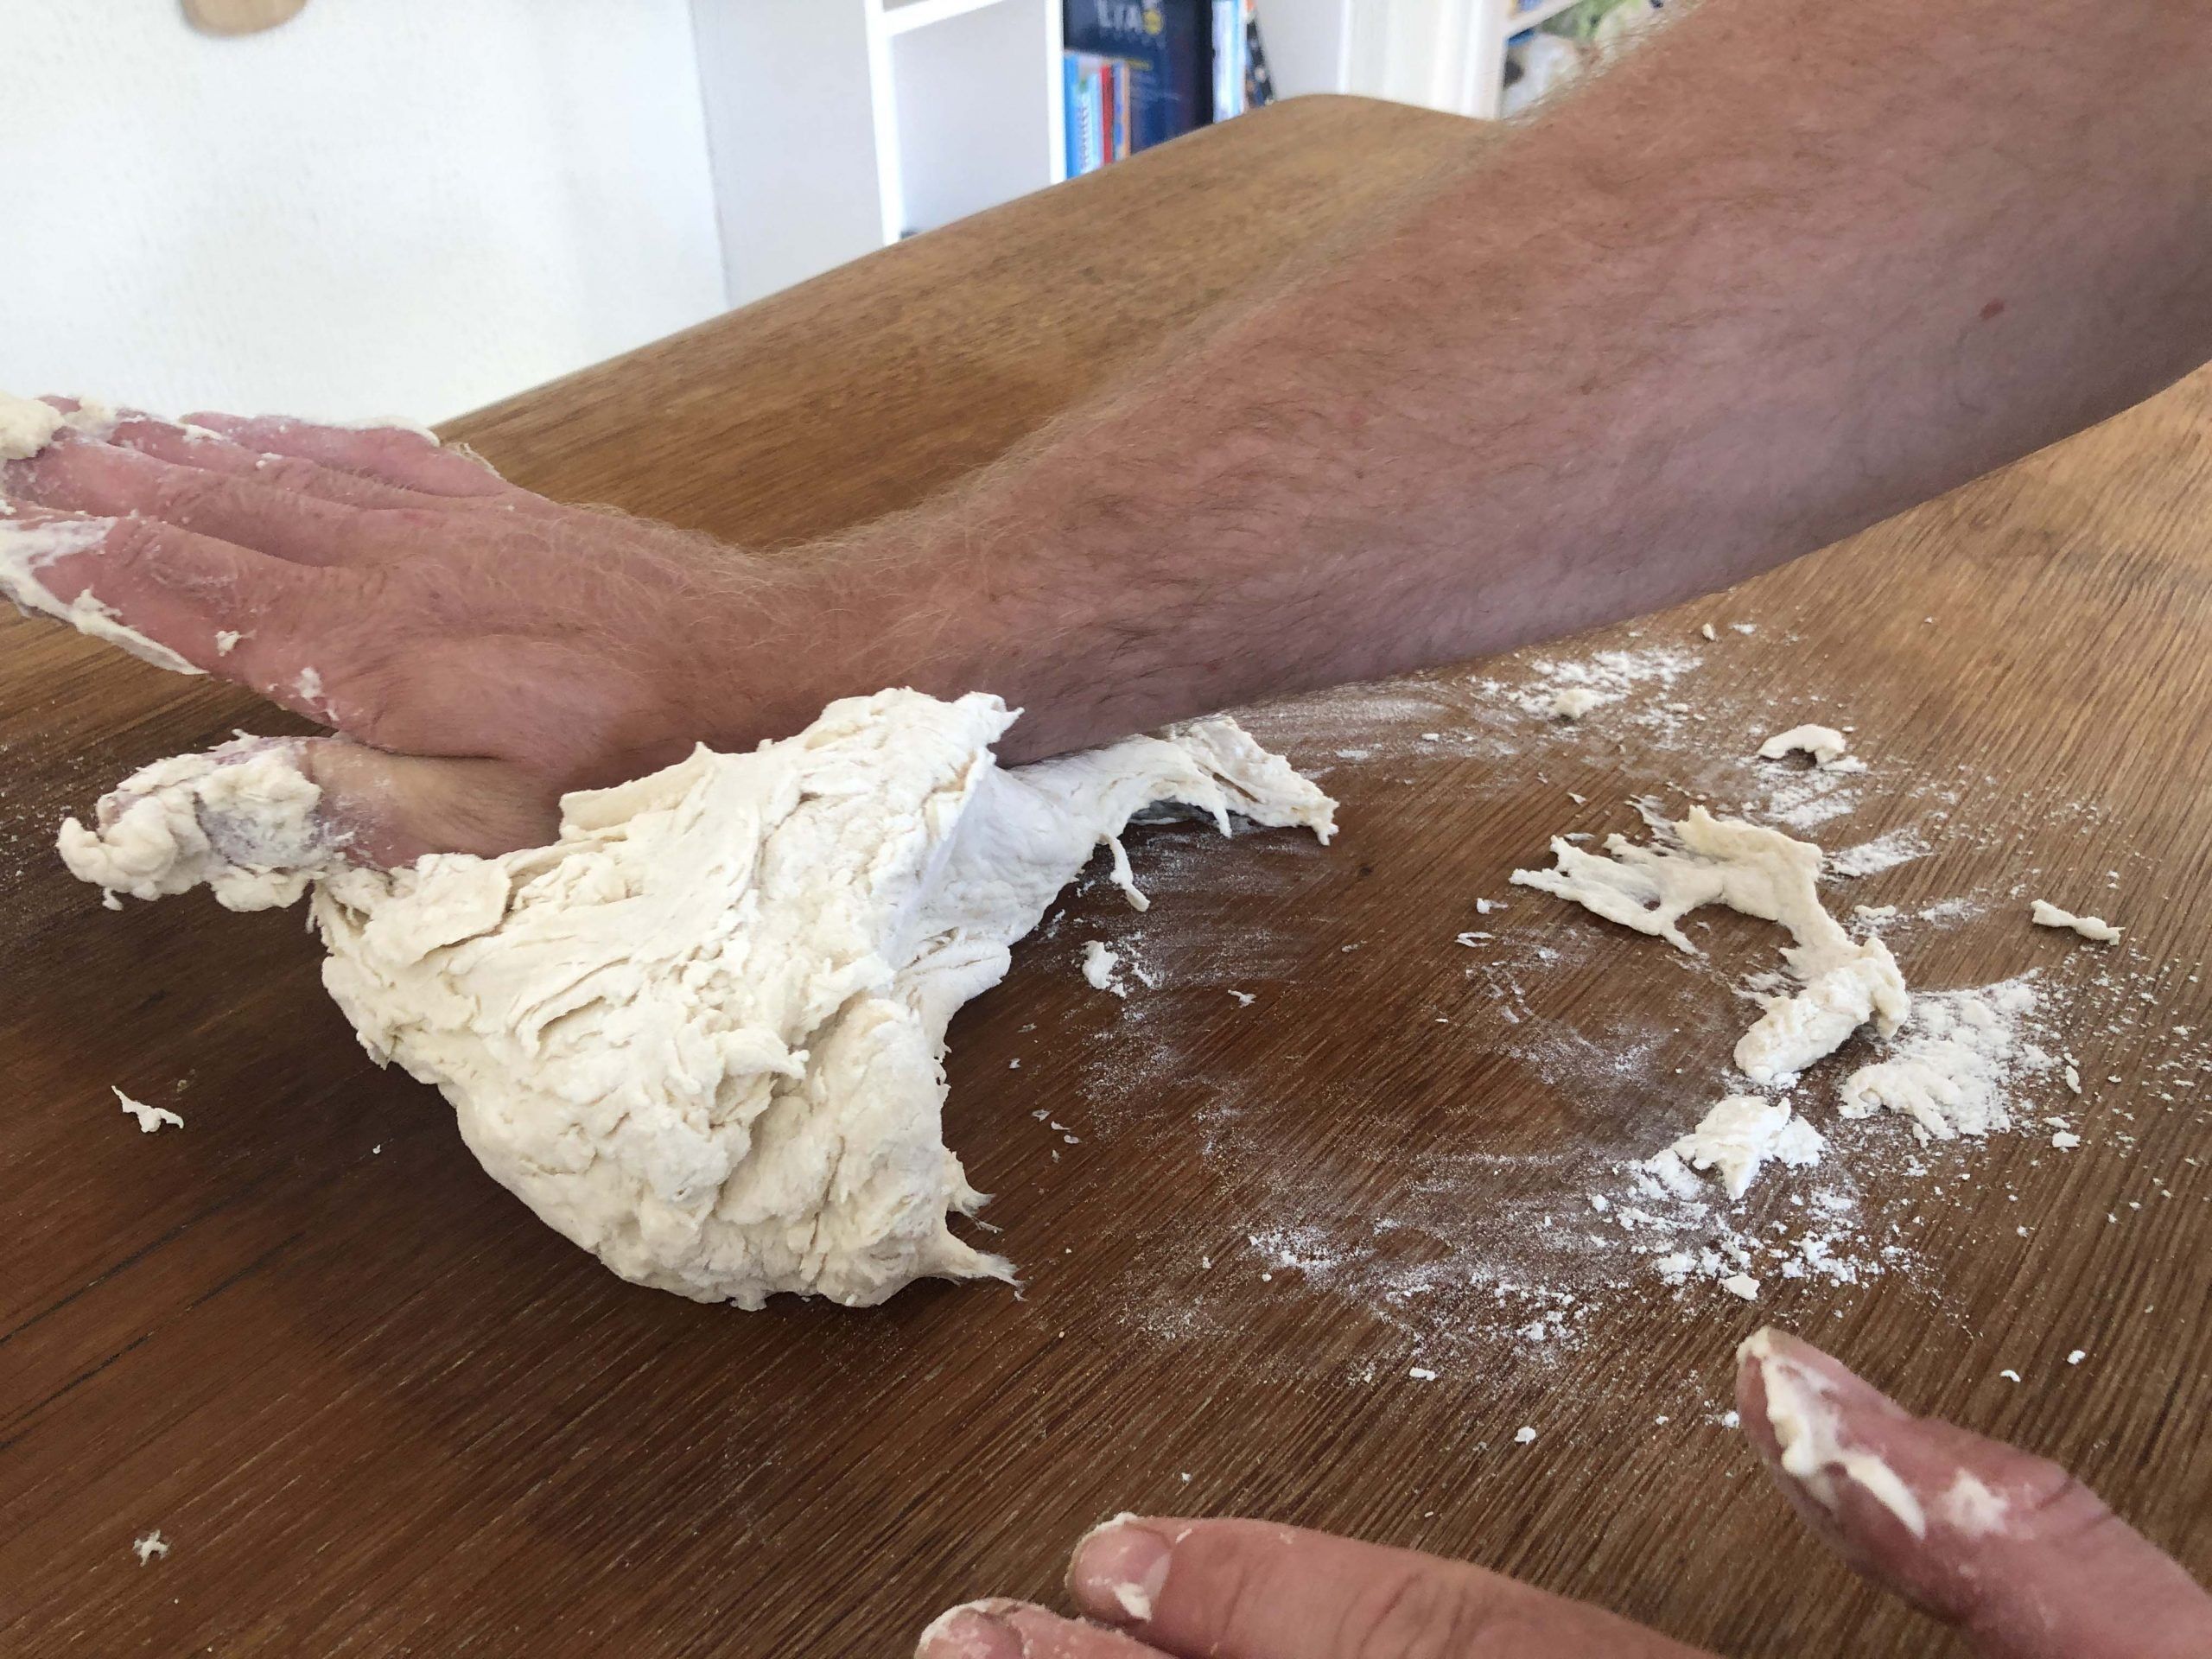
- Place the dough on a strong table or worktop.
- Take your strongest hand and use the bottom of your palm to push down into the dough and then away, dragging the dough on the surface.
- At the end of the movement, curve your push to bring the dough into a mass. You can use your other hand to bring it together.

- Push again and keep repeating, you can use your other hand to stabilise the dough whilst the other is pushing and then again when bringing it back together into a mass.


- Repeat for around 5-8 minutes. This stage ends once the dough has an even consistency that forms a mass easily. It shouldn’t be sticky or wet, and the gluten strands will feel long and strong.
Tip: If your dough gets too warm and sticky, put it in a bowl, cover, and cool in the fridge for 5-10 minutes before carrying on.
One-handed kneading technique
This method is less effective than the others. It takes a bit longer to develop the dough, but it is less intense, so if you are a stamina over sprint person, this one might be for you! Although I may not start out using this technique, I’ll often switch between methods when my hands tire. It does work, and I have made bread successfully using only this method.
This traditional kneading process is particularly good for dough with a low water ratio. The dough will absorb a lot of warmth from the hands, so try to steer clear of this one when a high level of gluten development is required. It’s best for simple pan loaves and small dough batches.
| Rating criteria | Intensity (/5) |
|---|---|
| Evenly distribute the ingredients | 1 |
| Hydrates the flour with water | 3 |
| Develops a strong gluten structure | 2 |
| Incorporates oxygen into the dough | 2 |
- Place the mass on a work surface in a disc shape.
- Take one hand to the edge of the dough closest to you and fold it over itself around halfway.
- Take from the bottom again and fold over to the top this time.
- Repeat until the dough is ready.
Keep repeating this process until the dough is gassy and elastic. It’ll become more fluid after a few attempts and is quite therapeutic once you get the hang of it!
Tip: You can stop halfway and allow your arms to rest for 5-10 minutes if you wish. Placing it in the fridge during this period will let the dough cool down if it gets too warm.
Rubaud method of hand kneading
This style of kneading was created by legendary baker Gérard Rubaud. It’s best for kneading wet dough and also…. very wet dough! Moving the dough quickly with wet hands develops the dough whilst incorporating lots of oxygen for strength. Best for short mixed doughs when a prefermented levain is used, such as sourdough. The preferred choice when making any long bulk fermented wet artisan doughs. Don’t use it for firm dough types.
| Rating criteria | Intensity (/5) |
|---|---|
| Evenly distribute the ingredients | 2 |
| Hydrates the flour with water | 3 |
| Develops a strong gluten structure | 4 |
| Incorporates oxygen into the dough | 4 |
- First, wet your hands with water.
- Place your strongest hand in a cupping shape.
- Hold the bowl with the other hand.
- Then, using your cupping hand, scoop the dough up to stretch it.
- Repeat stretching using a circular motion.
- After 15-20 repetitions, let go of the dough and repeat on a different area.
The French method
This method of kneading became popular through another French baker, Richard Bertinet. This baker brought his typically French approach to bread baking to England. The French method is known as the “Bertinet Method” by some. This technique works the dough at a mid-range rate that’s in line with how traditional one-speed mixers operate. Many French traditional loaves of bread excel when using this method. It’s a good all-rounder for French bread and large amounts of dough (if you are fit!), and prefermented dough. Not ideal when a high level of gluten development is expected.
| Rating criteria | Intensity (/5) |
|---|---|
| Evenly distribute the ingredients | 2 |
| Hydrates the flour with water | 3 |
| Develops a strong gluten structure | 4 |
| Incorporates oxygen into the dough | 3 |
Take the mass of dough onto the table. Using a hand on each side, pick up and stretch the dough outwards. Then throw the dough at the table and let it slap!

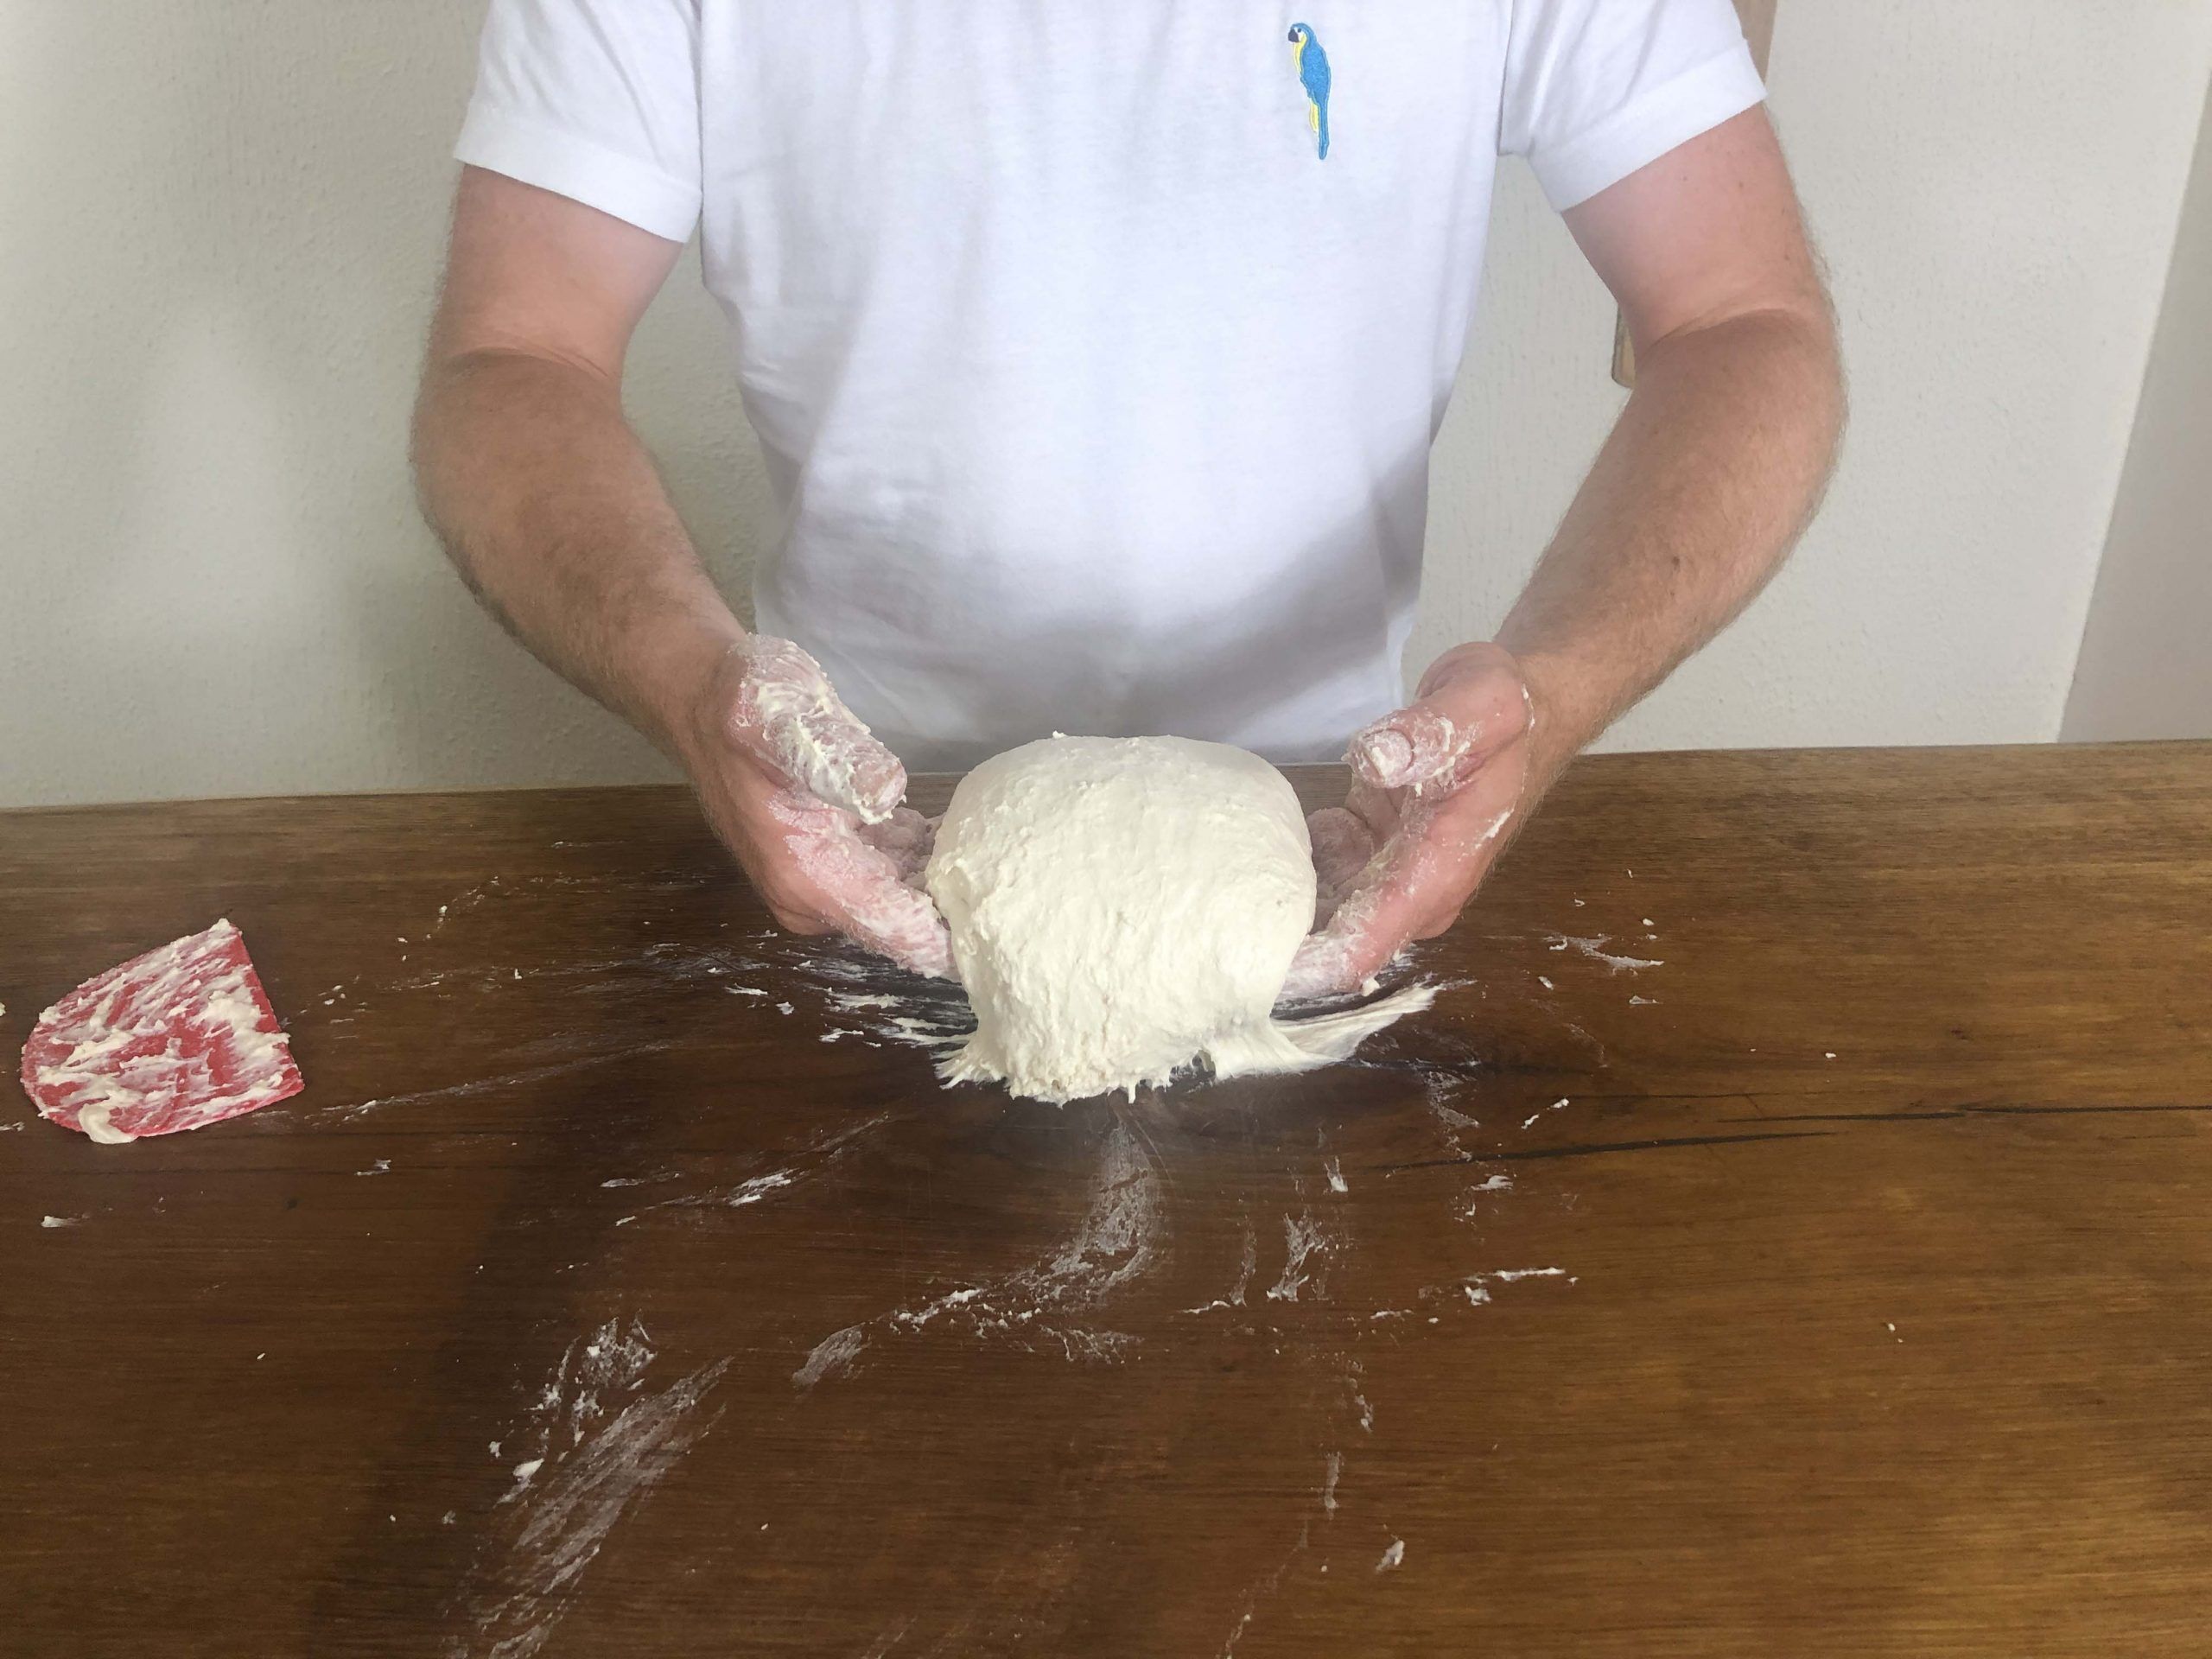


Next, use both hands again to pick up the dough from the centre, width ways. Lift the dough from the centre and turn it 90 degrees so the long side points away from you. Drop the closest edge on the table and then roll over the top. This takes a little practice. Use the video to see the technique firsthand.


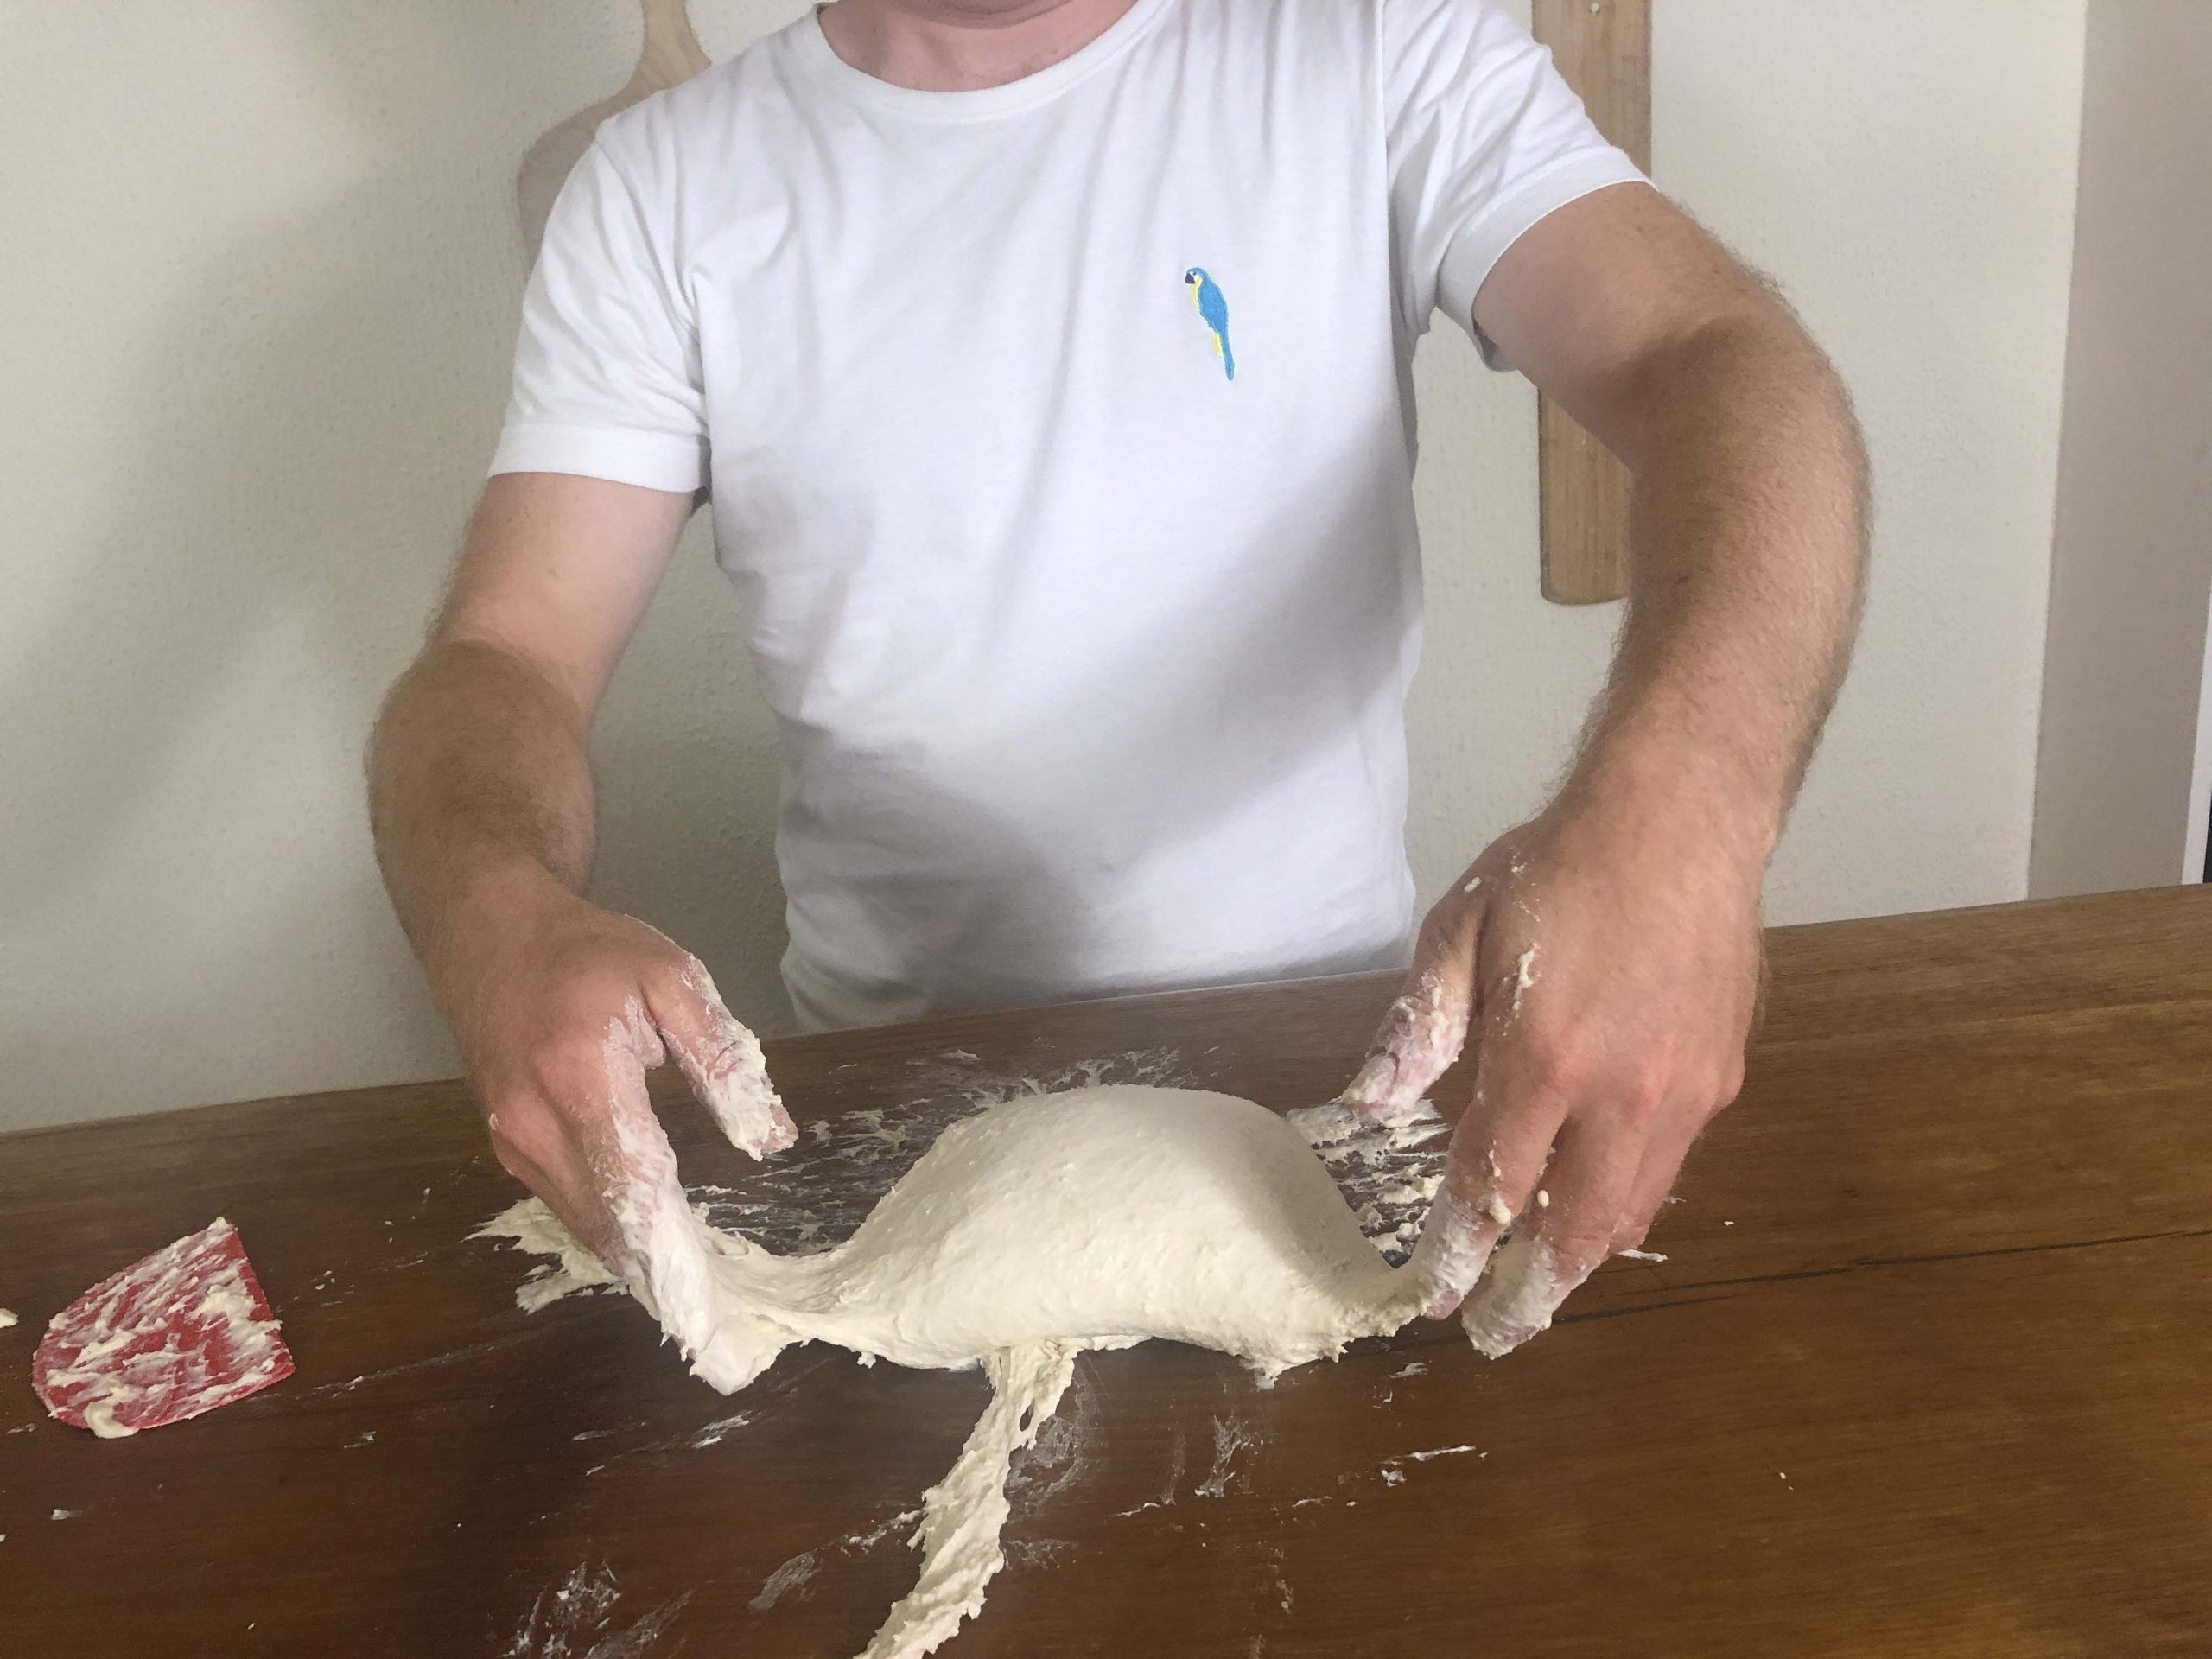

The dough should be in a rough ball, and we can start the method again. Repeat the slapping and the folding action for 10-20 minutes.
The stretch, slap and fold method
I discovered this method by accident when practising the French technique. It turns out it works and (IMO) works better at developing gluten. It’s the most effective way to develop gluten by hand kneading that I have found. And it does this without absorbing too much heat from my hands. It is best for prefermented doughs, ciabatta, and baguettes as it generates gluten strength quickly. Be warned, it is tiring and makes a lot of noise – there’s a story about that one that to tell one day!
| Rating criteria | Intensity (/5) |
|---|---|
| Evenly distribute the ingredients | 1 |
| Hydrates the flour with water | 2 |
| Develops a strong gluten structure | 5 |
| Incorporates oxygen into the dough | 5 |
- When the dough is on the table, take a side of the dough with each hand
- “Stretch” it out to at least double the width and throw it onto the table so it “slaps”
- Pick the dough back up with your hands and repeat 10 times
- Then turn your hands to pick the dough up at the centre of its width.
- Lift up and rotate and fold the dough into a ball.
- Then repeat the stretches, slaps and folds as fast as possible.
5 tips to make hand kneading bread easy
Here are a few golden rules that I follow when kneading and I recommend you should too:
- Use cool water for the dough to prevent it from getting warm and sticky when kneaded
- Choose the correct technique for the dough you are making
- Don’t add flour to the table -it just gets soaked up into the dough anyway!
- Don’t worry about over-kneading by hand. Just keep going!
- Use a timer so you can keep check of how long you are kneading
If you don’t have a timer already, try avoiding using your phone. Flour gets into it and can ruin it! Here’s the timer I recommend from Amazon.

How long should I knead dough?
The length of time that dough is mixed must be relative to the duration of the first rise. If the dough is well-kneaded, then the first rise is reduced. Likewise, a light amount of mixing should be partnered with a longer bulk ferment. See the how long should I knead dough page for accurate timings.
Ending thoughts on kneading dough
The topic of kneading dough can go on and on. I’ve spread more information about how to knead dough on sibling pages which you will find linked throughout this one. I hope that you’ve learned a few dough kneading techniques that you’re eager to try? If so, let me know which ones you’ll be trying next time you bake in the comments below, and if you’ve tried one, let me know how you found it!
Kneading dough frequently asked questions
If you’ve enjoyed this article and wish to treat me to a coffee, you can by following the link below – Thanks x

Hi, I’m Gareth Busby, a baking coach, senior baker and bread-baking fanatic! My aim is to use science, techniques and 15 years of baking experience to make you a better baker.
Table of Contents
- The results
- What is the point of kneading dough?
- The stages of kneading bread dough
- How long should I knead bread dough for?
- The dough scraper incorporation technique
- The Claw incorporation technique
- How to knead dough with the slow method (intermediate)
- One-handed kneading technique
- Rubaud method of hand kneading
- The French method
- The stretch, slap and fold method
- 5 tips to make hand kneading bread easy
- How long should I knead dough?
- Ending thoughts on kneading dough
- Kneading dough frequently asked questions
Related Recipes
Related Articles
Latest Articles
Baking Categories
Disclaimer
Address
53 Greystone Avenue
Worthing
West Sussex
BN13 1LR
UK


