What Is The Best Bread Proofing Temperature?

If bread dough is too warm, yeast activity accelerates and becomes unmanageable. Too cold, and the dough will take longer to rise. Sounds simple right? But, there is more to proofing temperature than just timing. Temperature is such a key variable in dough fermentation that many bakers consider it an ingredient in their recipes. Its impact is massive! Read on to learn more about the impact of changing the bread proofing temperature and the best temperature to proof bread dough.
What happens during proofing?
First off, “what is proofing bread”? Well, it’s what happens once the dough exits the mixing bowl until the bread “proves that it’s ready” to go into the oven. It’s common to break down proofing into two stages, bulk fermentation and the final rise:
The first rise, or “bulk fermentation”, occurs right after kneading.
Here, the batch of dough naturally develops in a container, sometimes with the addition of stretch and folds. The dough becomes more mature and flavourful during this stage, allowing it to retain gas and better hold shape.
After bulk fermentation, the dough is divided and moulded to its final shape, ready for the second rise.
The second rise, or “final proof”, is where carbon dioxide gas fills the pockets of gluten developed in the earlier stages. Carbon dioxide is produced by aerobic or anaerobic respiration by yeast. The gluten structure retains the gas, forcing the dough to expand.
Once the dough rises to its optimum height, it is “proofed” and baked in the oven. During the first few minutes of baking, the yeast produces an extra burst of gas, making the bread rise further. This extra rise is called the oven spring.
Proofing vs bulk fermentation- What’s the difference?
During the first and second rise, the same processes occur. Yeast produces gas throughout both. The difference is that bulk fermentation and proofing aim to achieve different things. During bulk fermentation, the dough matures by:
- Strengthening its gluten network
- Breaking down starch into sugars to feed the yeast cells
- Developing organic acids
The dough still does all of those during proofing, but the primary aim of the final rise is for the dough to rise until it is ready for the oven.
Tip: It's expected that the bread has doubled in size during proofing. You can also use the poke test to help test when bread is ready to bake.
What happens when the proofing temperature changes?
Yeast activity increases and decreases depending on the temperature of the dough. When warm, yeast produces more gas as it burns through the sugars it has available to it.
Gas production is halted once temperatures pass 68C (155F). At this point, the yeast becomes permanently deactivated.
Yeast is still active in cooler conditions, albeit at a slower rate. However, the enzyme amylase operates best between 25-32C (78-90F). Amylase is very important in bread dough as it breaks down the starch in the flour into simpler sugars called monosaccharides. This is important as complex sugars are too large to penetrate the cell walls of the yeast.
If a yeast dough is proofed below 25C (78F), it soon consumes the available sugars, and the rise slows down. For this reason, it is not advised to proof bread dough below 25C (78F) unless in the refrigerator.
Choosing the ideal proofing temperature
The ideal temperature to proof bread depends on the bread you are making. High-output bakers typically set their proofers at 38C (100F) for their bread to rise quicker, yet artisan bakers prefer slower rises and proof bread at temperatures close to 26C (79F). Here are four essential factors that change as the temperature of the dough increases:
1. Timing
Dough proofing at warmer temperatures will rise faster. This is great for speeding up the baking process. In busy production, the temperature of proofing dough can be changed to speed up or slow down specific batches of bread. This prevents bottlenecking the ovens by providing a continuous supply of bread ready to bake.
When considering the impact temperature has on yeast activity, at 20C (68F), the proofing rate is half of that at 30C (86F). If dough is proofed at 20C (68F), it will take twice as long to rise than at 30C (86F).
2. Flavour & aroma
Enzymes and bacteria found in the dough prefer different temperatures. Like wine, if the dough is proofed in warmer temperatures, it will be lightly flavoured. If it’s a cooler temperature, it will be more aromatic.
3. Texture
If yeast activity is sped up by increasing the temperature, gas will be created quickly, but the dough might lack maturity. We can mix the dough for longer to improve the strength of the gluten network, but the dough will still miss some vital organic acid maturity.
Underdeveloped bread can contain unwanted irregular holes throughout the crumb, sometimes known as “tunnelling”. Additives such as ascorbic acid, vinegar, or soy flour can be added to “quick bread” to improve the crumb structure.
Extending bulk fermentation is a natural and more “artisan” way of enhancing the gluten structure.
4. Keeping quality
Bread made slowly develops organic acids and ethanol, which add maturity to the dough. This benefits the gas-retaining properties of the dough and increases the acidity of the bread.
A more acidic environment is more challenging for mould to develop and makes starch less able to recrystallise. This keeps bread softer and fresher for longer.
Warmer, faster rises don’t make long-lasting bread without extra manipulation.
How does proofing humidity impact the final bread?
Humid conditions are also excellent for yeast fermentation. The moisture increases water activity, making it easier for the dough to ferment. This accelerates carbon dioxide and ethanol production.
The benefits of cold proofing temperatures
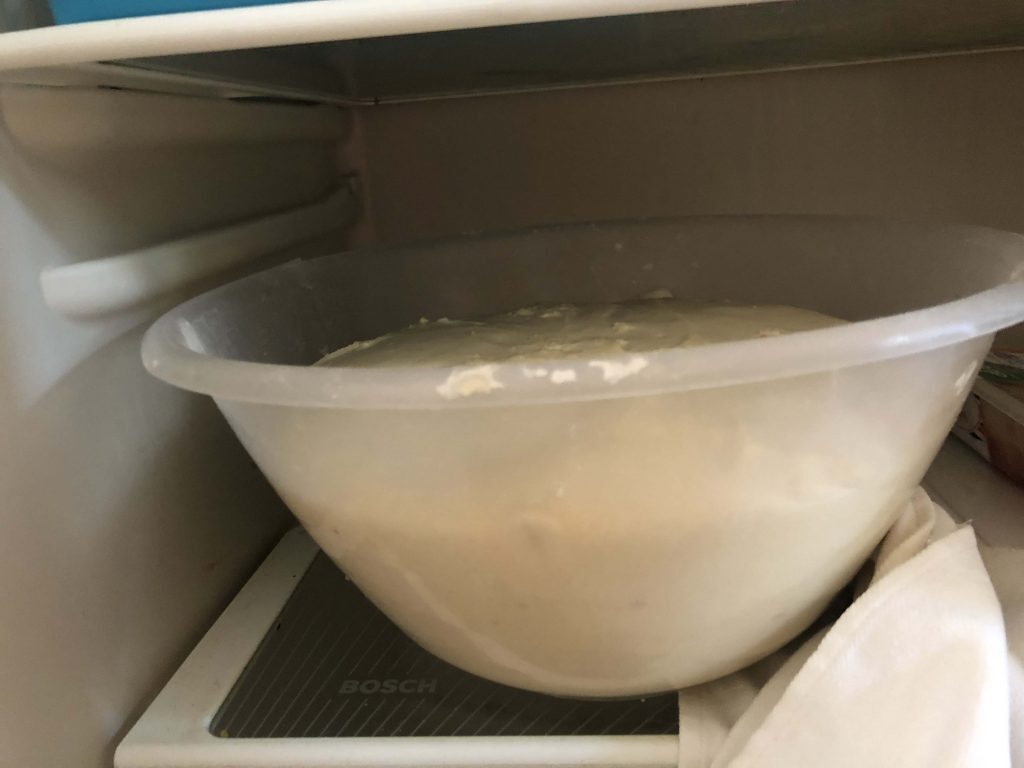
Proofing bread in low temperatures below 10C (50F) slows yeast activity. However, some dough maturation occurs through natural hydrolysis. This is the action of the hydrated wheat breaking down into sugars.
Cold proofing or bulk fermentation leads to the breaking down of more complex starches. This releases new flavours in the bread and often produces sweeter notes.
During this time, the hydrated protein continues to form a close-knit gluten network to mature the bread structure. Here are some critical adaptations of dough after being proofed in the fridge.
- Enhanced gluten structure making it possible for large air pockets and a more” open crumb”
- An increase in gluten extensibility leads to improved gas retention (a more considerable rise and lighter texture)
- The dough can lose extensibility if the dough is proofed for too long, causing a broken gluten structure
- The bread flavour and aroma will be more intense and sweeter tasting
- An improvement in dough handling properties (machinability)
- The dough will take longer to be ready for the oven
- Continued exposure to air results in the risk of over oxidation
- Potential collapse or gummy crumb if the flour is not strong
- If the dough is baked from cold, larger loaves can suffer from the core of the loaf remaining cold and reducing the oven spring or turning out dense
So some good and some bad. There is no fix-all solution in bread baking. Every change you make has a positive and adverse effect on the bread! See, can dough go bad in the fridge to learn more.
How does the final dough temperature affect proofing dough
The final temperature of the dough (FDT) is its temperature after it has finished kneading. Getting the dough to reach the ideal temperature means the best start for dough fermentation.
Get it wrong, and you might need to change the temperature of the proofing environment to slow down or speed up the rise of your bread.
How it works: Bakers use a Desired Dough Temperature (DDT) formula to determine the ideal water temperature for each dough. It uses the temperature of the flour and the room to calculate the temperature that water should be.
The aim is for the dough to be at the correct temperature at the end of mixing, called the Final Dough Temperature (FDT).
If the FDT is too warm or cold, the proofing environment may be cooled or warmed to aid the rise.
Basic DDT formula:
DDT x3 – Room temperature – Flour temperature – 18 = Water temperature
Example For a 24C DDT: Room temperature is 25C, and the Flour temperature is 20C:
72 – 25 – 20 – 18 = 9
The water temperature should be 9C
This method also works in Fahrenheit. Instead of 18, take away 30
How to control bread proofing temperature
First off, you’ll need a dough thermometer to really master your final dough and proofing temperatures. There are laser thermometers, but I like probe thermometers as they can take readings in the centre of my dough. Here is the one I use at home:

A proofer is used for the most accurate control when managing a proofing environment. They are fantastic bits of kit! And what’s more, you can get one suitable for your home baking station for a very reasonable price!
The quality of the Brod & Taylor proofer shown below is outstanding. Not only does it control temperature, but it also adds humidity to the proofing chamber!
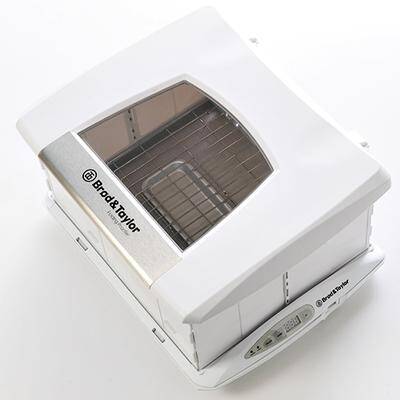
There’s no need to cover the dough to stop it from drying up, and you will be more consistent with your proofing times.
If you want one, go direct to Brod & Taylor or Amazon.
What is the best bread proofing temperature?
The ideal proofing temperature is different for all types of baked goods. It will affect how the loaf looks, feels, smells, tastes and stays fresh. It gets more complicated, considering the first and final rise can be at different temperatures. Here are some popular bread types with their ideal proofing temperatures and timings:
Imperial proofing temperature table
| Bread | Dough Temp | Proofing Temp | Bulk Fermentation Duration | Final Fermentation Duration |
| Pullman loaf – commercial | 84F | 100F | nil | 60-90 mins |
| Soft Rolls | 84F | 100F | nil | 60 mins |
| Artisan Loaves | 77F | 80F | 3-5 hours | 2-3 hours |
| Baguettes | 77F | 80F | 90 mins | 60 mins |
| Sourdough Bread – light | 77F | 72-79F | 4-5 hours | 3-4 hours |
| Sourdough Bread – acidic | 84F | 88-94F | 3 hours | 2-3 hours |
| Sweet bread | 77F | 81F | 1-2 hours | 1-2 hours |
| Pastries & croissants | 69-75C | 81F | 2-4 hours | 2 hours |
| Rye bread | 84F | 81-88F | 90 minutes | 1-2 hours |
Metric proofing temperature table
| Bread | Dough Temp | Proofing Temp | Bulk Fermentation Duration | Final Fermentation Duration |
| Pullman loaf – commercial | 28C | 38C | nil | 60-90 mins |
| Soft Rolls | 28C | 38C | nil | 60 mins |
| Artisan Loaves | 24C | 26C | 3-5 hours | 2-3 hours |
| Baguettes | 24C | 26C | 90 mins | 60 mins |
| Sourdough – light | 24C | 21-25C | 4-5 hours | 3-4 hours |
| Sourdough – acidic | 28C | 31-34C | 3 hours | 2-3 hours |
| Sweet bread | 24C | 27C | 1-2 hours | 1-2 hours |
| Pastries & croissants | 20-23C | 27C | 2-4 hours | 2 hours |
| Rye bread | 28C | 27-30C | 90 minutes | 1-2 hours |
Note: These timings and temperatures are subject to the standard mixing duration for each dough type. If the dough is mixed for longer, the first rise will be reduced.
Why proof bread at 38C?
We can also consider the gas production route of the yeast. When yeast respires in the presence of oxygen, it produces lots of energy.
When respiring anaerobically (without oxygen), the alcoholic fermentation process takes over to produce ethanol alongside carbon dioxide. This process is less efficient, but the slower rise allows the development of lactic acids and other organic compounds to mature the dough.
What happens is that gas production is slower at the beginning of proofing. Gas production increases as the dough warms, but the bread’s inner core won’t be as warm as the outer.
Once the dough temperature reaches 38C (100F), the amylase enzyme is less effective, slowing gas production. This has two benefits:
- There is more breathing space for the bread to be loaded into the oven.
- Alternative enzymes and acid bacterias prevail, adding extra flavour to the bread.
What is the best proofing temperature for artisan bread?
Artisan bakers prefer a cooler bread proofing temperature, typically in the region of 25-32C (78-90F). This slows yeast activity which means a longer development time, less kneading, more fermentation flavours and less risk of over-oxidation.
Many artisans include an overnight bulk fermentation or final rise in the refrigerator. This combines the benefits of cold fermentation without working through the night.
What is the best proofing temperature for sourdough?
As sourdough is a less vibrant levain compared to baker’s yeast, it needs a longer time to rise. Many bakers cold-proof sourdough, yet it must also spend time at warmer temperatures to rise.
The perfect proofing temperature can change depending on the species cultured in a sourdough starter. The best proofing temperature for sourdough bread is around 34C (93F).
Proofing at a warmer temperature supports the acidic bacteria at higher rates. This means a faster rise and a more lactic or yoghurt-like taste. Lower temperatures make the sourdough rise slower, creating a more acidic vinegary flavour.
For more acidity in your sourdough bread, proof at 31-34C (88-93F). For a lighter, more aromatic loaf, the ideal proofing temperature should be 21-25C (70-78F).
What is the best proofing temperature for rye bread?
Rye flour doesn’t contain gluten. It uses proteins called pentosans to build a structure capable of retaining gas. Rye bread best rises at around 27C (81F).
What happens if the final dough temperature is wrong?
The desired dough temperature (DDT) formula can only be used as a guide. There will also be kinetic energy imputed into the dough from kneading by hand or in a mixer. This is called the Friction factor and is represented in our formula by the number 18 (30 when using Fahrenheit).
Any DDT formula is not always 100% accurate, and at some point, you will forget to take the readings! Here are some tips on what to do if it goes wrong:
What should I do if the final dough temperature is too hot?
If the dough is too warm after mixing, you might be able to lower the temperature of the proofer. But if I can’t do this, place it in the fridge for ten minutes to cool down. After this, it can be removed and it will develop at the expected rate.
What should I do if the final dough temperature is too cool?
If the dough is too cool, increase the temperature of the proofing environment to compensate. If you can’t do this, I’ll put it in a warmer place for a short period to warm up. There won’t be a problem if it is not warmer than 38C (100F).
What should I do if I forget to take a temperature reading?
All you can do is estimate.
For instance, fill up another jug of water and test that, or probe another bag of flour? Then continue with the formula.
If you have forgotten to take any readings and realise midway through mixing, take a reading as soon as possible of the dough. You know the final dough temperature of the dough will become slightly warmer due to friction.
How to manage proofing temperature without a proofer
It is hard to create the ideal proofing temperatures at home without using a proofer. This can be done at home by placing the dough in a warm area, such as near the oven. You can also move the dough around the house near various heat sources to be warm. It’s not accurate, but it will speed things up!
Many modern ovens have a proof setting that you can use to proof bread. You can also use an oven to proof baked goods. This will likely be set at a reasonably warm temperature, so expect a fast proofing dough!
Other great places to proof bread include an oven or microwave with just the light on or a DIY-proofing box.
Do I need to make a DIY proof box?
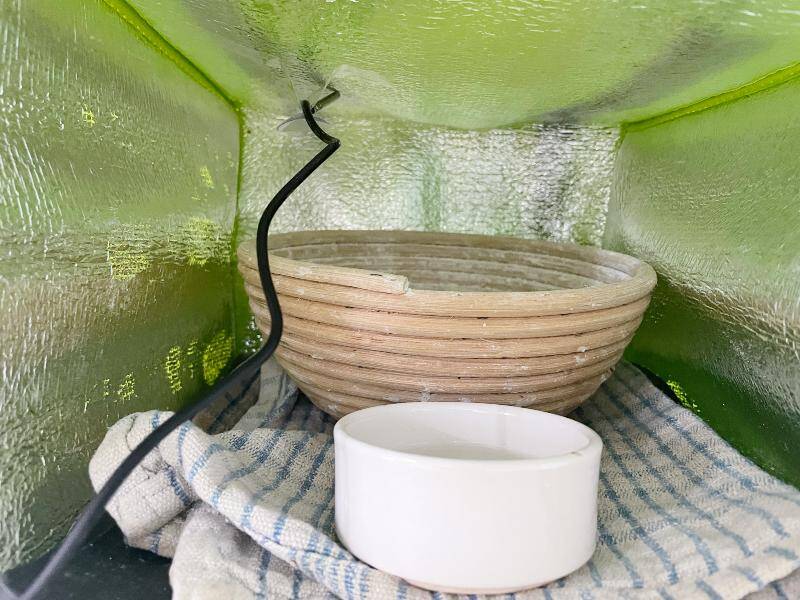
Building your own proofing box is a sensible option. Making a proofer yourself means you can make it as big or as small as you want.
See my DIY proofing box guide to learn how to do it and other ways to prove bread at home without a proofer.
What should I do if I can’t change the proofing temperature?
If you can’t change the temperature of the proofing environment, many bakers will change the length of the fermentation period. This will create different characteristics, but you will have a loaf of bread!
Another solution is increasing or decreasing the Desired Dough Temperature to compensate for the cool or hot environment. This is especially common in summer, as ice is often used to cool down the water in hot bakeries.
How to proof bread dough in summer?
Bread made in the summer can get hot very quickly. When kneading a warm dough, it can get very sticky and hard to mix!
Try lowering the dough’s temperature before you reach for an extra handful of flour.
Here are a few ideas to prevent this from occurring:
- Cool everything, the water, the flour, the mixing bowl, the room….everything!
- Use a fan to cool the room – but not directly on the dough.
- Use the fridge to cool the dough during autolyse and bulk fermentation.
- Reduce dough handling – don’t touch it too much with your hands!
- Use a wooden surface that doesn’t transfer heat to the dough.
- Add pre-fermented dough to the dough mix to reduce the mixing and bulk fermentation time.
How to proof bread in winter without a proofing box?
Proofing bread in winter can get frustrating. Sourdough becomes much less active in cool temperatures. I’ve heard of many people who give up starting a sourdough in cold weather, as it will not work at room temperatures.
Ideally, you want a consistent temperature during each stage of bread production.
Bulk ferment at night in the fridge and final proof in a warmer place during the day.
If you use the oven as a proofer, you can remove the bread once it’s almost risen to preheat the oven.
You can also increase the yeast or levain used in the recipe or make your sourdough runnier to encourage activity.
Why is bread proofing temperature so important? – Conclusion
Temperature is known to impact the timing of the rise, but it can alter so much more! If selling bread, a baker needs their bread to taste and look the same every time, as consistency is key to growth. But home bakers should want to achieve consistency too!
By creating the ideal proofing environment, you can eradicate this key variable and fix consistency problems by troubleshooting other areas. What have you found out about bread proof temperature today? Let me know in the comments below. Questions are welcome!
Frequently asked questions about bread proofing temperature
If you’ve enjoyed this article and wish to treat me to a coffee, you can by following the link below – Thanks x

Hi, I’m Gareth Busby, a baking coach, senior baker and bread-baking fanatic! My aim is to use science, techniques and 15 years of baking experience to make you a better baker.
Table of Contents
- What happens during proofing?
- Proofing vs bulk fermentation- What’s the difference?
- What happens when the proofing temperature changes?
- Choosing the ideal proofing temperature
- The benefits of cold proofing temperatures
- How does the final dough temperature affect proofing dough
- How to control bread proofing temperature
- What is the best bread proofing temperature?
- What happens if the final dough temperature is wrong?
- How to manage proofing temperature without a proofer
- What should I do if I can’t change the proofing temperature?
- How to proof bread dough in summer?
- How to proof bread in winter without a proofing box?
- Why is bread proofing temperature so important? – Conclusion
- Frequently asked questions about bread proofing temperature
Related Recipes
Related Articles
Latest Articles
Baking Categories
Disclaimer
Address
53 Greystone Avenue
Worthing
West Sussex
BN13 1LR
UK


