Best Equipment For A Home Bakery Or Micro-Bakery

If you are looking to start a home bakery or micro-bakery, the amount of bakery equipment available can be overwhelming! There has been an influx of home bakers making the step up to semi-professionals in recent years, so there are a lot of products to choose from!
All you need is a couple of bowls, scales, and an oven to start a bakery. But you want the best equipment for a home bakery, don’t you? Well, this guide aims to explore all the options available so you can get your home bakery business off the ground with ease.
How to choose the best equipment for a home bakery or micro-bakery
When choosing the best equipment for a home bakery, your decisions should revolve around three key considerations; space, time and money.
Space
The equipment used in a traditional commercial bakery will not fit into most homes. This means that unless you are extremely blessed with space, you’ll need to consider the space you have seriously. You may be under pressure from family members who say your business won’t work (see: is a bakery business profitable?). You might have to start with less space until you prove them wrong – which you will!
Time
The majority of baking equipment is time-saving. Think about it, aside from the oven and scales, what can’t be done by hand? If you have plenty of time to make and watch your dough, you don’t need much equipment. If you’re already busy or baking as a side hustle, you’ll want to invest in speeding up production, so you have more time.
Money
The best equipment for a home bakery is expensive. If you don’t have the money for everything right away, you will have to be more frugal. Selecting the best equipment for each growth stage is a better way to manage your resources. By purchasing your items gradually, you’ll be able to test and learn each piece of equipment as you buy them. Slowing transforming into a real home bakery. Continue reading to find out how I suggest you do this.
Best equipment for a home bakery
What do you need to get your bakery started, and what items will you want when you expand? There are many options to consider, but first, can you use your existing kitchen equipment?
Can I start a micro-bakery with a domestic oven?

The most important piece of equipment in a home bakery is the oven. The majority of domestic ovens don’t provide enough power to keep up with a busy morning routine and can only fit one or two large loaves at a time. It is possible to start a micro-bakery with a domestic oven, but you’ll want to upgrade as soon as possible.
Domestic ovens can take hours to reach temperature when there is a big baking stone inside. And you will always be trying to compensate for steam and heat escaping at the start of each bake. These issues increase the time you have to wait for the oven to recover between bakes, extend the total baking time and affect the quality of the bread.
If you are going to start your home bakery with a domestic oven, you’ll need a baking stone. The stone will sit at the bottom of the oven to absorb heat. The unbaked dough is placed on the stone, which conducts heat into the bread for oven spring. An oven having top and bottom heat and bottom heat only settings is almost essential for perfecting temperature.
Can I use Dutch ovens in a micro-bakery?

If you are starting with one or two orders a day, then you can use a Dutch oven. They make baking bread easy, and you can get some really nice loaves! Why they are not helpful for a busy bakery is:
- They are expensive to buy
- You can only bake one loaf at a time
- Extended baking times
- More storage space required
These issues make Dutch ovens non-viable when scaling production in a micro-bakery. Instead, try and save up for a suitable bread oven as soon as you can.
What is the best oven for a home bakery?
If you want the best equipment for a home bakery to cope with the demand of mass production, it is best to move away from domestic kitchen ovens. You’ll want an oven that is well-sealed and high-powered to make fantastic loaves from the get-go.
Here are the ovens and brands to consider:
Deck oven
A professional baker will likely use a rack or deck oven to bake bread. A rack oven offers even heat distribution and reduces the baking time. They are extremely expensive and take up a lot of space and extraction, so you won’t use one in a micro-bakery!
The deck oven is the preferred choice for artisan bakers as it adds more depth of colour to the crust.


If you have the space and budget for a deck oven, you will love owning it. It’s possible to pick up a small single-deck oven secondhand for around £1000 or $1400.
Check the power rating of the oven is compatible with your supplier before purchasing. If it requires a different current than your existing sockets provide, it will need to be installed by an electrician. It is worth speaking to one before you purchase the oven to check they can carry out the work.
Commercial ovens run on three-phase power, which costs an eyewatering amount to install. Stick with single-phase equipment in a home bakery.
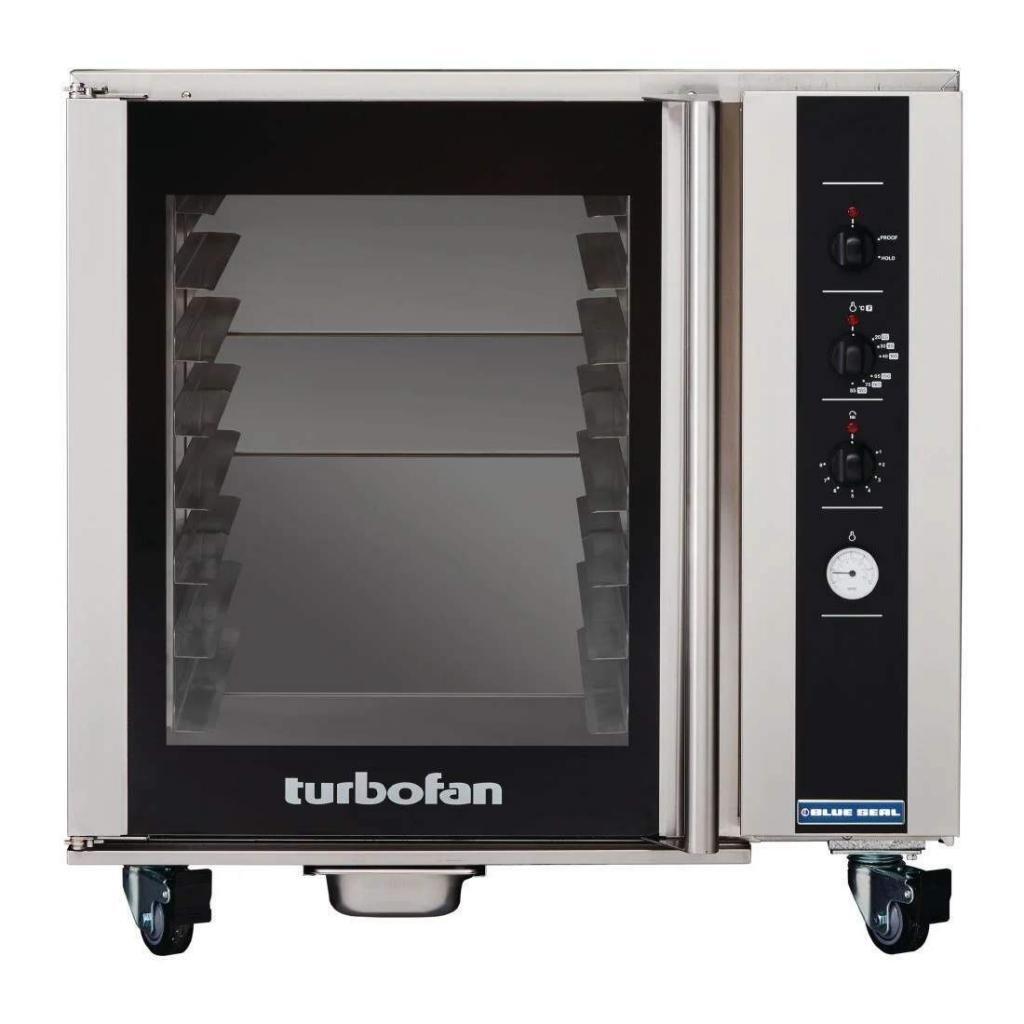
Turbofan oven
These ultra-powerful fan ovens are commonplace in commercial kitchens and can be picked up for relatively low amounts of money. Whilst I’ve had success making bread in these ovens, the fans can lead to the bread rising unevenly when baking. They are great if you produce pastries and cakes but risky for baking bread.
Wood-fired oven

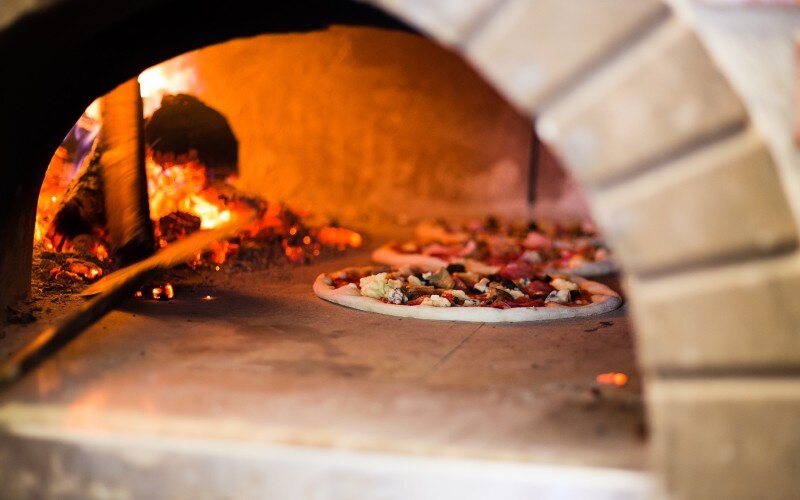
If you have outside space, you could build a wood-fired hearth oven.
Although wood-fired baking is not as popular as it used to be, there are a few micro-bakers that bake big batches once or twice a week. The unique flavour the oven provides is always a winner, and if you source your own wood, it is a very low-cost way to bake!
Microbakery oven

Arguably the best oven for a micro-bakery is one specifically designed for the task! In recent years Rofco ovens have been the leading the micro-bakery industry in recent years, but there are notable competitors, including; Tom Chandley’s Pico and the Simply Bread Oven.
What’s so good about these ovens?
It’s like having the power and bake quality of a deck oven but with an oven that uses a domestic plug.
There are different sizes of micro-bakery ovens, ranging from baking 4 loaves at a time to 12 large loaves.
What shocked me about the Rofco was how short the recovery time between batches is. Once one batch is finished, the next can go straight in! It also doesn’t release much heat, which makes it much more efficient than a domestic oven.
#After using one for a few months, I love mine!
What dough mixer should I buy to make bread?
If you’re on a tight budget, you don’t need a dough mixer. If you can, knead by hand to start with. Invest the majority of your budget in a decent oven. Spend the rest on the accessories you’ll need to proof and bake the bread.
When your production starts to increase, or you need to spend less time “at the table,” a dough mixer is a sensible choice.
When you choose to invest in a dough mixer, it should be to generate more money, but choosing the wrong one can mean money down the drain!
Here are my tips on choosing the best dough mixer for a bakery:
Stand mixer

Stand mixers such as a Kenwood or KitchenAid have an essential place in professional kitchens. Whilst they are great for whisking eggs and making cake batters, they struggle to knead the dough.
In general, they are not powerful enough to make bread dough. The reason for this is they are belt driven. This means the belt can slip under resistance, and the motor can burn out if used at high resistance for a long time.
KitchenAid states on its website that bread dough can only be kneaded for 2 minutes in their machines. You then have to wait for it to cool down before kneading again. This is impractical for domestic kneading as it is.
Using a stand mixer, the dough is often not as well-developed. The likelihood is that the dough will have a poor crumb structure and can sometimes collapse.
Planetary mixer

If you compare the internal parts of a planetary mixer to a stand mixer, you see why they are superior.
Instead of belts and plastic, planetary mixers use gears and metal. This gives them much more torque and power to handle bread dough.
Planetary mixers don’t move around as much on the table. This enables you to do another job whilst kneading, such as weighing ingredients.
Around £400 or $500 will get you a secondhand planetary mixer perfect for home baking.
Stick to the brand names like Hobart or Metcalfe. They are proper workhorses that are built to last! An old model will usually do you well for years. They don’t devalue as they age much, either! Most bakers later upgrade to a spiral mixer but keep hold of the planetary for smaller batches.
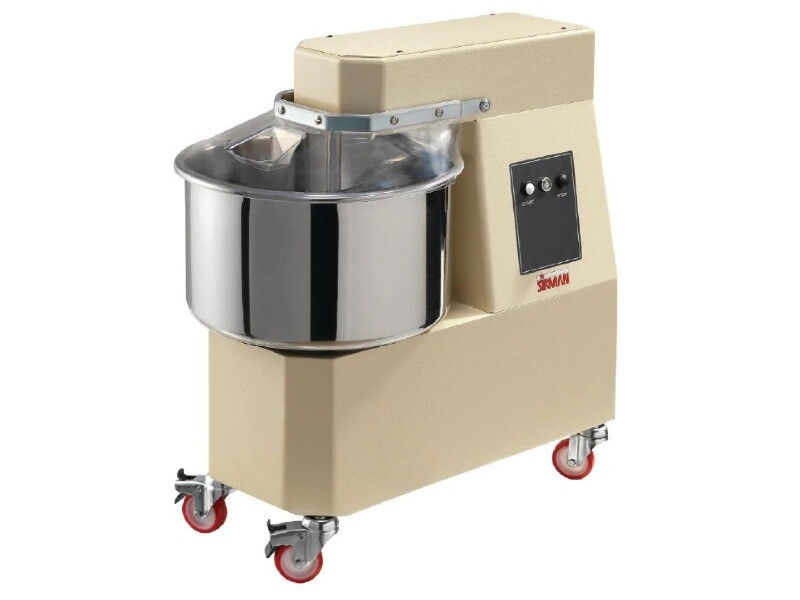
Spiral dough mixer
A spiral mixer is used for bigger mix sizes, typically from 8kg of flour to 48kg and more. Many spiral mixers won’t work that well for smaller dough batches of less than 8kg, but when at the recommended capacity, they produce beautiful bread dough!
Don’t try unbranded imports that flood eBay. They may have the same specifications as the leading brands, but they don’t always make good dough.
A spiral mixer is probably too large for a micro-bakery, but worth considering in the future.

Helical fork dough mixer
There are very few manufacturers of these helical fork mixers. The idea being they have a similar action to hand kneading, which should lead to a better quality of dough.
If true, the Santos 10Ltr Dough Mixer is a bargain! I’ve not used one, so I won’t offer further feedback.

Bread baking accessories
To set up your own home bakery, you’ll need a few essentials to get you going:

Cheap ones will do when you first get started. More expensive bowls may last longer, but not always. You’ll need large bowls to weigh and mix ingredients and small ones for smaller quantities.
Racks

When baking multiple loaves, you need plenty of space for proving and cooling your bread. Bakery racks with wheels are great as they can hold several trays of bread and be wheeled where you need them. You can also place them in a warm place to accelerate proofing if you aren’t using a proofer.
Trays
Many micro bakeries use wood boards to raise their dough. The boards can then be stacked up in racks and covered to give you more space. You can use the boards to slide your bread into the oven too! They are great as you can ask a builders merchant to cut plywood sheets to the size needed to fit your racks. Low cost and effective!
Scales

Many micro-bakery owners use the KD-8000 scale from MyWeigh. They are more accurate and durable than your normal kitchen scales, so they are a good choice, especially for the price. When considering the best scales for your home bakery, you need to consider the maximum weight that can be placed on the scales. Extra-large baker’s scales can hold up to 10kg, while the best home baking scales will be around 5 kg.
It is also essential to check the range of the scales. If you plan on making small amounts, you may wish to select scales with 0.1-gram accuracy. 1-gram or even 5-gram increments are ok when making large batch sizes.
If you wish to sell your bread at a stated weight, you may need to “check weigh” your bread as it comes out of the oven. If so, it’s best to use a separate set of scales to prevent baked crumbs from entering your dough.
See your local authority to determine if this is necessary for your area.
Baking trays
For baking rolls, slices, pastries and other small bread types, you will need baking trays. They must be capable of not warping at temperatures up to 240C (465F).
Work surface
Metal tables are commonly used as they are cheap, durable and easy to clean. Wood surfaces don’t absorb heat which makes them ideal for kneading dough. They are harder to clean, so some local hygiene authorities don’t like them.
Water spray
Use a water spray to inject steam into your oven. For larger ovens without built-in steamers, a heavy-duty version is preferred.
Bannetons

Bannetons are usually made from wound wicker, but brotform (compressed cardboard) is also used. I’m not too keen on brotform as if you put an overly wet dough in one, it will get stuck and make a mess.
Stick with wicker bannetons. To save money, you can use lined serving baskets from household stores.
Lame

A quality lame will last a lifetime if looked after. The blade will blunt and need replacing every 50 loaves (roughly).
Dough scraper
Use a plastic scraper to remove dough from bowls. Metal scrappers are for dividing the dough into equal weights and for cleaning the work surface. They become your best friends!
Timer

This will save you from getting your phone filled with dough. A digital countdown timer is perfect for multitasking when baking and timing your mixing duration.
Couche
To make baguettes or ciabatta, a couche is essential. It’s a sheet of cloth that is folded between the dough when final proofing. You can buy them or make your own with curtain liners.
Oven peel

A peel is used to transfer bread out of the oven. They come in different shapes and sizes. A baguette peel is used to lift and carry baguettes out of the couche to a tray or directly into the oven.
A pizza peel is a circular peel used for pizzas but can be used for bread.
A bread peel can be rectangular or round.
Check the handle is the right length for the oven before making your decision.
Oven gloves

Whilst a baker’s peel removes bread from the oven, a quality set of oven gloves is necessary when bread or pastries are baked on trays.
Whisk
A hand whisk is great for distributing yeast evenly or whipping eggs or cream when making cakes.
Thermometer
To measure the temperature of your dough, a temperature probe is essential.
Bakery equipment for scaling up production
Croissant cutter
This tool makes making equal-shaped croissants easy. You simply roll the croissant cutter across the dough, and even-sized pieces are cut. Some bakers produce better croissants without a croissant cutter.
Pastry break

If you are making layered pastry for savoury snacks, croissants and other viennoiseries, a pastry break is a handy tool. Using one produces thinner and more even layers than if you were to use a rolling pin. They produce better quality pastry in less time.
Proofer

A proofer allows you to control the humidity of your working environment. This will automatically turn on and off, keeping the dough at the best temperature for rising. Using a proofer in your micro-bakery enables you to time your dough to be ready to bake at the same time every day.
Tabletop proofers such as the Rofco RK48 are perfect for micro-bakeries.
Hydraulic press

A hydraulic press divides a large portion of dough into smaller pieces, around 250-600g. They are great for speeding up the scaling process. To make larger dough sizes, fold two pieces together.
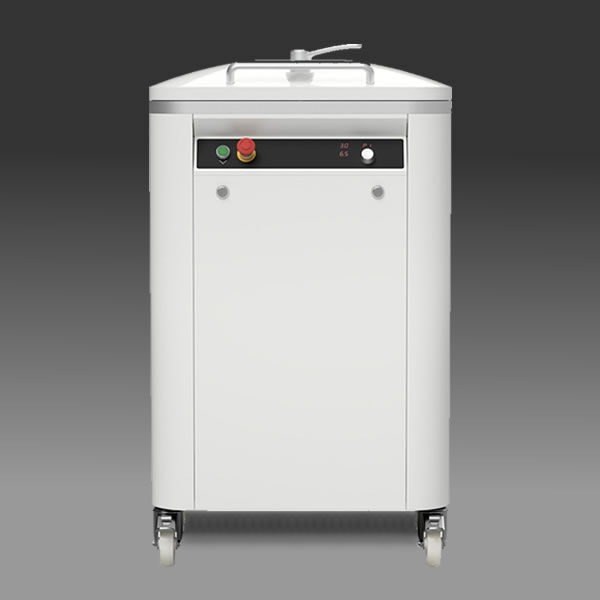
Bun Divider Moulder

A BDM takes a pre-determined weight of the dough and divides it into smaller weights, and rounds them. They are great for making bread rolls or buns.
Should I buy new or secondhand bakery equipment?
Commercial bakery equipment is built to last for several years. Buying secondhand equipment that has been well looked after is a good way to save a bit of money. Getting equipment on finance will lower your start-up costs and can be more tax efficient. It can be a bit harder to get finance on secondhand equipment, but still possible.
Bakery equipment suppliers
eBay is a great place for used bakery equipment. It’s my go-to. If I’m in no rush, I’ve always found that the product I need comes up at the right price, eventually. I’ve also found some good deals on Facebook Marketplace lately.
Most bakery equipment suppliers deal with new and secondhand equipment. Reputable UK stockists include Brook Food, Secondhand Catering Equipment and Belmont. Nesbits is also worth mentioning as they supply high-quality accessories at very reasonable prices. US stockists include Used Food Machines, Sigma, FMBE (great for accessories) and Discount Bakery Equipment. If you have any suggestions, drop them in the comments, and I’ll add them to the list.
What equipment do I need for a home bakery?
The most important piece of equipment in a home or micro-bakery is the oven. Without one, you cannot make a quality product. After this, a good mixer follows. Everything else is product specific or a timesaving tool. It might feel like a distant dream when you first start your business, but it’s worth considering what equipment you will need in the future now.
See my starting a home bakery guide for more information about planning your micro-bakery.
Ending thoughts on the best equipment for a home bakery
As your equipment arrives, you will be thrilled to use it. I still get excited when I buy anything for my home bakery set-up, even if it’s just a scrapper! I’ve gone over my recommendations based on using these products, and now I ask you where you are in your micro-bakery journey. I would love to know, so drop a comment in the section below and feel free to ask any questions.
Frequently asked questions about micro-bakery equipment
If you’ve enjoyed this article and wish to treat me to a coffee, you can by following the link below – Thanks x

Hi, I’m Gareth Busby, a baking coach, senior baker and bread-baking fanatic! My aim is to use science, techniques and 15 years of baking experience to make you a better baker.
Table of Contents
- How to choose the best equipment for a home bakery or micro-bakery
- Best equipment for a home bakery
- What is the best oven for a home bakery?
- What dough mixer should I buy to make bread?
- Bread baking accessories
- Bakery equipment for scaling up production
- Should I buy new or secondhand bakery equipment?
- Bakery equipment suppliers
- What equipment do I need for a home bakery?
- Ending thoughts on the best equipment for a home bakery
- Frequently asked questions about micro-bakery equipment
Related Recipes
Related Articles
Latest Articles
Baking Categories
Disclaimer
Address
53 Greystone Avenue
Worthing
West Sussex
BN13 1LR
UK


