How To Select And Use A Banneton Proofing Basket For Bread

In this article, I’m going to show you how to use a banneton bread basket for proofing dough. A banneton is the easiest way to get fantastic results in yeast or sourdough bread. We’ll also discuss how to use a banneton for the first time, how to care for a banneton and a few alternative bread basket ideas. This is a full “how to use a bread basket” guide that includes everything I know (/can remember!) about bread proofing baskets. So let’s get into this!
How a banneton is used in bread baking
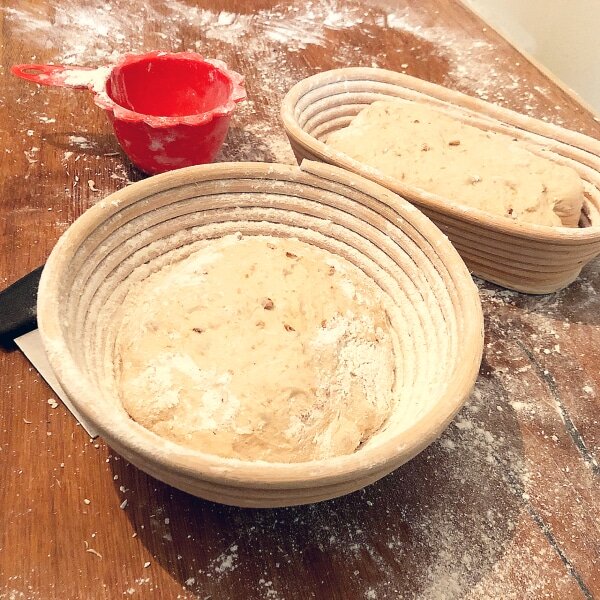
Once a dough has undergone bulk fermentation (first rise) and is sufficiently developed, it is preshaped and left to rest on the workbench for 15-30 minutes. After it has rested it is shaped for a final time and placed into a prepared banneton. The banneton will then support the dough during its final rise. When it has fully proofed, the dough is tipped out of the basket and onto a lightly floured board, tray or peel. The bread is then scored before it makes its way to the oven. Alternatively, the dough can be tipped onto a sheet (or sling) of baking paper which is then lowered into a Dutch oven for baking.
Are bannetons and bread proofing baskets the same?
A banneton is the most common form of bread proofing basket. Most varieties are round or oval, but other shapes are available too. There are other types of proofing baskets that aren’t bannetons. These bread proofing baskets are baskets that are made primarily for another use but double up for proofing dough. Durability at a low cost makes the popular raton banneton the industry-standard proofing basket. The circular lined pattern that the canes imprint on the bread is much adored in many artisan and sourdough bread styles.
Why use a bread proofing basket?
A banneton supports the dough to force it to rise upwards, not outwards. This provides more volume for bread than freestanding proofing can provide. For open crumb or sourdough bread, a bread proofing basket is the only way to support a high-hydration dough without it collapsing. They also produce consistent “boule” (round) or “longue” (long) shapes which is important for appearance.
Is using a banneton essential for proofing bread?
Many artisan bread recipes use a banneton to complete the final proof stage, especially sourdough bread recipes. A banneton is not the only way to proof bread. Other proofing supports include:
- Bread tins
- A couche
- Free-form without any support
- Proofed and baked on a tray like rolls
- Banneton alternatives
What is the best bread proofing basket?
The Rattan banneton – The industry standard

A banneton made from wicker is the most common bread proofing basket. They are used in bakeries across the globe, primarily, but not restricted to sourdough bread. The spiral pattern indent these proofing baskets leave on the bread is a popular trait. If you don’t want the rings around the dough you can use a cotton liner which many bannetons come with (check the description before you buy). A well-made banneton will last for years and can put up with getting wet, mouldy and baked (by accident) and still work fine.
The only thing that you have to be wary of is the occasional splinter coming from the wicker wood. A quick inspection whilst preparing the banneton is the best way to stop splinters from appearing in the bread.
My favourite size is 9-inch in diameter. These are perfect for doughs that are 500-700 grams in size. As 650 grams is the weight I usually make, this banneton is perfect for me.
View the latest price on Amazon
The Brotform banneton – German efficiency?
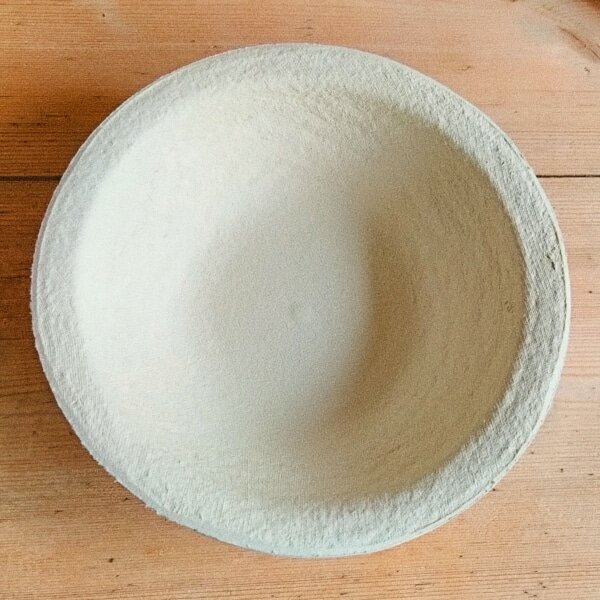
The first banneton I ever purchased was made from brotform. They are made from compressed cardboard that’s often from a recycled source, so are better for the environment than a wicker basket. They also don’t splinter. The material is slightly more porous which means less flour is required when dusting. You can get different designs, some will have ringed indents, and some are smooth.
But it’s not all good news for brotform bannetons. For a start, they are hard to find at the moment. I can only find one supplier in the UK. A high hydration recipe can also be a problem and often brings an end to a basket’s life. The wet dough gets stuck and when hard it is impossible to scrape away without destroying the basket!
Brotform bannetons can also get damp which can lead to mould. You will want to use them regularly and store them in a warm place to dry out the moisture when not in use.
Panibois – wood proofing basket

Panibois are thin wood baskets that are lined with a one-use sheet of baking parchment. The shape is similar to a tin although more hexagonal on the edges. Like with a baking tin, the baker will proof the loaf in the basket and once ready it will go into the oven for baking, or you can tip the dough out. They are really cute to use, but a little flimsy.
Is a panibois better than a bread tin?
I believe I get the same quality bake with a panibois as with a metal bread tin. The crust is identical as the thin wood conducts heat quickly during baking for a great oven rise. After 10 bakes or so, I find the Painibois start to fall apart. So if you want the loaf to hold its shape, you have to purchase a new one, or proof in the painbois, and remove the dough to bake in the oven.
If you want to experiment, panibois are definitely worth a try. They have a low price and look beautiful stacked up in a bakery. Use them for small loaves when you want something a bit different.
The wicker bread basket – have a unique bread shape

You can use a wicker basket that’s fitted with a cloth liner to proof bread dough. These serving baskets are easy to find in household stores, you might already have one in your cupboard! The lined imprint that rattan baskets leave on the dough is missing, but that doesn’t stop them from being amazing proofing solutions. The price of a wicker basket is lower than a banneton, and what’s great is you can find unique shapes for your loaves! You can find wicker basket shapes to make round loaves, oval loaves, long loaves, deep loaves and thin ones too!
The cloth liners are not very suitable for super high-hydration recipes. This is not a problem if you make standard sourdough bread such as the one in my sourdough recipe for beginners. One of the most highly regarded bakeries in the world, the Poilane bakery use oval wicker baskets to produce their sourdough Miches’. So it’s safe to say that you can too!
How to prepare a new banneton
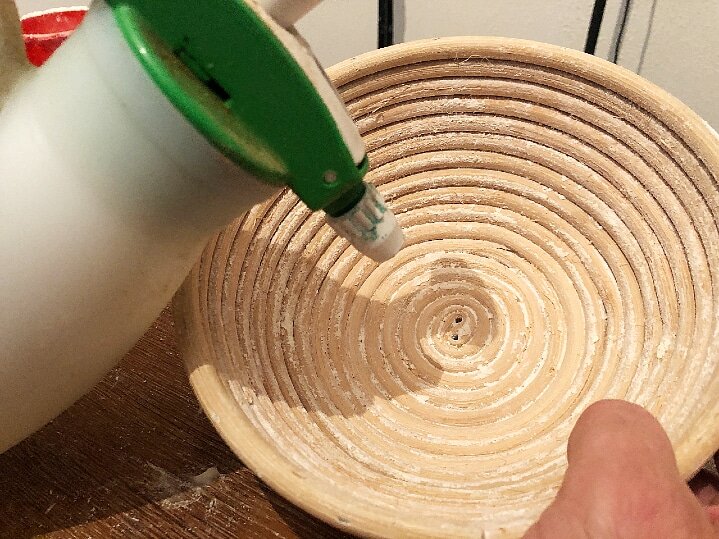
The first time you use a banneton there are a few steps to take. The only tool you will need is a water mister. The protective layer that forms which stops dough from sticking to the banneton.
Spray the inside of the basket with water and let the water soak in for 15 minutes. On return, lightly spray and liberally dust the wet surface with flour and rice flour (if you have any). The flours will then attach itself to the moisture. Tilt the banneton so the excess flour moves around to cover all of the contact area. Once a thin layer of flour is left, turn it upside down and give it a hard tap on the table for the excess flour come out. You can now use your banneton right away, or for a stronger barrier leave it in a warm place for a couple of days before using.
How to flour a banneton basket
- Tip the banneton at a 45-degree angle to the table.
- Working from the outside lightly dust with flour and rice flour whilst rotating.
- Cover the inside of the basket with a dusting of flour.
- Keep going until the banneton is well covered.
If you find a lot of the flour from the edges has dropped towards the centre, do not worry, it’s normal.
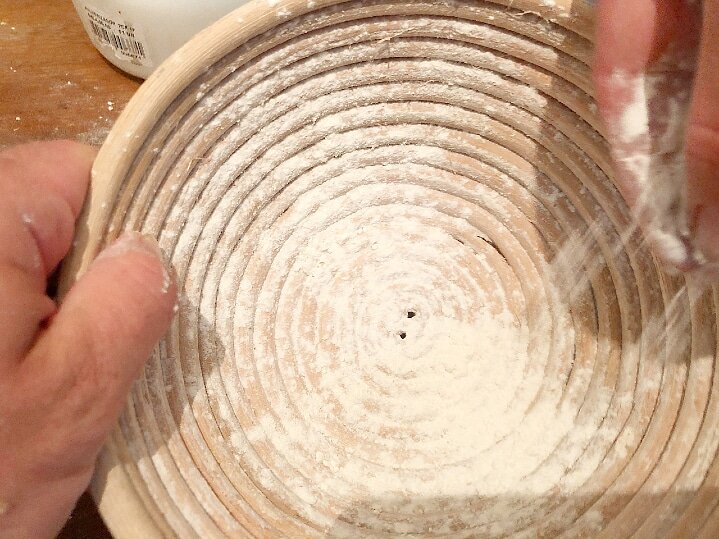
After the dough is placed inside, lift it up the sides slightly and dust a little extra flour around the edges. This part isn’t essential but I always do this with a new banneton basket to stop the dough from sticking.
Too much flour dusting is better than too little!
Is flour the only way to dust a banneton?
A larger sized grain is often used to line the banneton in addition to flour dusting. Grains such as rice flour or coarse semolina are popular. Larger grains create a larger barrier between the dough and the proofing basket which reduces the chance of the dough getting stuck.
Large grains like rice flour add a crunchy texture to the surface of the crust to change its taste and appearance. French bread bakers are not permitted to use any other grain other than flour. Therefore, French and baking purists choose to solely use flour and not rice flour to line their bannetons.
How long to proof sourdough in banneton
The height that sourdough bread dough will rise will depend on the size of the banneton you are using and the weight of the dough piece. Once you have made the same recipe a handful of times you’ll be able to tell when it’s risen just by looking at the height of the rise, but you can use the poke test to get started: Wet your finger and lightly press down on the dough around 5mm. Pull your finger away, and you should leave an indent in the dough. If the indent pops straight back up it needs longer to proof. If it stays down for 2-3 seconds before bouncing back your sourdough is ready to bake. If your dough was very gassy (well-fermented) at the time it was shaped then it will be proofed in about 3 hours. If the dough was less active when it was shaped or the room is cold then it will take around 6 to 8 hours to rise. To speed up the rise of your sourdough bread use more starter in your recipe and/or use a proof box.
How to remove the dough from the banneton
When the dough is fully proofed, turn the banneton upside down above a board or baker’s peel. Lightly bang the edge on the table and the dough will come out. If it doesn’t drop out at first, give it a harder bang. If the dough does get stuck, add more flour to the basket next time.
Can I add too much flour to a banneton?
Yes, you can cover the proofing basket with too much flour. If this happens, the loaf will have excess flour on the crust as it bakes. This will burn at high temperatures and looks unappealing after the bake. To avoid this happening, add an even coverage across all areas of the basket. Try to avoid the flour from mounting up at the bottom of the basket. If your banneton is new you might want to spray it with water to obtain even coverage.
What can I do if I add too much flour to the proofing basket?
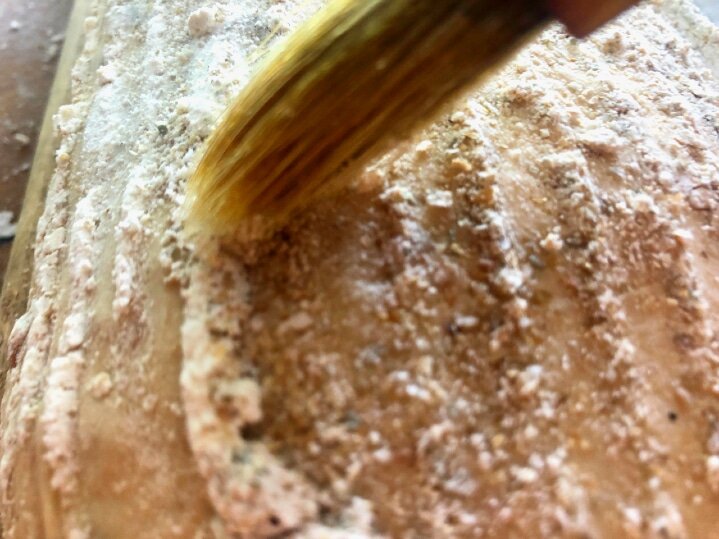
If there is too much flour on the surface before baking, you can remove it. Use a pastry brush to lightly brush away the excess flour. Doing this on every bread is quite a time-consuming task, especially when high volumes are involved. As your confidence grows and your bannetons become “broken in”, try to dust with less flour.
Do I use the banneton liner that came with my banneton?
Bannetons often come with a cloth liner which can be used, or not. It’s a personal preference. Without the liner, the bread will inherit the characteristic lines from the wound wicker. With the liner, the bread has a smoother appearance. If proofing a wet dough I prefer to not use a liner. If they get wet the dough can stick, and they are a nightmare to clean!
How to store a banneton
It’s best to keep a banneton somewhere with airflow. Turn the basket upside down to stop dust or bugs from entering and place it on a shelf. To remove the moisture from a damp banneton, put it on top of the oven for a couple of hours. The warmth takes away moisture to prevent mould from appearing. To store a banneton in a cupboard, remove any debris and dry it out first.
How to clean a banneton after use
Washing a banneton is not necessary as they shouldn’t get wet. After use, I place them on top of the oven to dry. Any hardened bread dough can then be removed with a thin table knife or edge of a metal dough scraper:
Starting from the centre of the basket I run my blunt object along the grooves. I usually use a dough scraper, but a palette knife also works nicely. From the centre, follow the circles of the spun wicker until you reach the end. The knife/scraper removes the dough that’s stuck between the grooves.
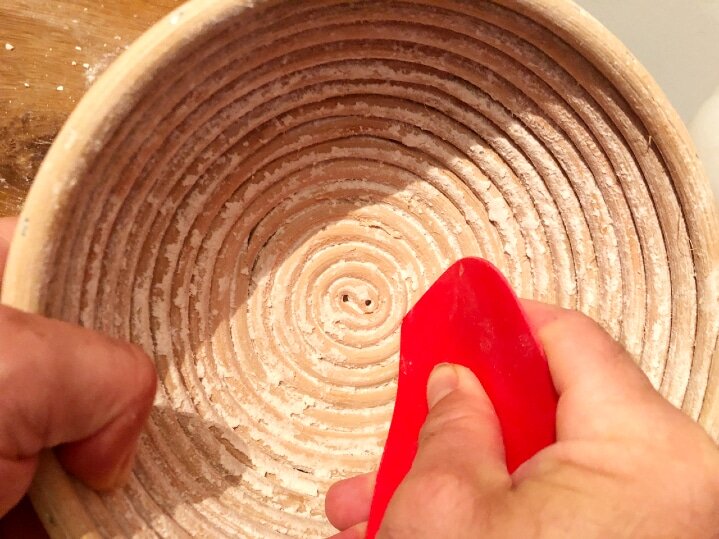
I find that the grooves of the cane remain on the loaf after baking when a clean basket is used, so it’s great to get the scraper out every now and again!
Homemade banneton alternatives
If you don’t have a banneton you can still make bread without having to purchase one especially. Any bowl or container can be used, just line it with a floured tea towel to stop the loaf from getting stuck. Smooth surfaces don’t stick to flour so a liner such as a tea towel is needed. Here are a few more banneton alternatives that you can use.
Rounding up
The choice of bread proofing basket is not going to make or break your recipe. It’s a personal choice for what you are most comfortable using to make a loaf. I use a mixture of rattan banneton shapes or wicker baskets to proof the majority of my bread. Now and again I will whip out the painbois for a loaf that’s a bit different. There is no right or wrong however, I would stay away from the brotform versions if you are a beginner. Let me know what you decide, or what you are already using in the comments below:
Frequently asked questions about bread basket proofing
If you’ve enjoyed this article and wish to treat me to a coffee, you can by following the link below – Thanks x

Hi, I’m Gareth Busby, a baking coach, senior baker and bread-baking fanatic! My aim is to use science, techniques and 15 years of baking experience to make you a better baker.
Table of Contents
- How a banneton is used in bread baking
- Are bannetons and bread proofing baskets the same?
- Why use a bread proofing basket?
- Is using a banneton essential for proofing bread?
- What is the best bread proofing basket?
- How to prepare a new banneton
- How to flour a banneton basket
- How long to proof sourdough in banneton
- How to remove the dough from the banneton
- How to store a banneton
- How to clean a banneton after use
- Homemade banneton alternatives
- Rounding up
- Frequently asked questions about bread basket proofing
Related Recipes
Related Articles
Latest Articles
Baking Categories
Disclaimer
Address
53 Greystone Avenue
Worthing
West Sussex
BN13 1LR
UK


