
Sourdough Autolyse | How To, The Science & Why Bother?
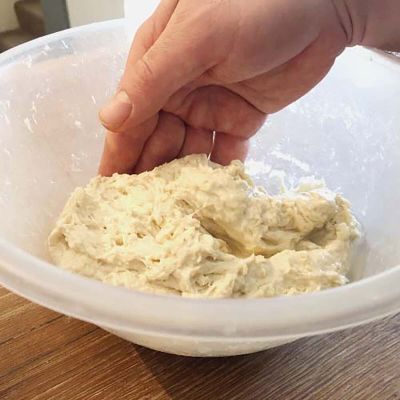
An autolyse (pronounced auto-lease) is a step taken to improve the gluten in the dough. It’s a simple process where the dough develops naturally. Autolyse is used in bread around the world and particularly in sourdough baking. Let’s find out how to do an autolyse with sourdough, variations of the basic method and the science that makes this technique so useful.
How to autolyse sourdough

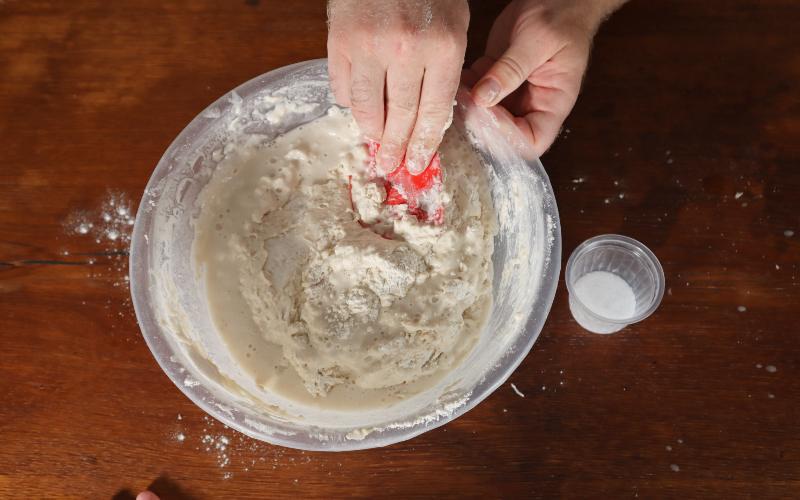
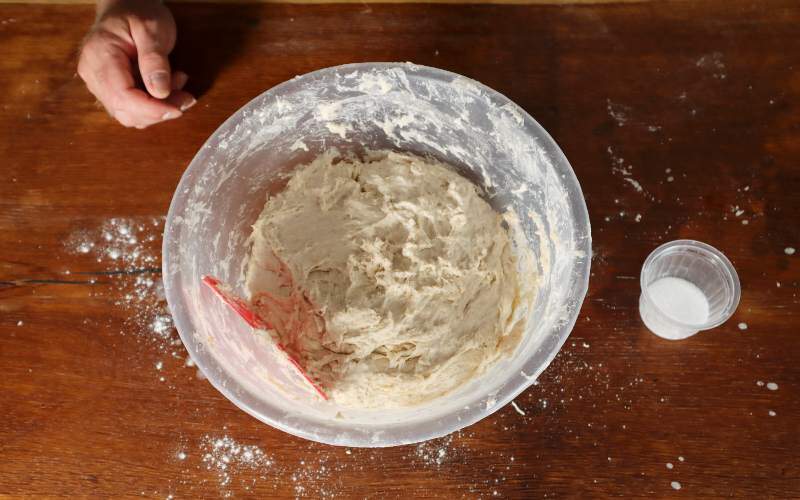
In a bowl, add the flour, water and starter and mix gently for around 1-2 minutes, until the flour is hydrated. Cover the bowl, and leave to rest for 20-60 minutes on the counter. Once your autolyse is complete, add the salt and any remaining ingredients and start kneading.


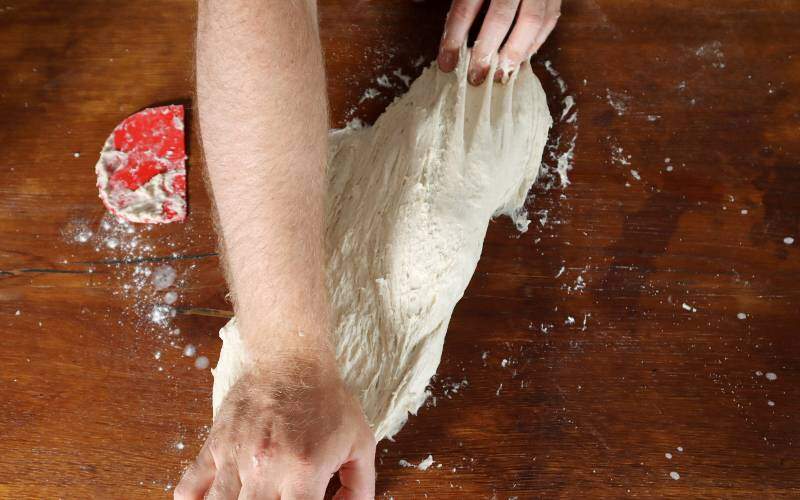
What are the benefits of sourdough autolyse?
Autolysing sourdough bread helps the texture and flavour of the bread. Though it’s not essential, it is really helpful. Here are the benefits of taking this extra step:
The dough becomes more extensible
The protease enzyme accelerates the breaking down of the peptide bonds between gluten strands. This occurs organically through hydrolysis, yet if dough is autolysed without salt the protease is most effective. Chains of gluten proteins lose single amino acids or are broken down into smaller groups of amino acids (polypeptides). This enables the gliadin gluten proteins to be able to stretch further, making the dough more extensible. Loose single amino acids will also make the dough feel softer.

The extensibility improvments of autolyse are especially useful when shaping baguettes. The strtehcy dough is less inclined to contract after rolling out, and is easier to score before being baked.
The extensibility helps the bread rise in the oven and be more resistant to tearing. It does this by allowing the gluten to stretch with less resistance.
Bigger oven spring gains
Sourdough is slower to rise than yeast-made bread. This means it naturally has a less prolific oven spring. Autolysing helps to counteract this as the more-extensible dough and extra sugars produced will enhance the dough’s ability to rise in the oven, giving it an extra 5% volume gain.
Less kneading is needed
The soaking of gluten instigates its development into a structure. As the gluten is well-hydrated before kneading, better gluten development can be achieved and/or the first slow kneading stage can be shortened. Autolysing the dough reduces the amount of time the dough needs to be kneaded and in some cases, bakers can skip it altogether.
Oxidation of the flour is reduced
As sourdough takes longer to ferment than yeasted bread we can run into problems with over-oxidation of the flour. This causes bleaching of the flour and can be very detrimental to the taste and health benefits of the bread. By reducing the required kneading time, autolyse leads to less oxygen being incorporated, and lowers the risk of over-oxidation.
Boosts the rate of gas production during bulk fermentation
Hydration initiates the breaking down of complex starches into simple sugars. Yeast needs these simple sugars to produce gas, therefore, giving your dough a head start before adding the yeast means it will rise faster during the early stages of proofing. This factor is especially noticeable when using wholegrain flour as it contains complex carbohydrates that require longer to simplify.
Bread browns more in the oven
Free amino acids can be processed by the yeast during proofing or oven spring. This darkens the colour of the crust due to Malliard reactions which also adds flavour throughout the bread.
The dough absorbs more water
Sourdough made with the autolyse stage will absorb more water. The extra water creates a softer crumb and being a cheap ingredient, lowers production costs.
Can you add the salt to a sourdough autolyse?
Salt inhibits over-fermentation and moderates the activity of the microorganisms. Salt also tightens the gluten and strengthens the bonds. Adding salt to the autolyse firms the structure and inheibts the action of protease. The result is a dough that also requires less kneading than without autolyse, but is not as extensible as if the salt was omitted. If you would rather a more elastic dough when hand kneading I recommended you autolyse with salt every time.
What if the salt doesn’t dissolve during autolyse?
Some large grain salts struggle to dissolve when added after autolyse. To get around this whilst autolysing without salt, reserve some of the water from the main inclusion to dissolve the salt in. I find a small jam jar is great for this. After the autolyse, add the salt water to the dough.
How much water do you need to dissolve salt?
If the water is at room temperature you’ll need 3 times the weight of the salt. Heating it will increase the amount of salt that can be absorbed.
Should you add the sourdough starter to the autolyse?
Sourdough is slow to begin fermentation. If you are autolysing for less than an hour, you might as well include it in your autolyse. If you are autolysing for longer, including the starter in the dough can lead to issues. The dough will begin creating gas amongst other sourdough’s fermentation benefits. When it is time to end the autolyse and knead the dough will be gassy and hard to work with. Removing the majority of the gas as you knead will lead to gas production having to be restarted. It’s possible that the yeast and bacteria run out of sugar to consume as they’ve already used some for no benefit.
The decision of whether you include the starter with the autolyse is further contested when considering dough hydration. A wet starter used in a sourdough recipe at a high ratio (>30%) to the other ingredients will be supplying a considerable amount of water to the recipe. If you delay its addition, the dough may be so dry that the gluten gets damaged when combing the autolyse ingredients. This will be detrimental to your bread, so it would be best to skip the autolyse altogether. If you need to remove a portion of the water to dissolve the salt as well then you are in big trouble! I would skip the autolyse or do a fermentaise. If your starter is as thick (or thicker) as your dough, delaying its addition won’t be a problem.
What is fermentaise?
This is a relatively new term used when adding salt and levain to the autolyse. I often use this method while kneading to rest the dough in between kneading to rest my arms and let the fridge cool down. It helps me to knead it for longer.
How long should I autolyse sourdough?
Anywhere from 10 to 60 minutes is recommended for autolyse. For white flour sourdough I allow 30 minutes, for wholemeal bread I’ve found an hour is a sweet spot. Even if you don’t have enough time to leave it for the full duration, just do it for as long as you can and you’ll notice a difference. In the sourdough bread recipe for beginners, I use a 20-minute autolyse. Some bakers prefer extended autolyse.
What is an extended autolyse?
This is where the autolyse time is extended to last up to 12 hours which has become incredibly popular in home baking circles. During this time the gluten fully unwinds and by the time the levain and salt are added, the gluten structure has almost fully developed. If you try this method expect a quick bulk fermentation as there will be plenty of simple sugars available. You’ll also produce sourdough bread with an extra-dark crust due to the free proteins and unused sugars caramelising in the oven. Dough that ferments without the salt is likely to bleach the flour leading to a weaker flavour and a whiter crumb. Exclude the starter when making an extended autolyse.
I prefer to keep the autolyse within an hour which many bread scientists also advise. The reason for this is there will be more gluten development during bulk fermentation. Therefore, continuing an extended autolyse with a long bulk fermentation can lead to the gluten actually becoming weaker. If proofing your bread at warmer temperatures this might not be an issue but in the UK it’s cool for most of the year, so I’ll bulk ferment my sourdough for longer.
What is the difference between bulk fermentation and autolyse?
The autolyse occurs before the kneading and the first rise. It produces a better environment for the dough fermentation process. The sourdough levain takes a little while to activate and start feeding on the sugars in the fresh flour. Providing the autolyse lasts less than an hour (two max) the fermentation process of the levain has minimal effect on the development of the dough.
Conclusion – Do I have to autolyse sourdough?
Many home bakers autolyse their sourdough bread. When it comes to professionals, space and time become a factor and it’s not as common. Some do, some don’t. Sourdough bakeries using plant machinery may discover significant gains in blockages by using this natural process. If you are hand kneading I would recommend following the steps in this guide as it will save you time and make better sourdough bread.
Sourdough autolyse frequently asked questions
If you’ve enjoyed this article and wish to treat me to a coffee, you can by following the link below – Thanks x

Hi, I’m Gareth Busby, a baking coach, senior baker and bread-baking fanatic! My aim is to use science, techniques and 15 years of baking experience to make you a better baker.
Table of Contents
- How to autolyse sourdough
- What are the benefits of sourdough autolyse?
- Can you add the salt to a sourdough autolyse?
- What if the salt doesn’t dissolve during autolyse?
- How much water do you need to dissolve salt?
- Should you add the sourdough starter to the autolyse?
- What is fermentaise?
- How long should I autolyse sourdough?
- What is an extended autolyse?
- What is the difference between bulk fermentation and autolyse?
- Conclusion – Do I have to autolyse sourdough?
- Sourdough autolyse frequently asked questions
Related Recipes
Related Articles
Latest Articles
Baking Categories
Disclaimer
Address
53 Greystone Avenue
Worthing
West Sussex
BN13 1LR
UK





Leave a Reply